
MYCURE X - How To Manage New Patient Consultations
8 min read
This tutorial walks you through the complete process of managing a new patient consultation in MYCURE v10, from registration to billing. You'll learn how to register new patients, document their clinical information in the EMR, and process payments efficiently.
What You'll Learn
How to register a new patient and add them to a queue
How to document clinical information in the EMR system
How to process billing and payments for patient consultations
How to navigate between different MYCURE modules seamlessly
Before You Begin
You need an active MYCURE v10 account with appropriate permissions
Ensure you have access to Registration, EMR, and Billing modules
Make sure your camera is functioning if you plan to take patient photos
Steps
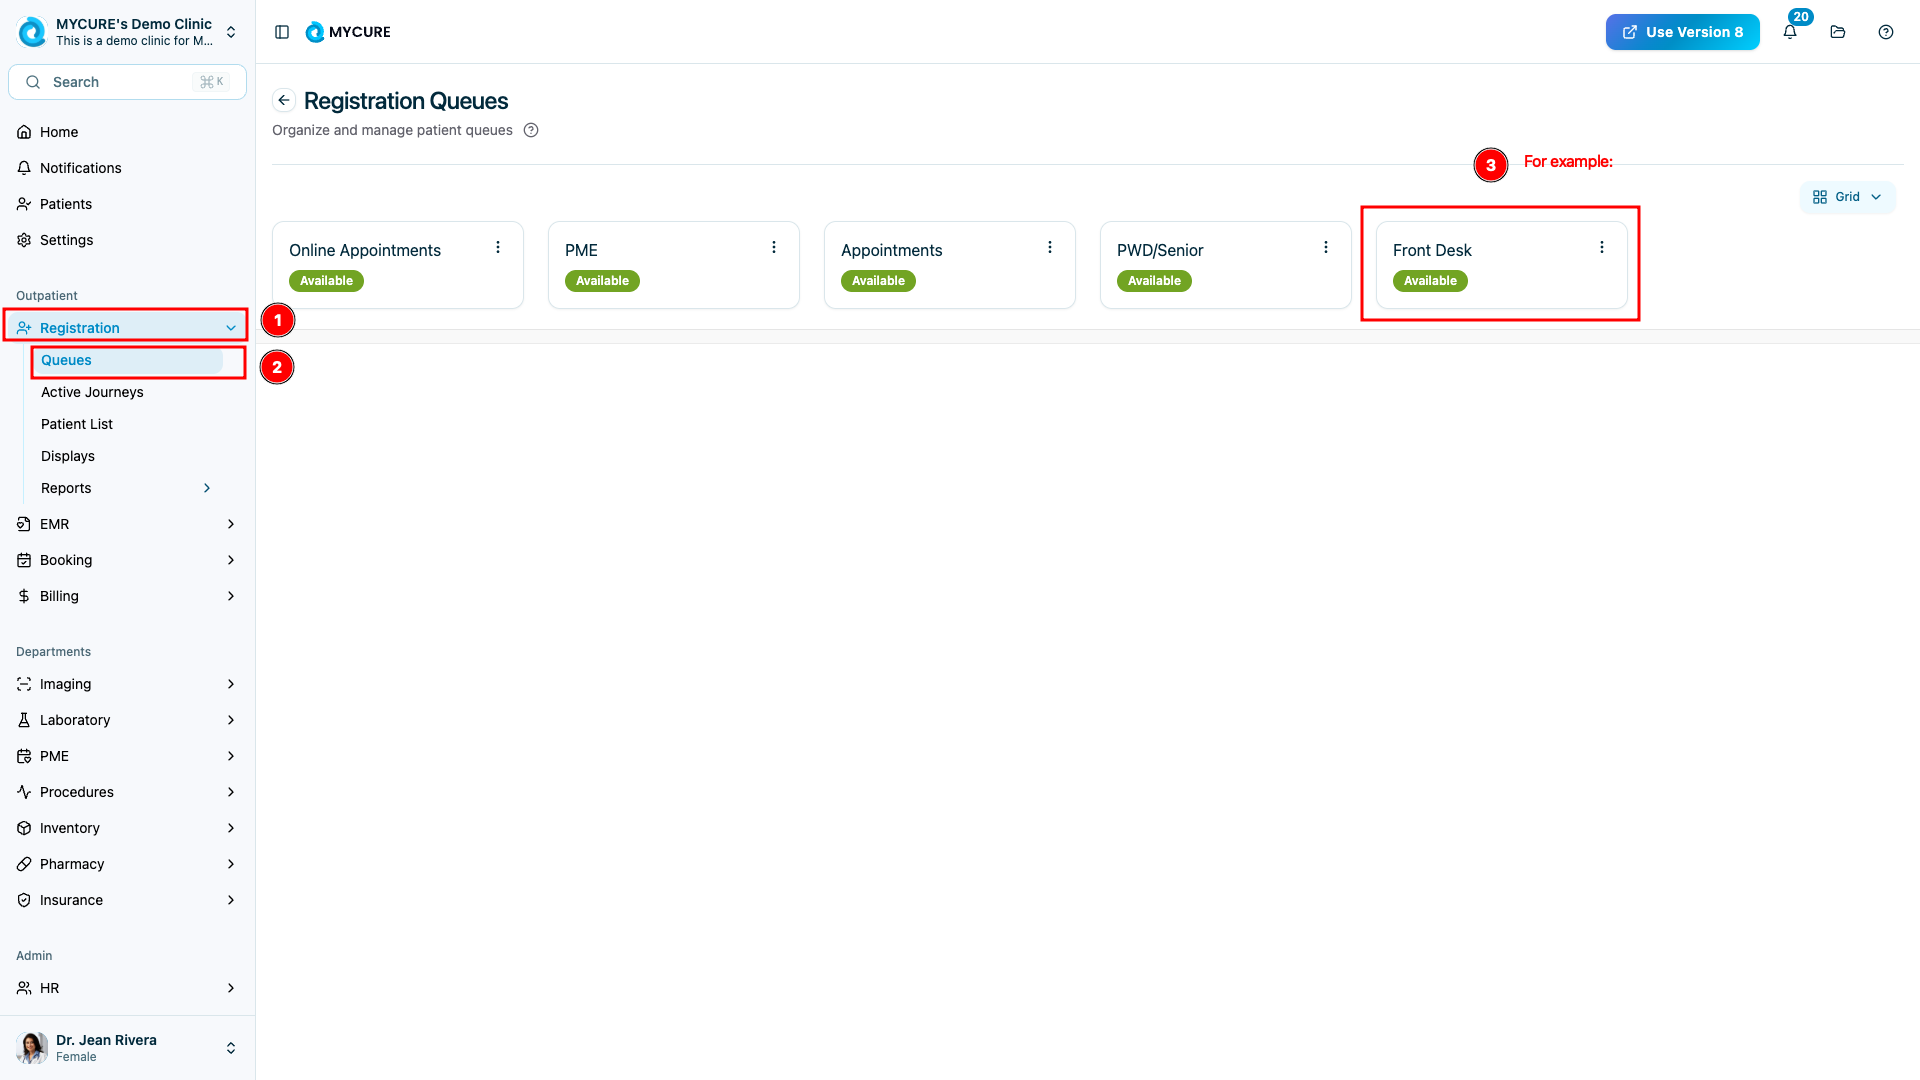
1. Register a New Patient
Click Registration on the main menu
Click Queues and select the appropriate queue from the list
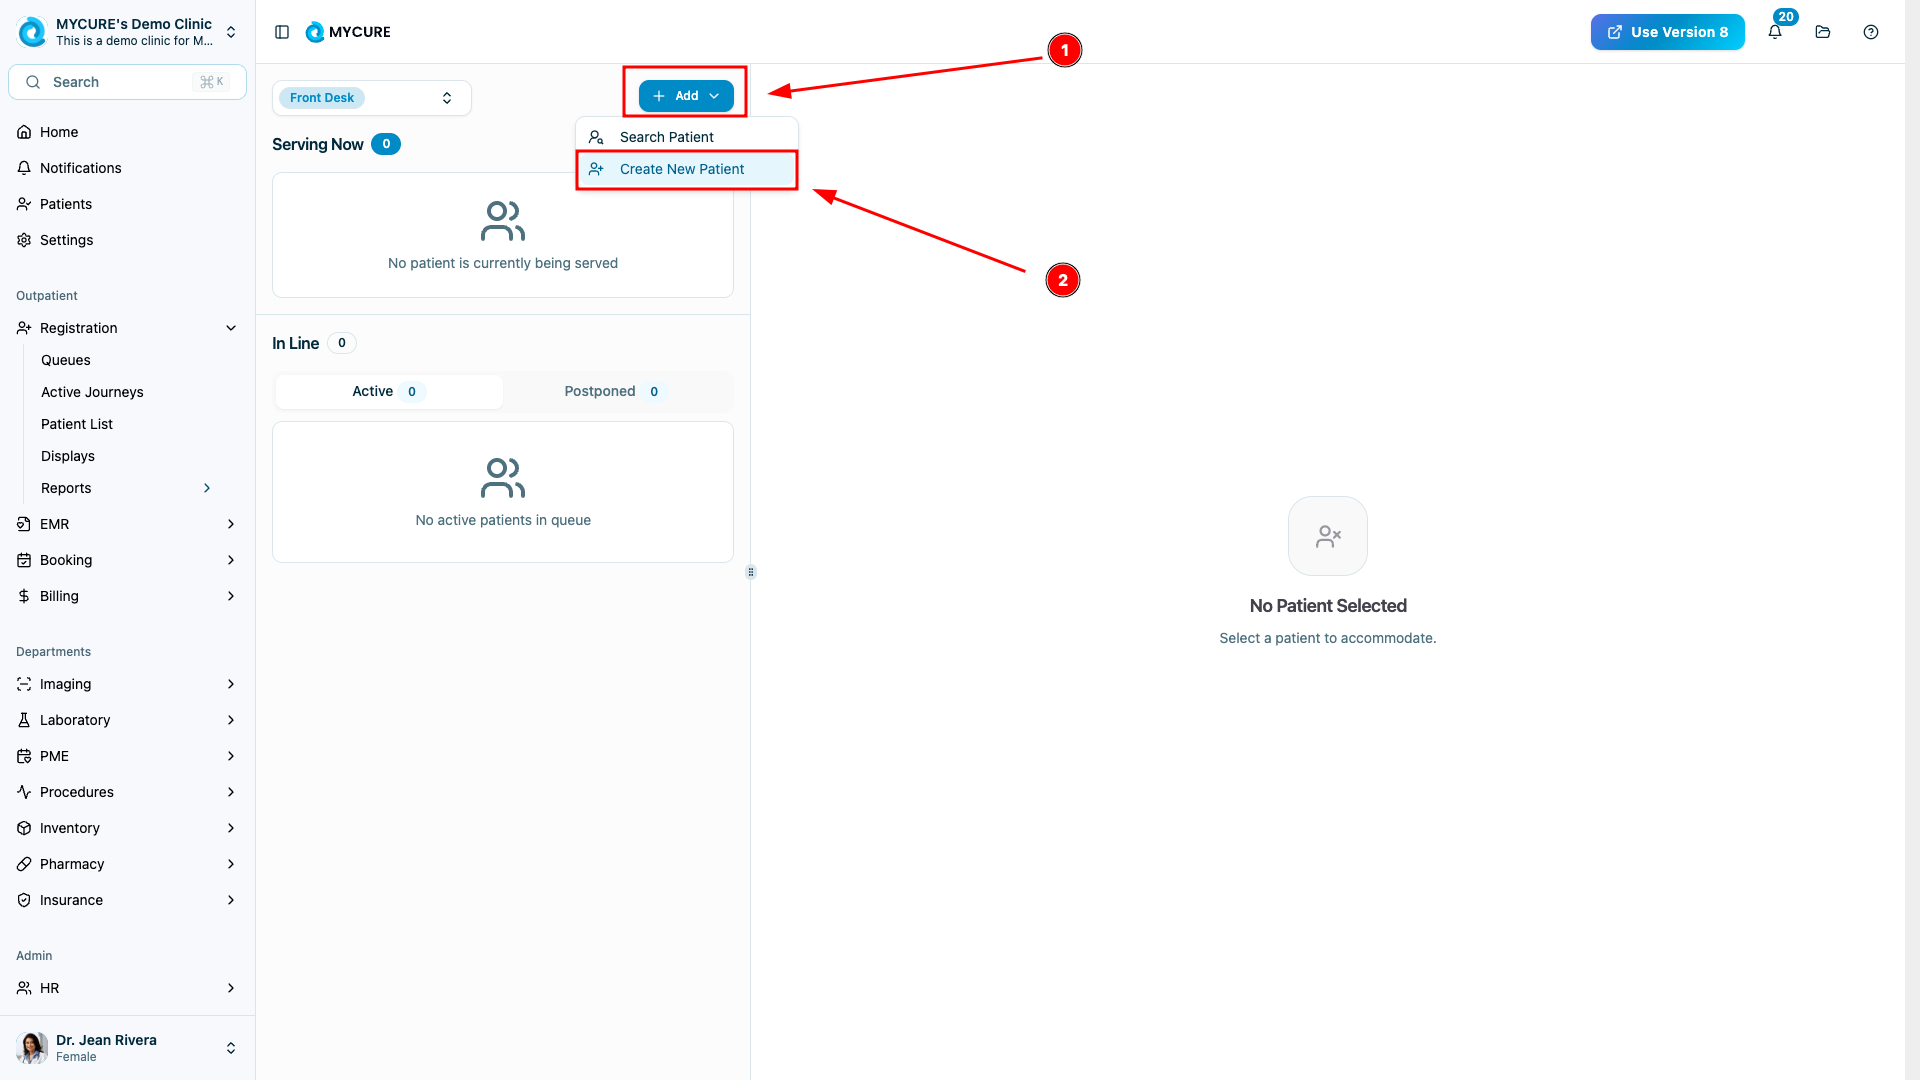
Click Add to begin adding a new patient
Select Create New Patient from the options
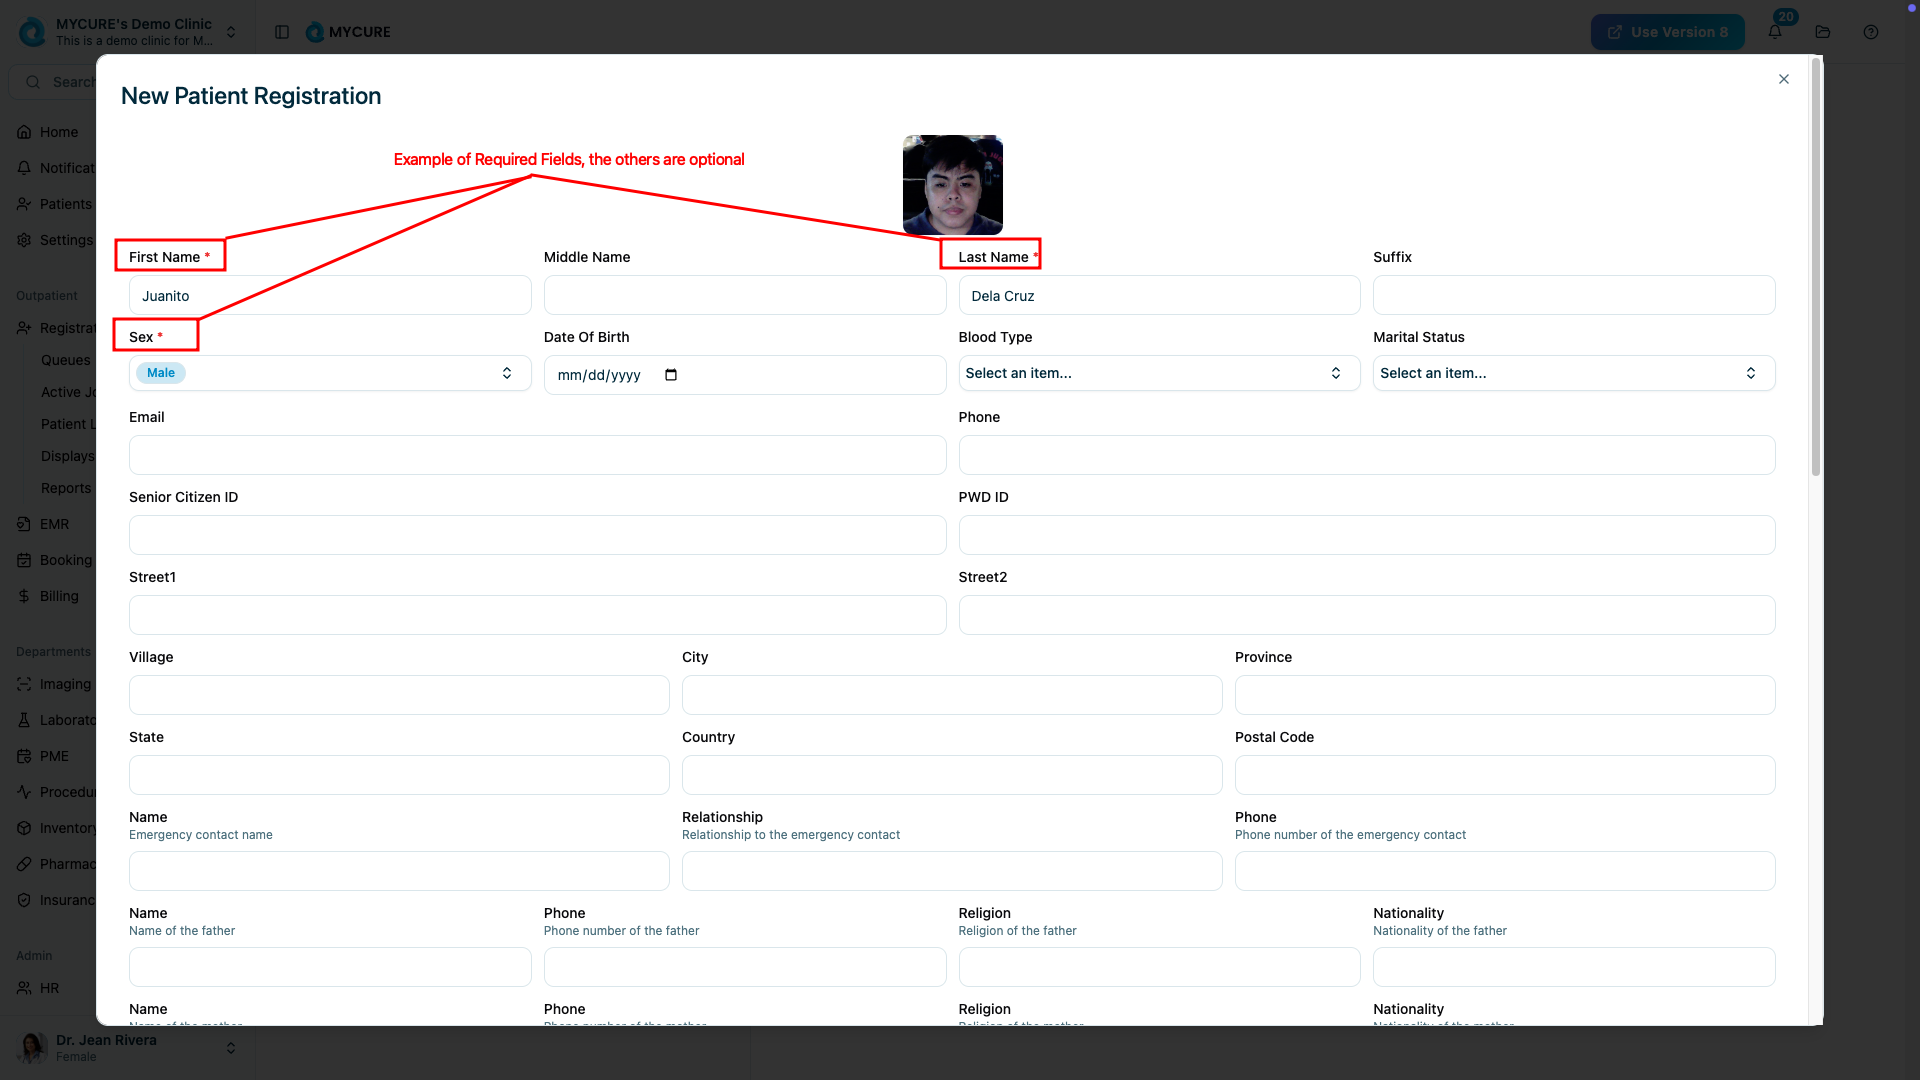
(Optional) Click Photo to capture the patient's image using the camera or upload an existing image
Fill out all required fields (First name, Last name, contact information, etc.)
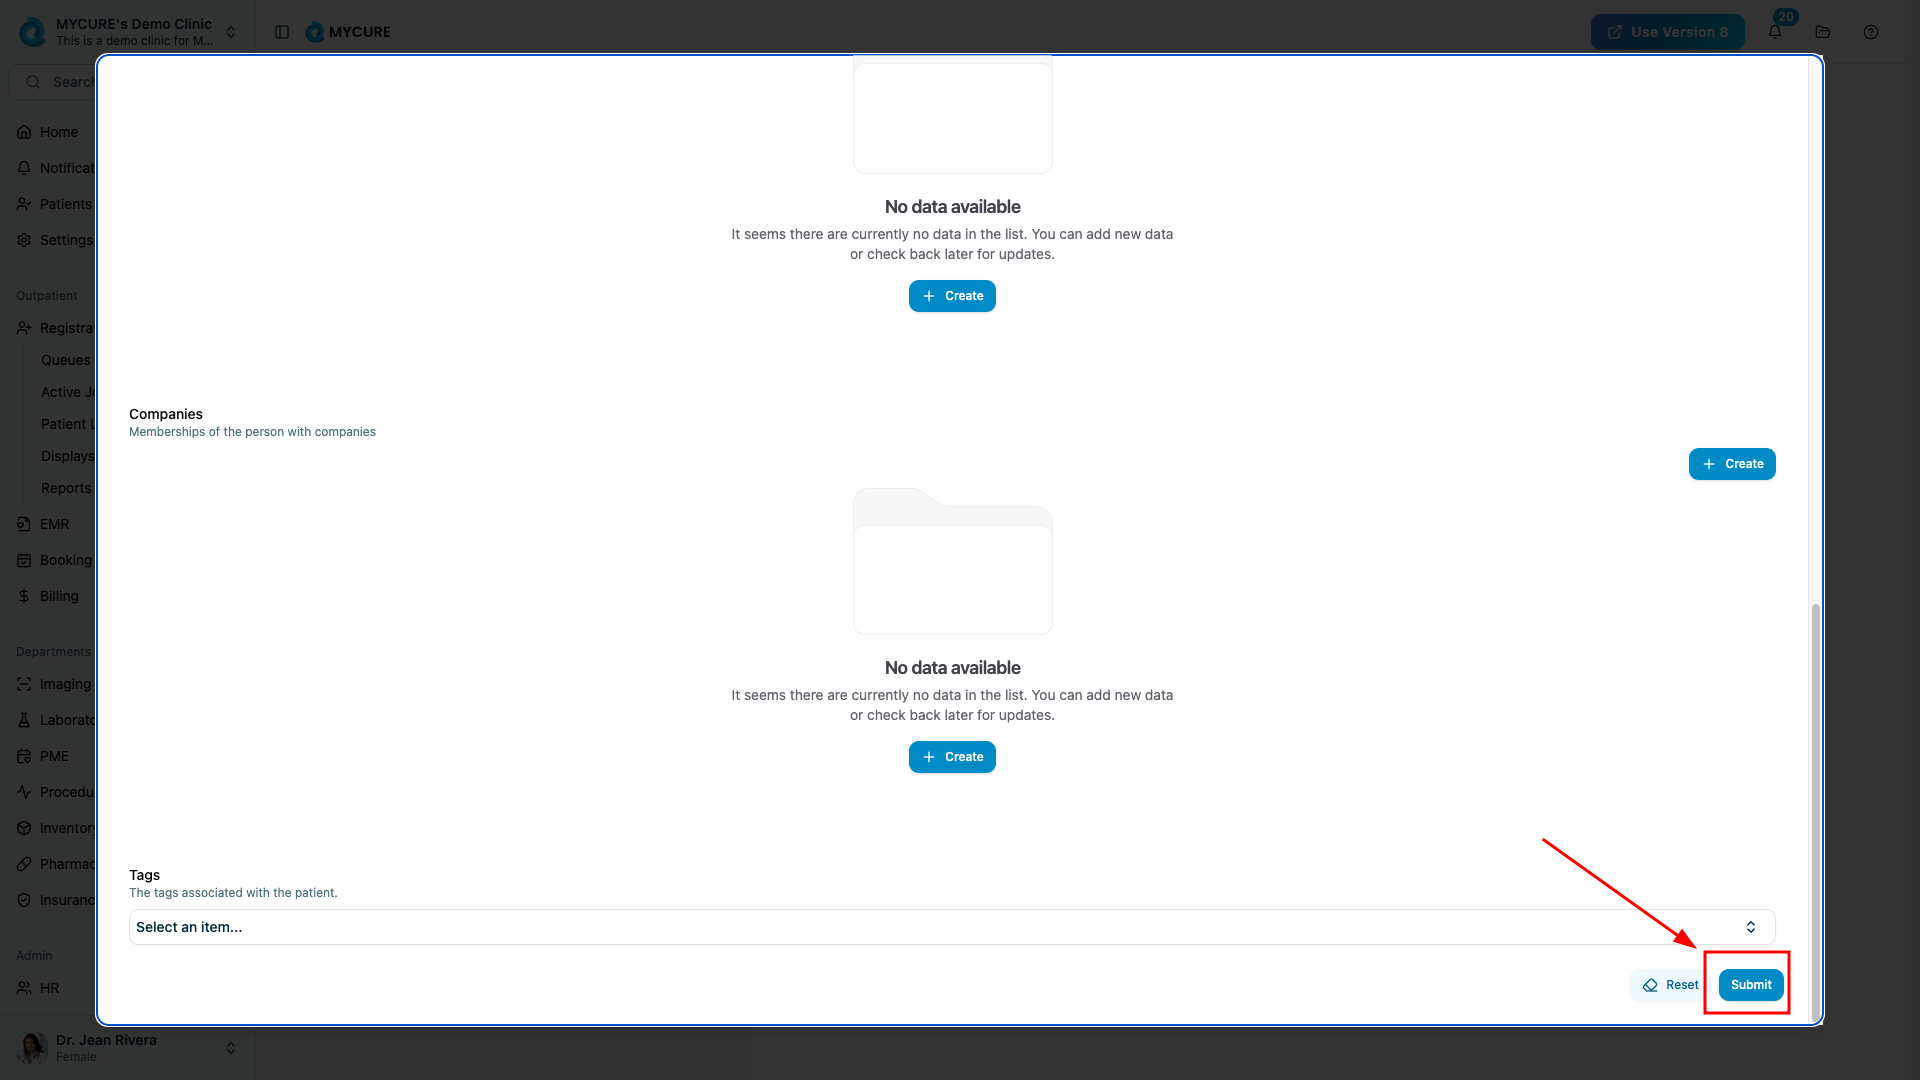
Click Submit to create the patient record
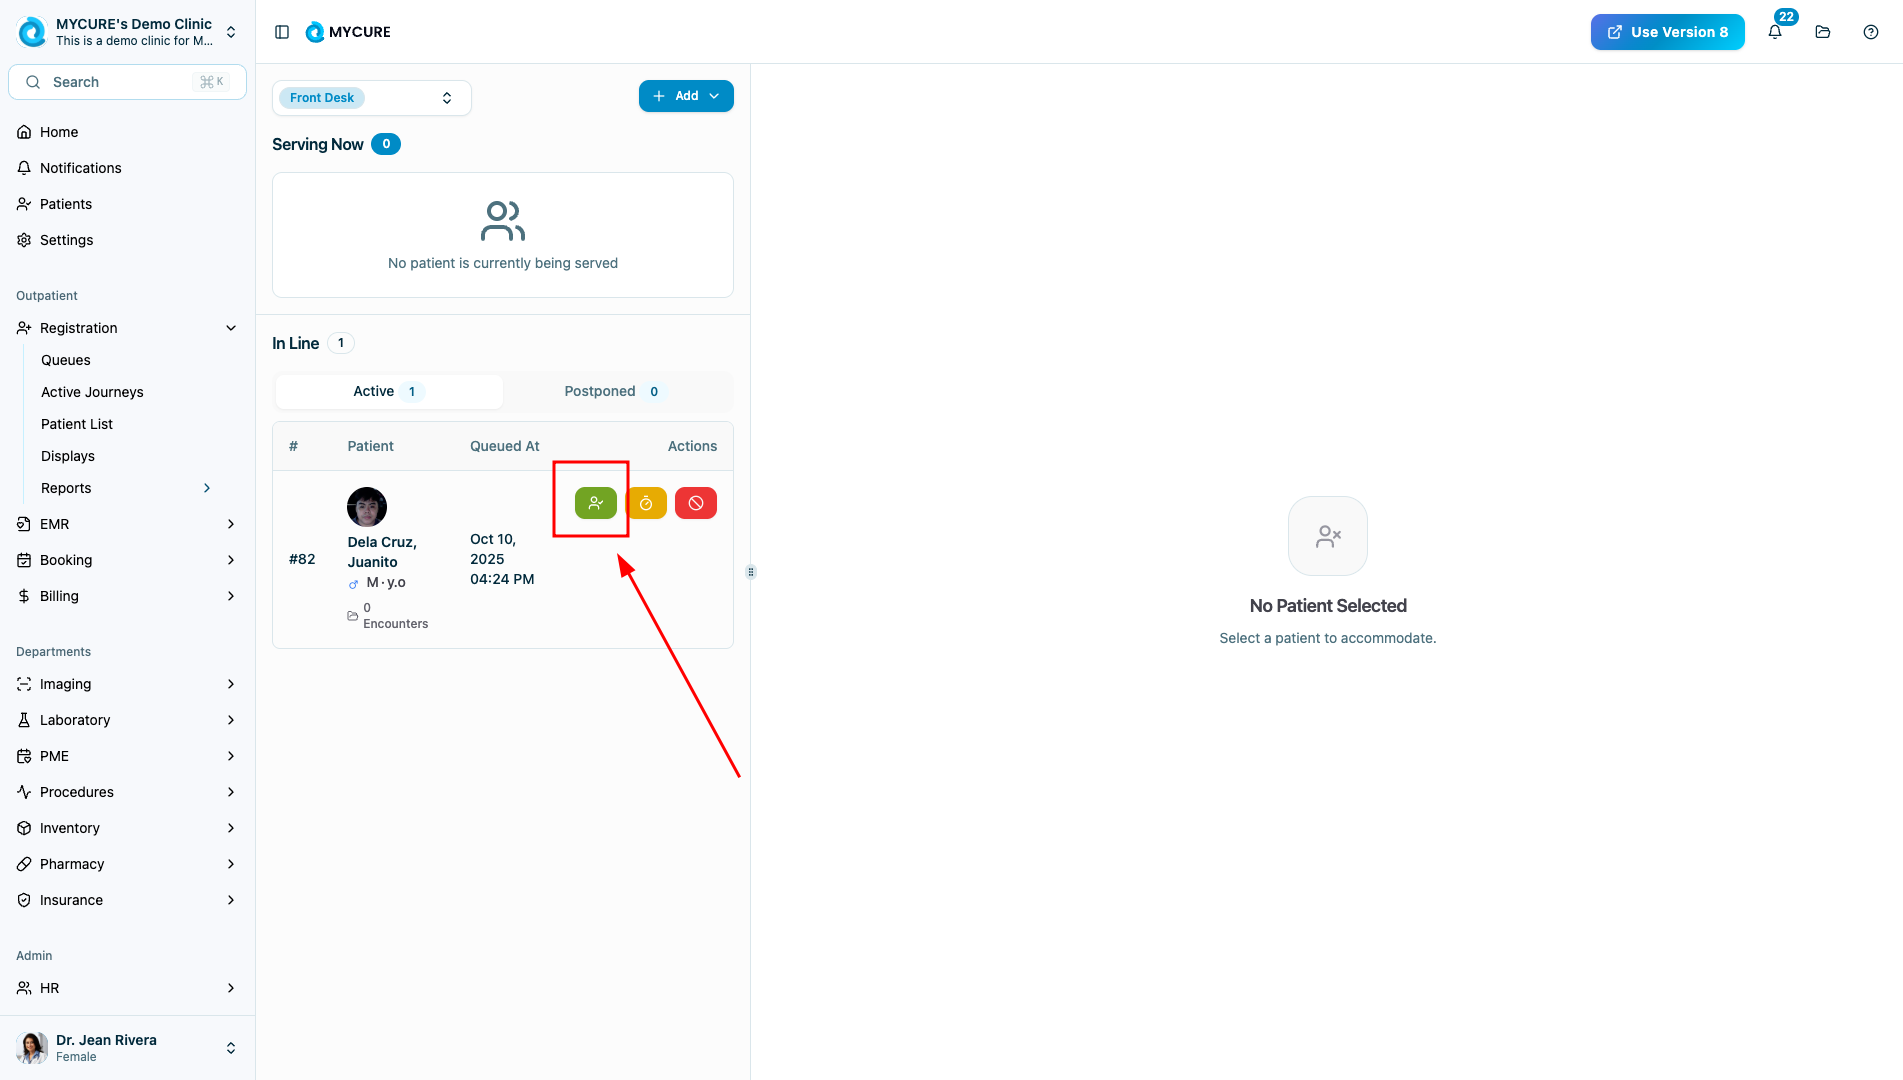
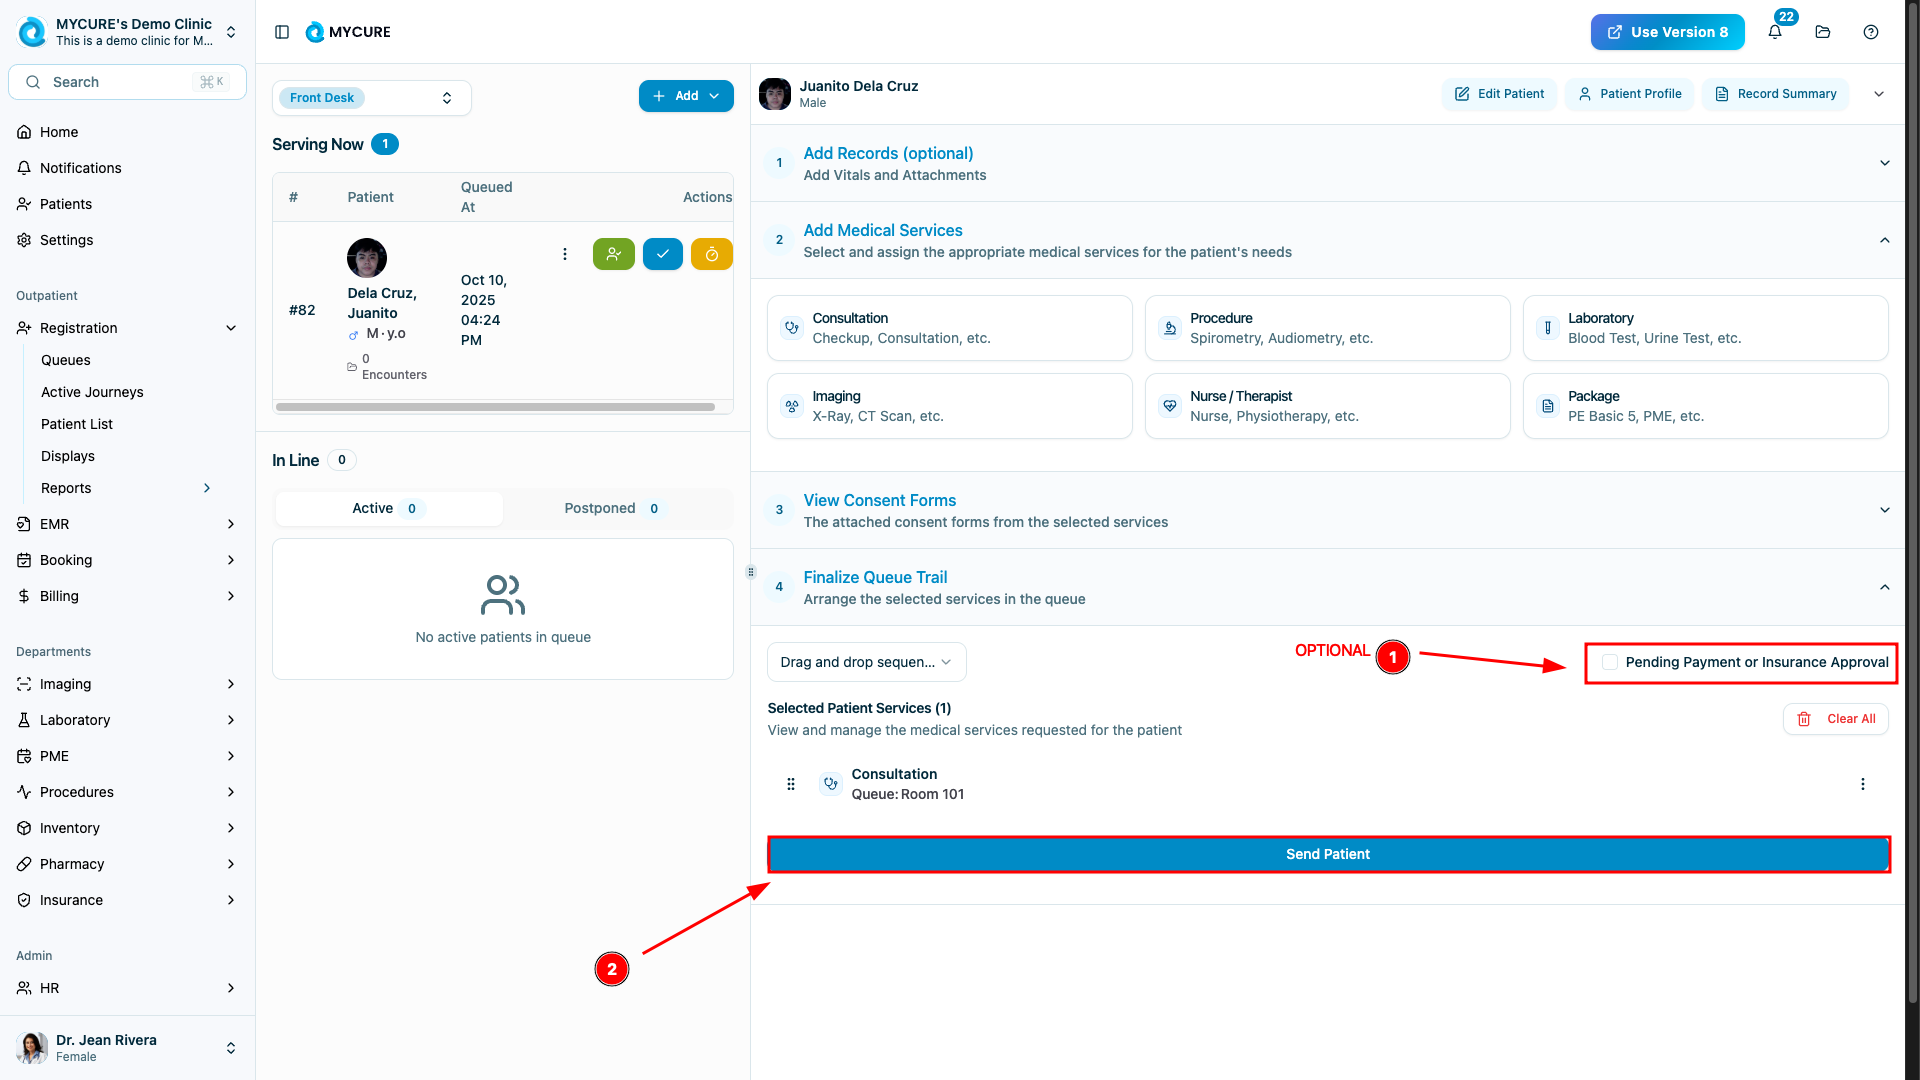
2. Serve the Patient and Create a Service Record
From the queue screen, select the newly created patient
Click Serve to begin the consultation process
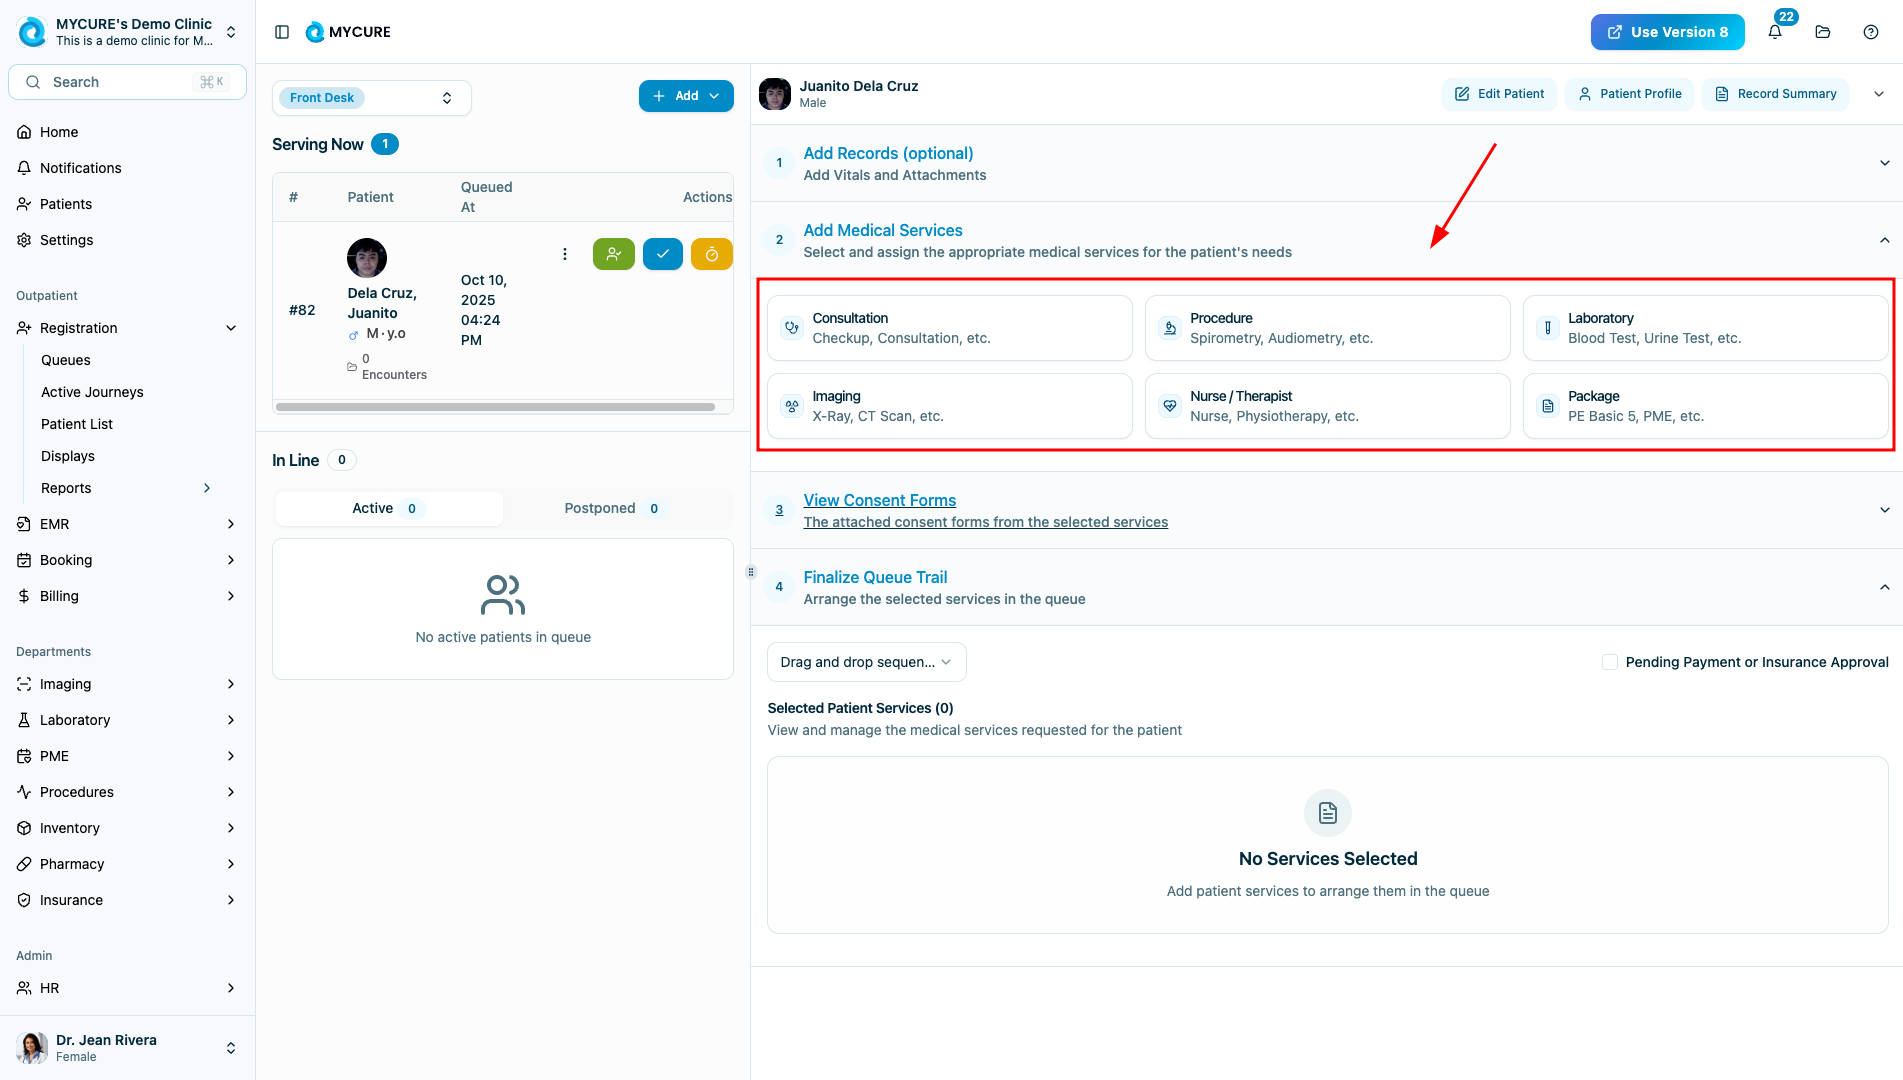
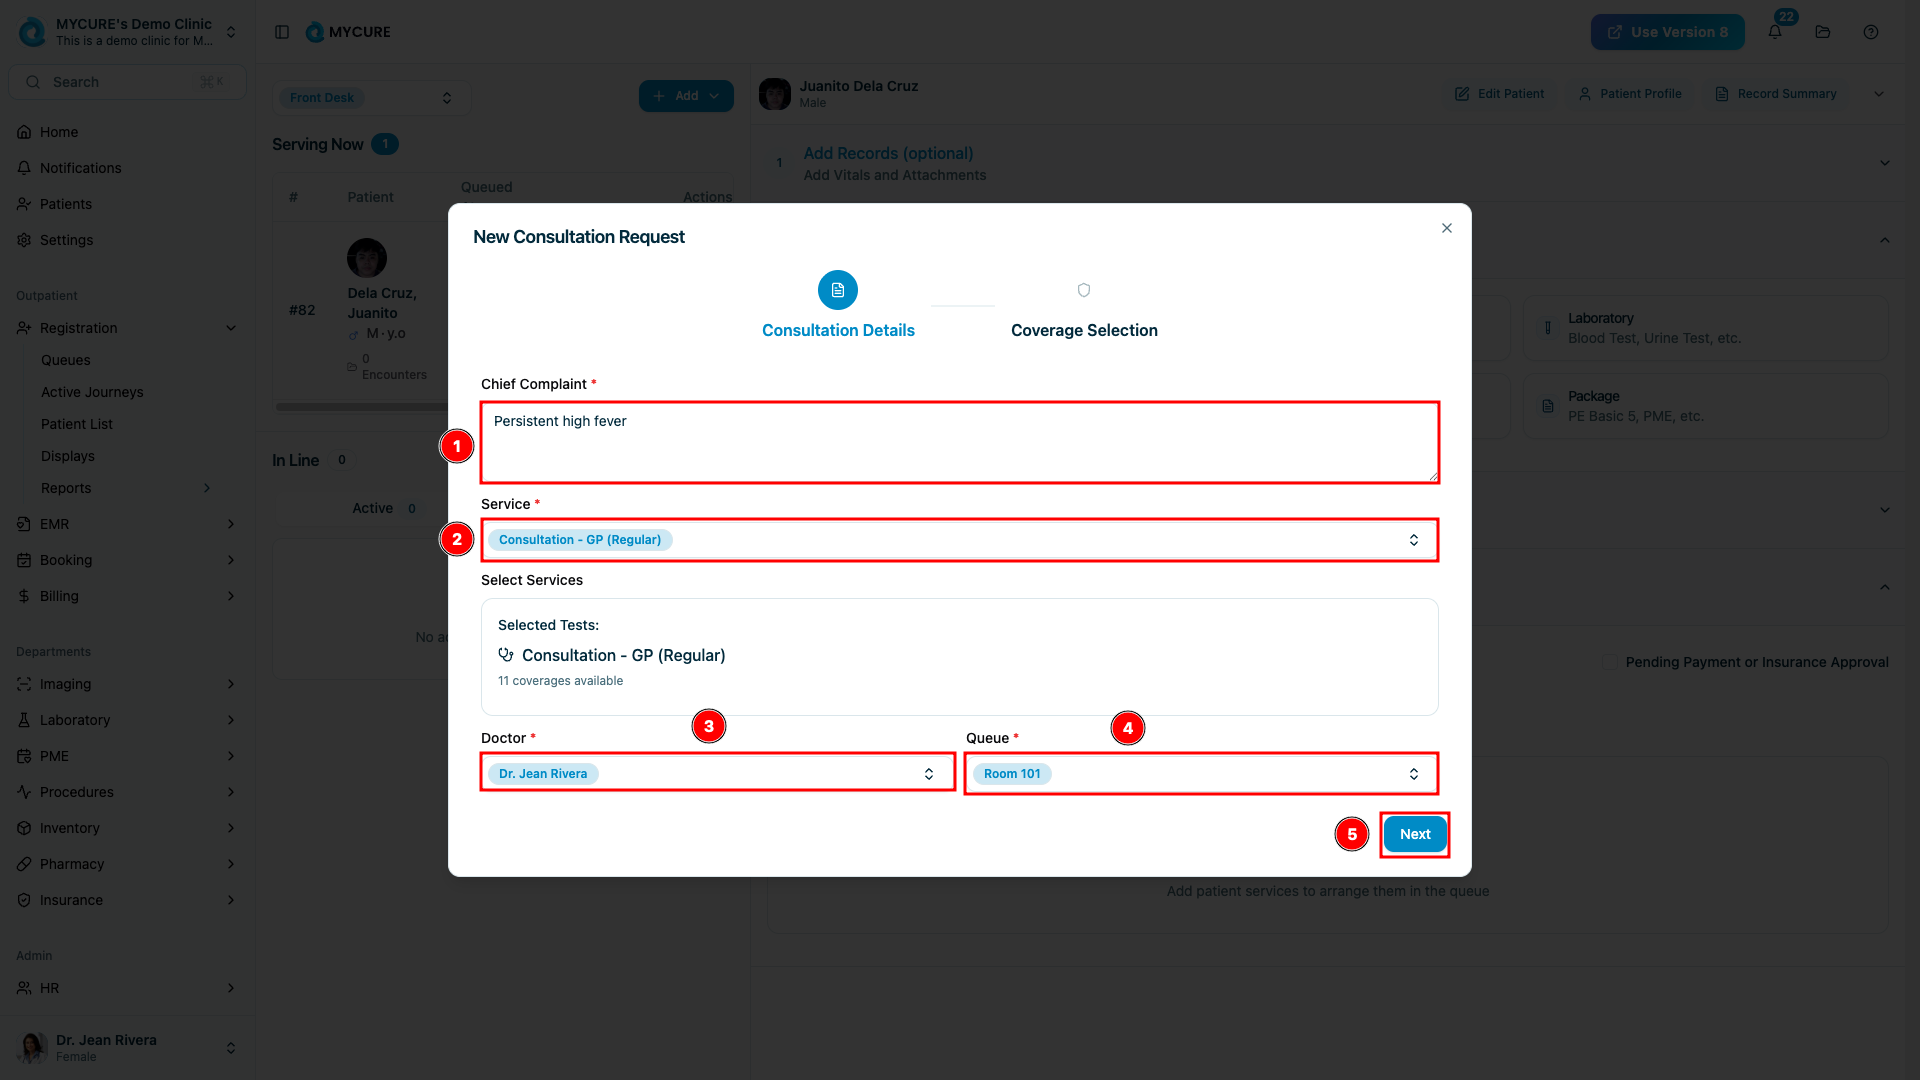
Select the appropriate Service Type
Fill in all necessary service fields that appear based on the selected service type
Click Next to proceed
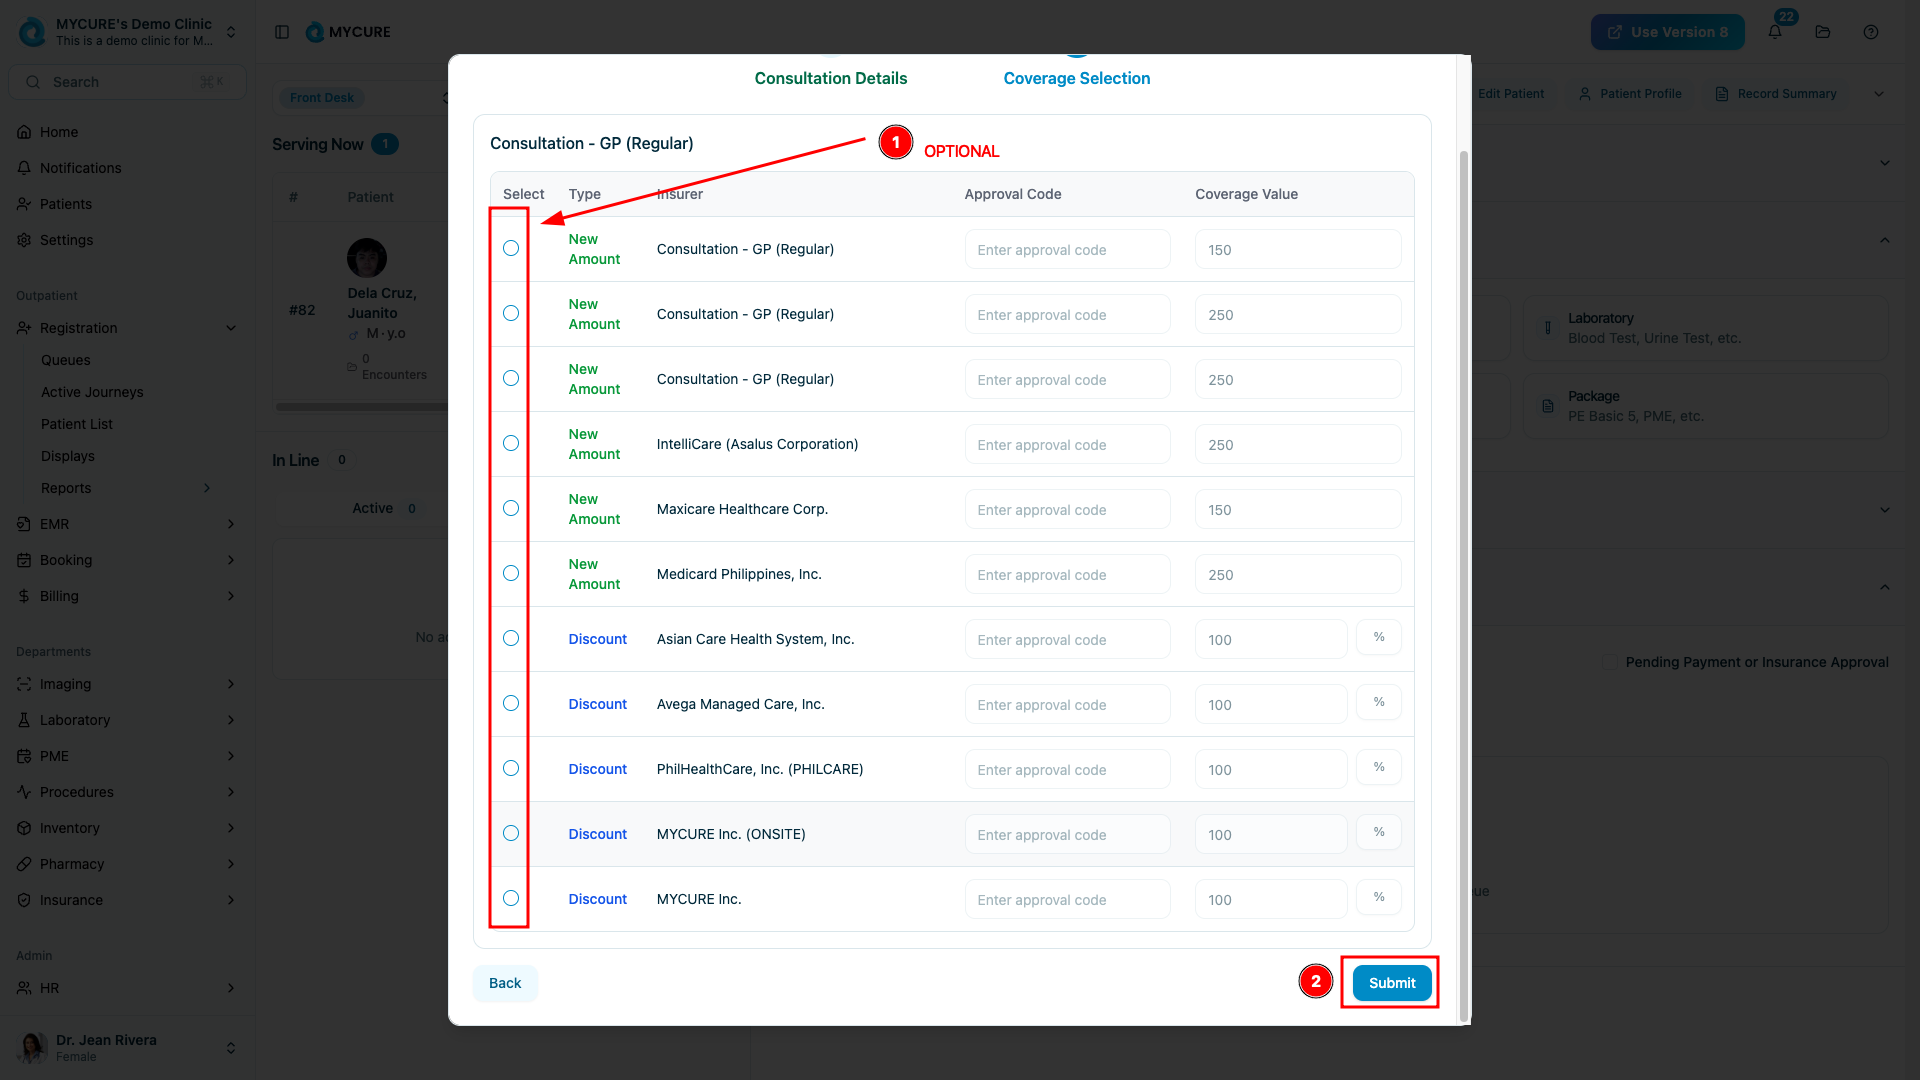
(Optional) Select insurance or other Coverage if applicable
Click Submit to save the service information
For payment workflow: Check Pending Payment or Insurance Approval as appropriate
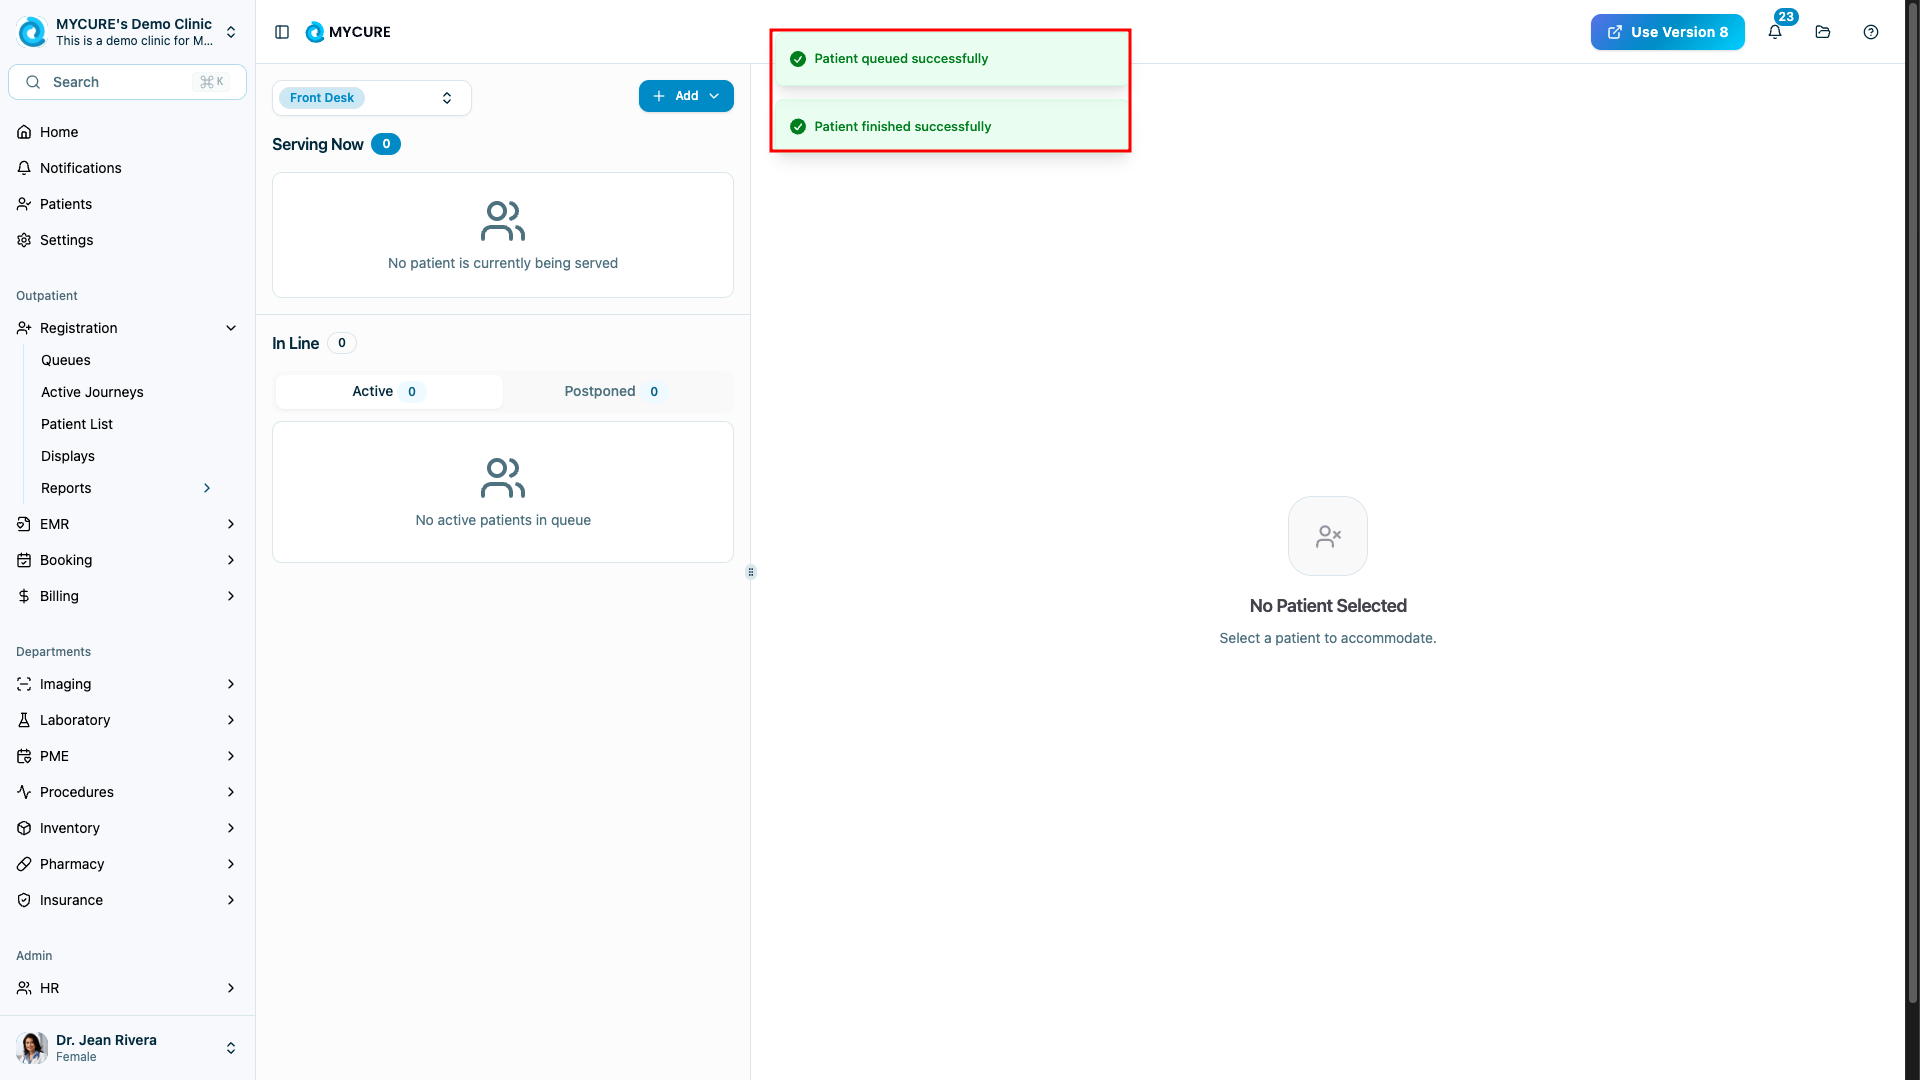
OR - If payment is not required first: Click Send Patient to move them to the EMR queue
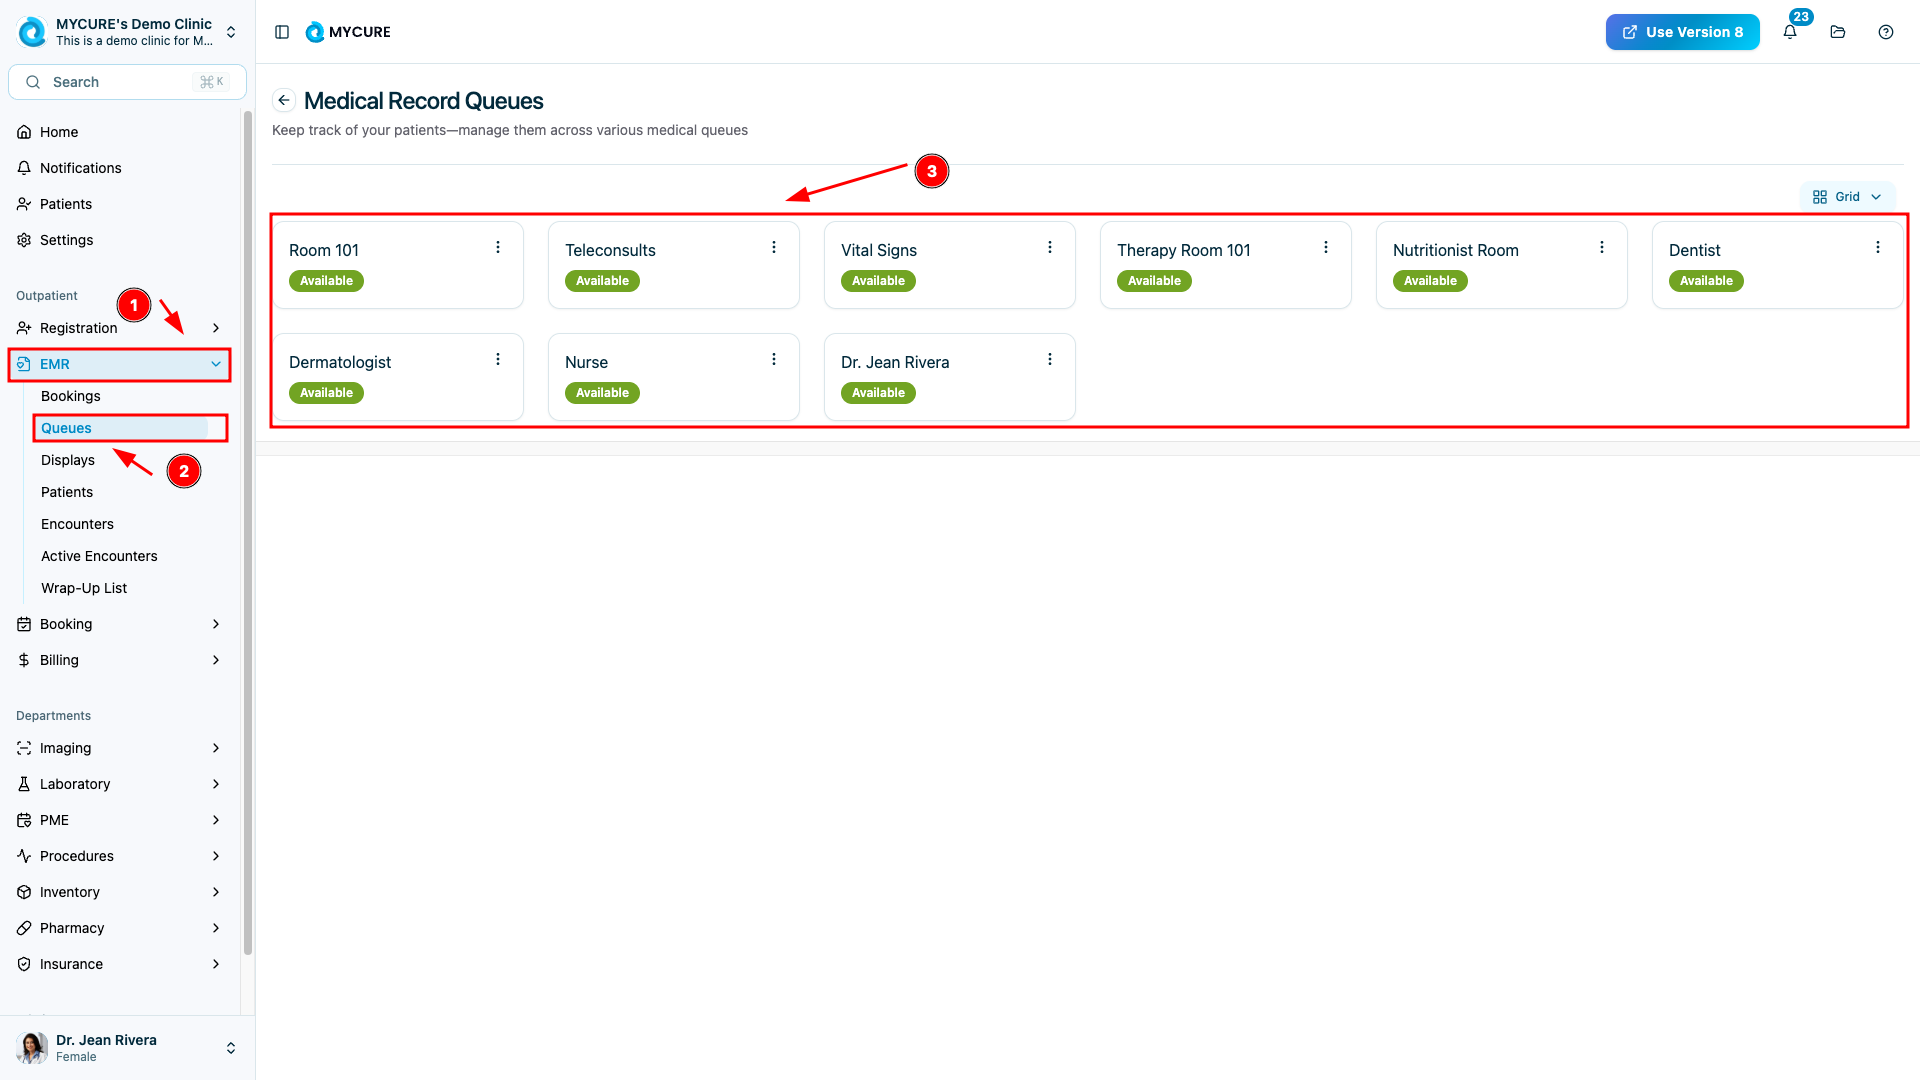
3. Document the Consultation in EMR
Click EMR from the main menu
Click Queues and select the appropriate queue
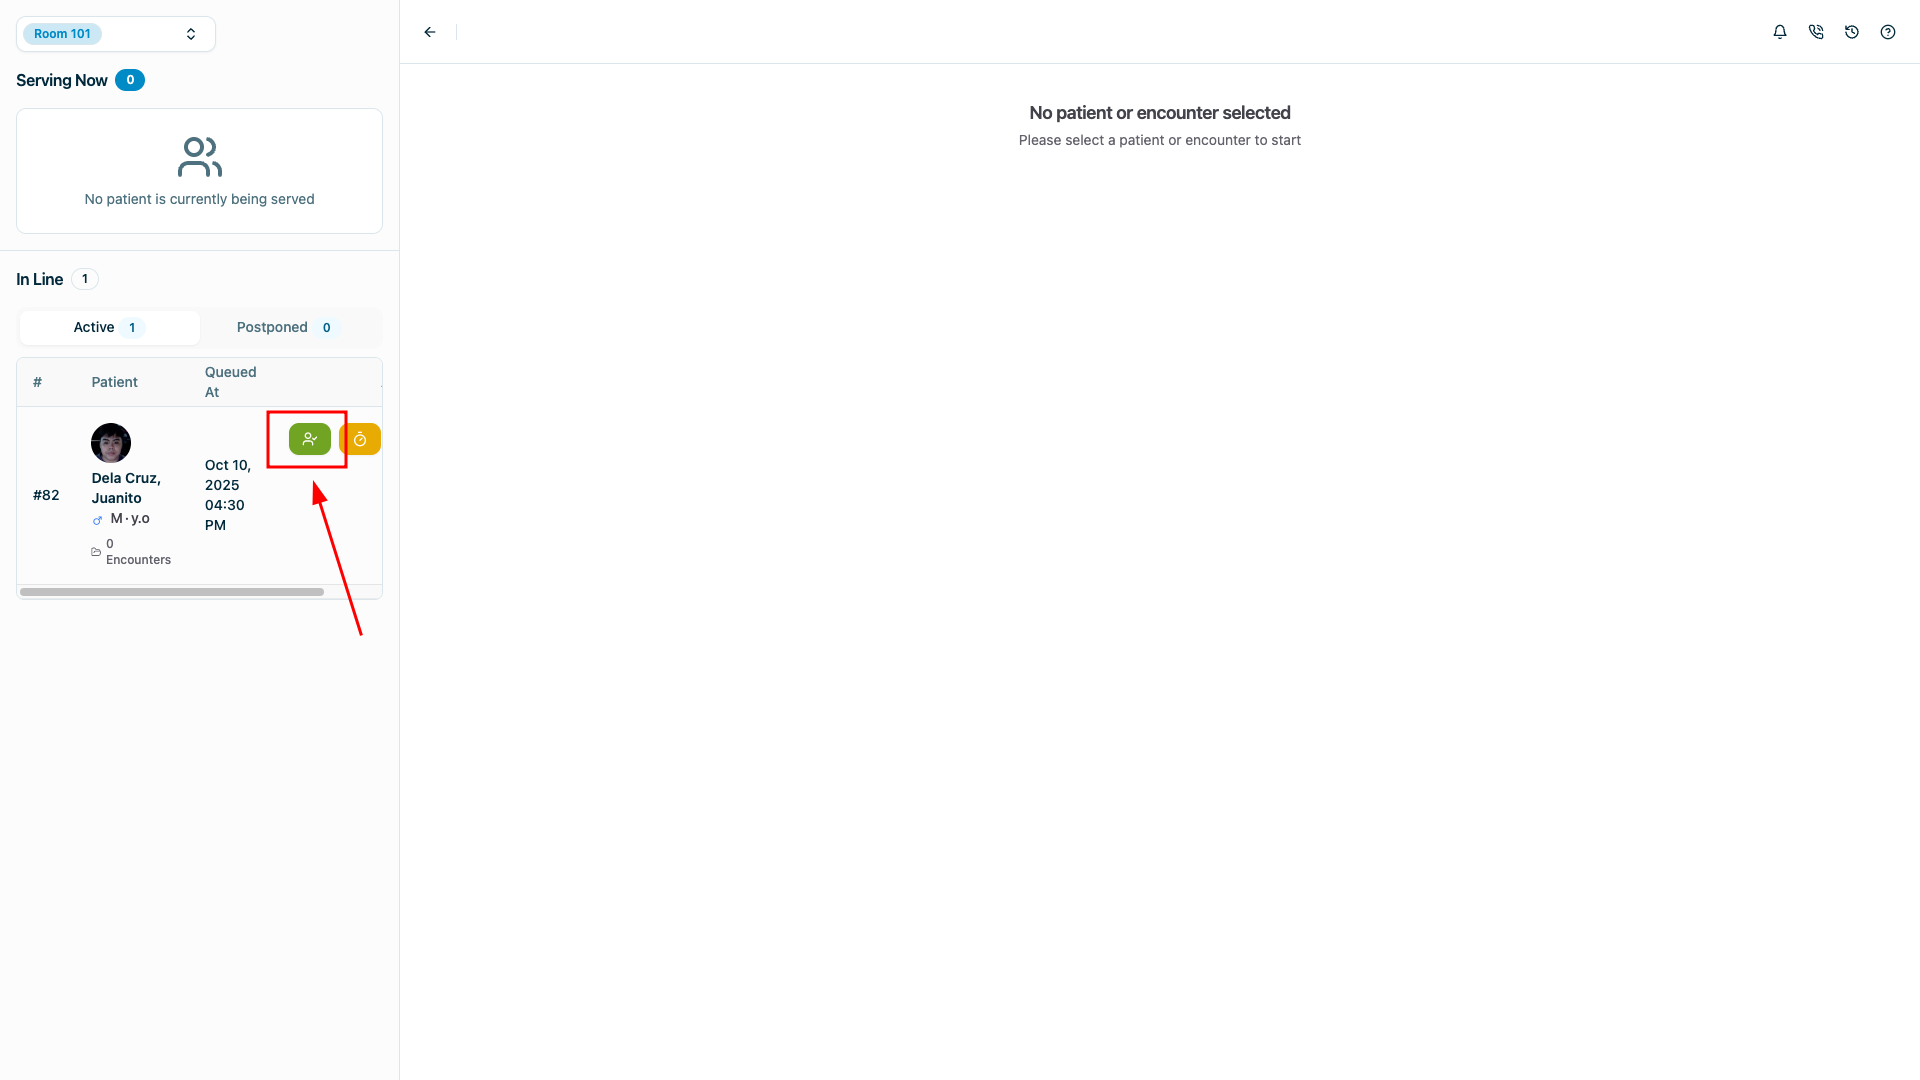
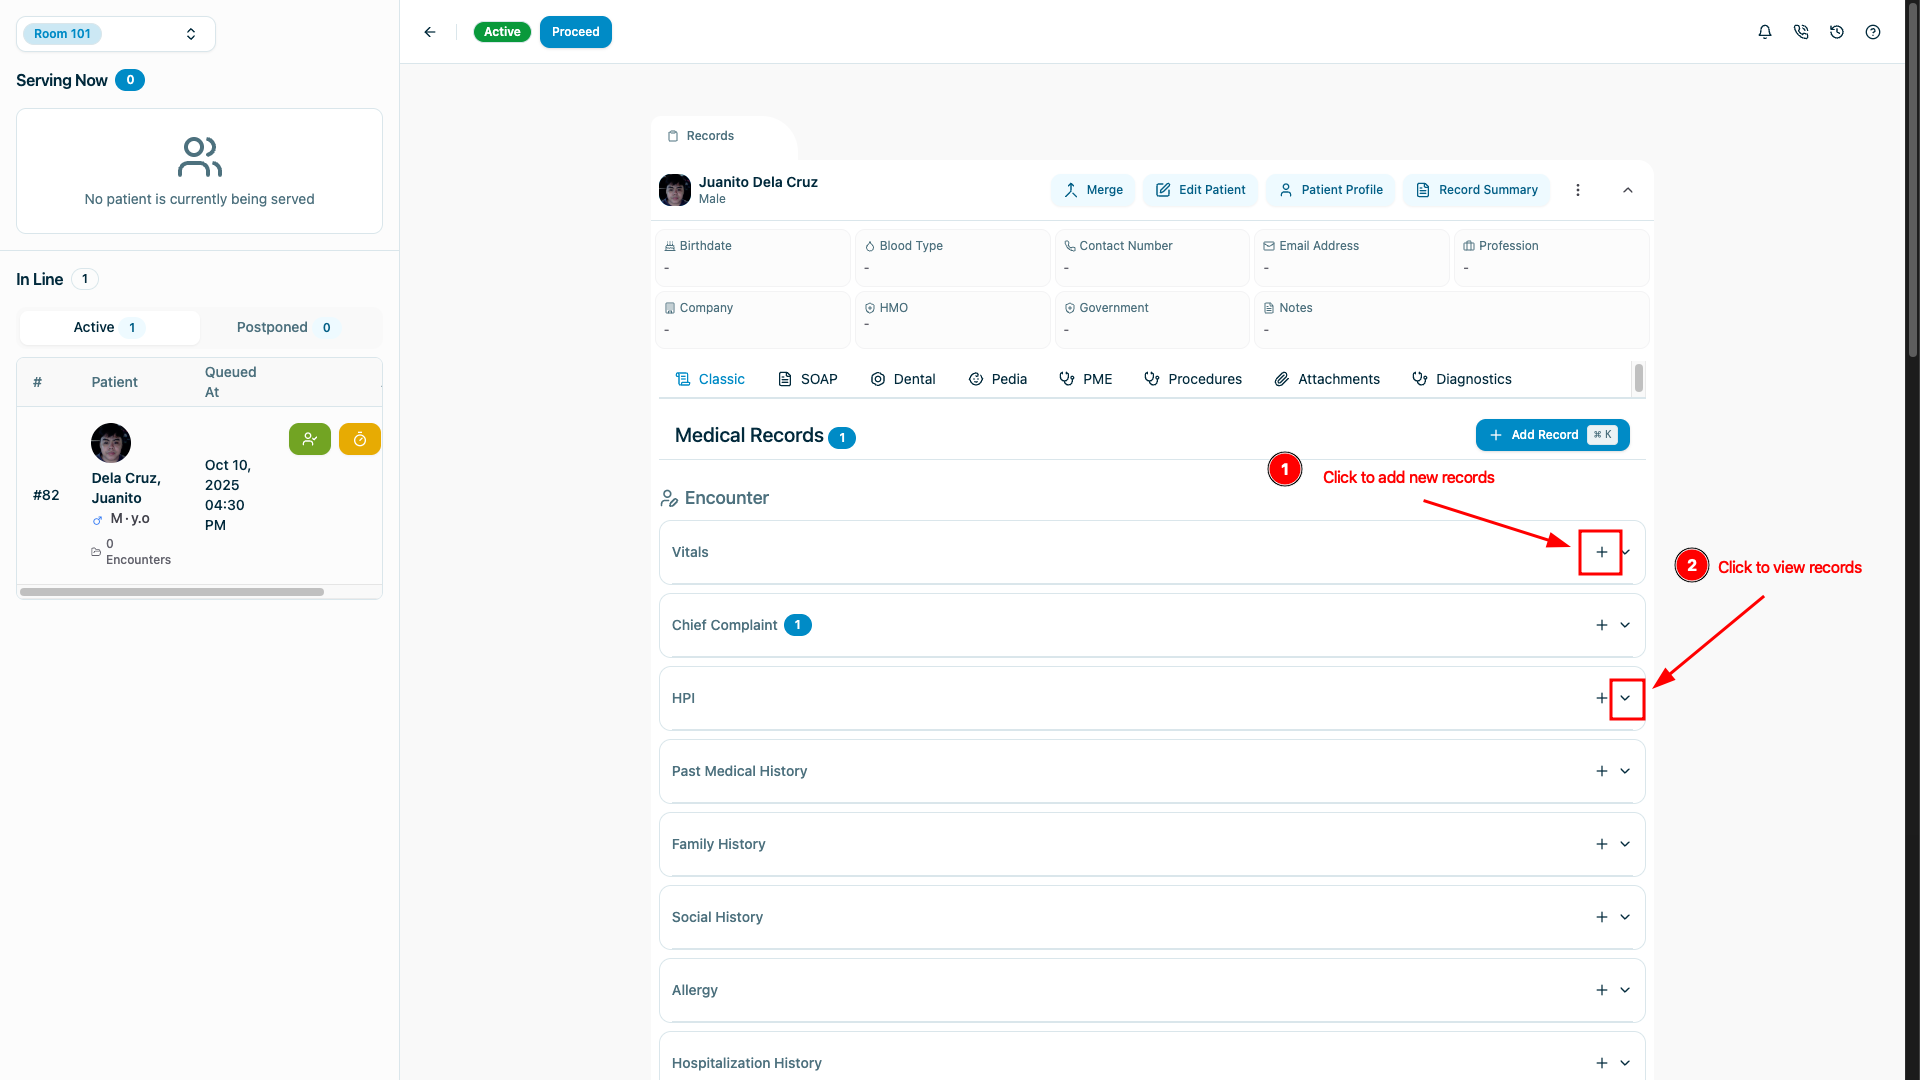
Find your patient and click Serve to open their record
Fill out all necessary clinical fields:
Chief Complaint
Vital Signs
Medical History
Assessment
Other required documentation
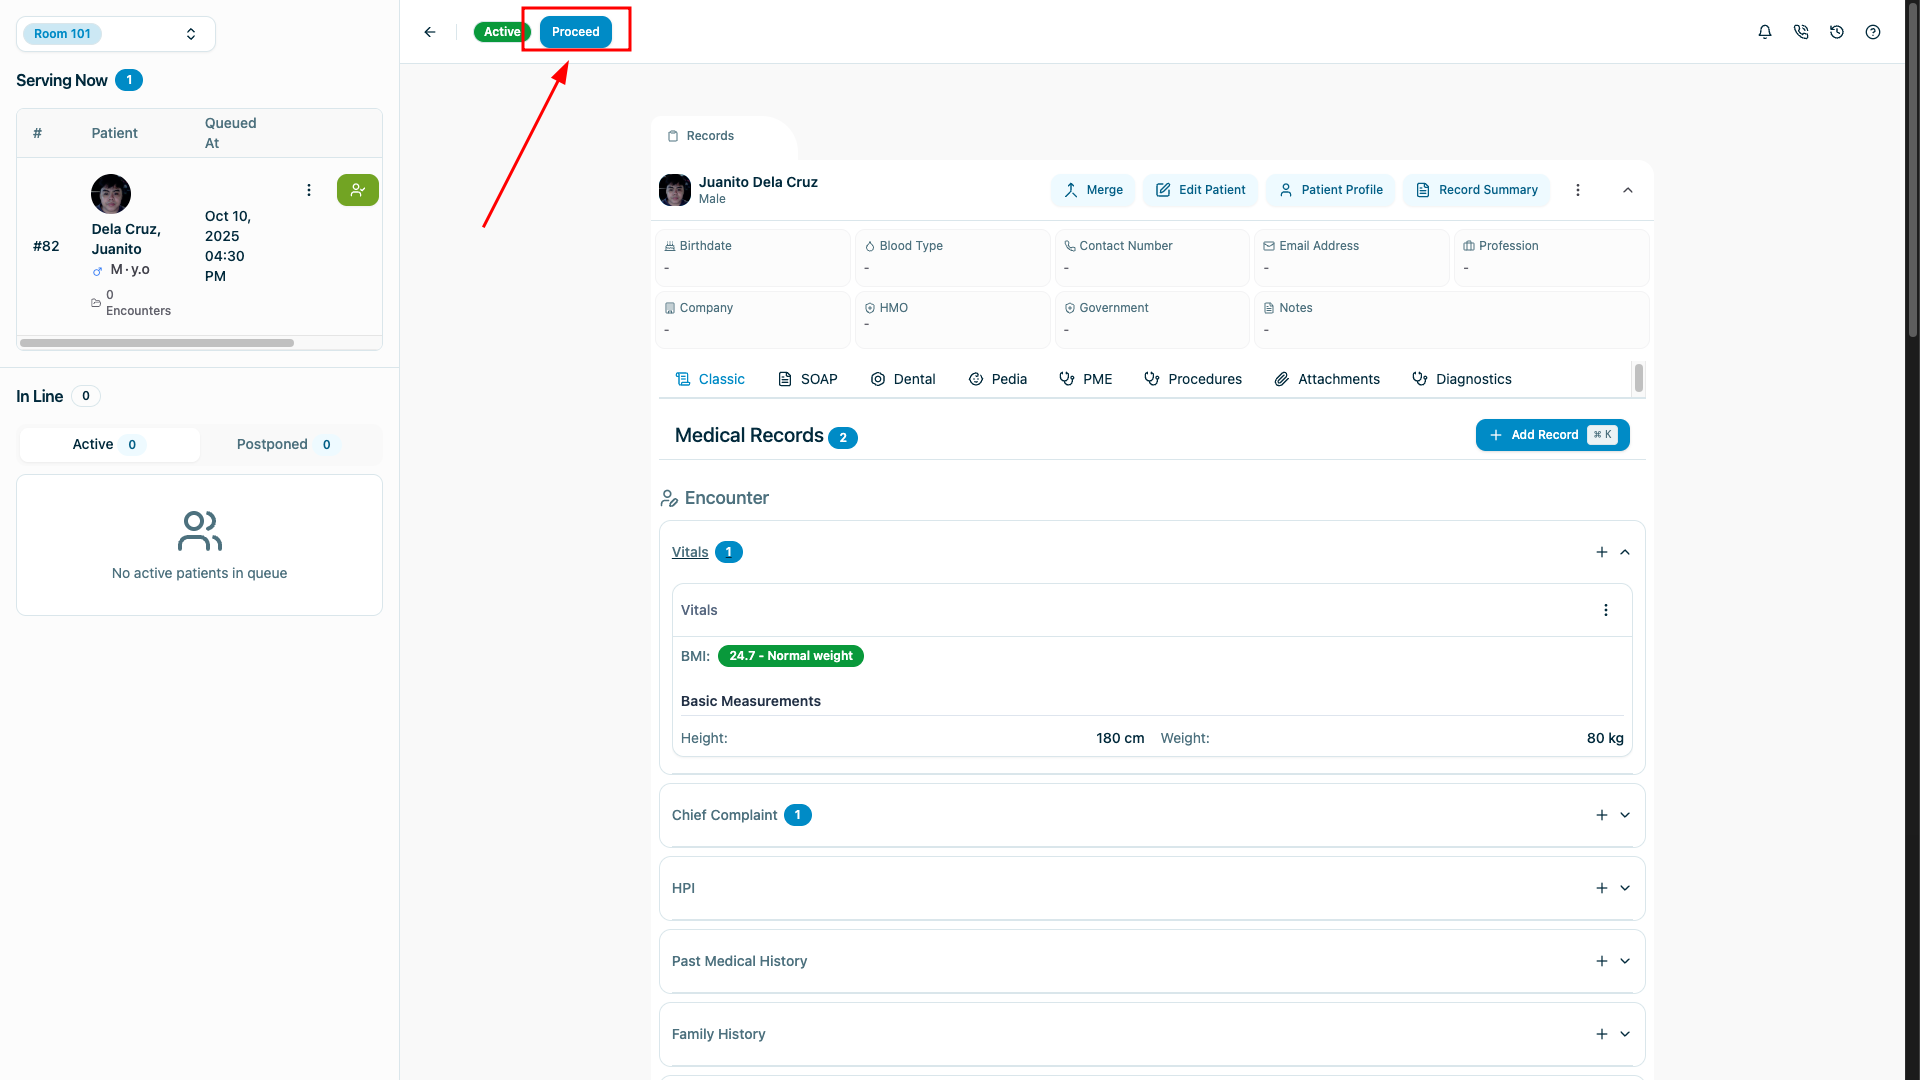
Click Proceed to save the clinical documentation
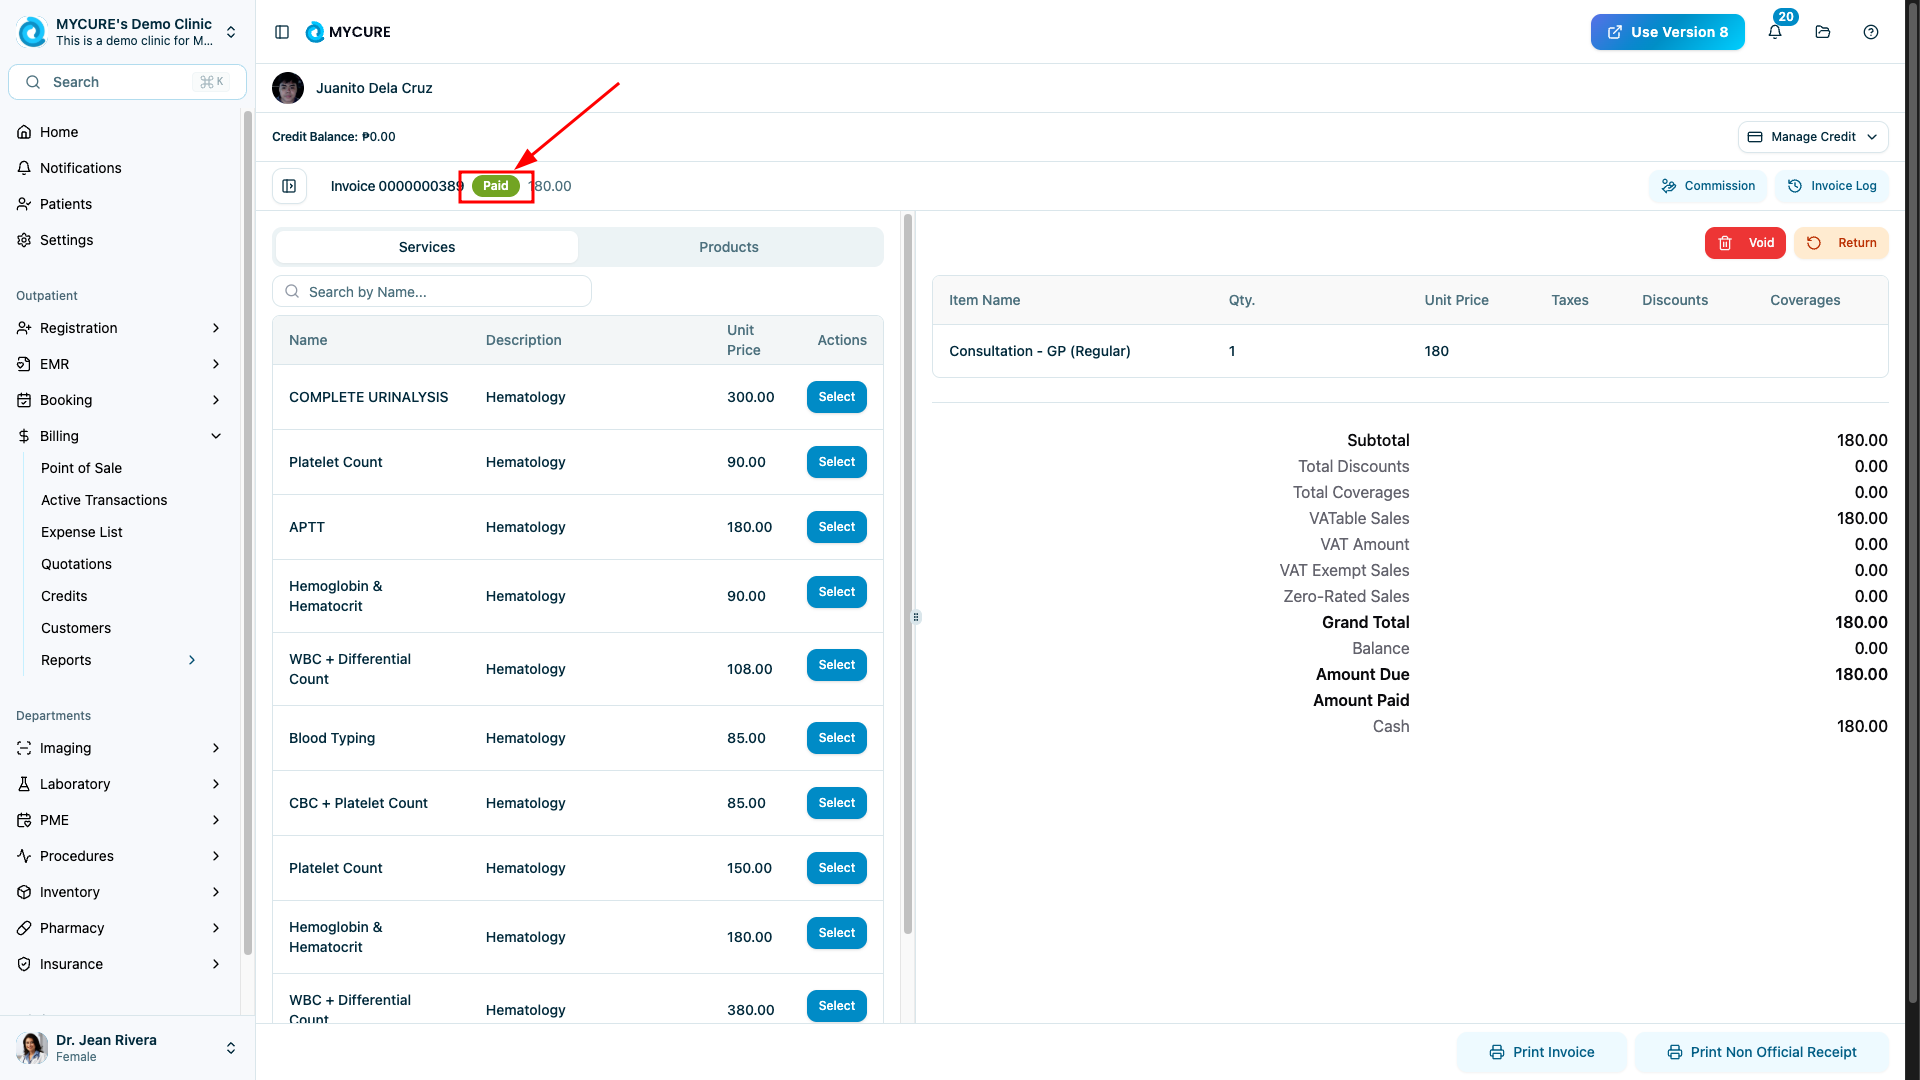
4. Process Billing and Payment
Return to the Homepage
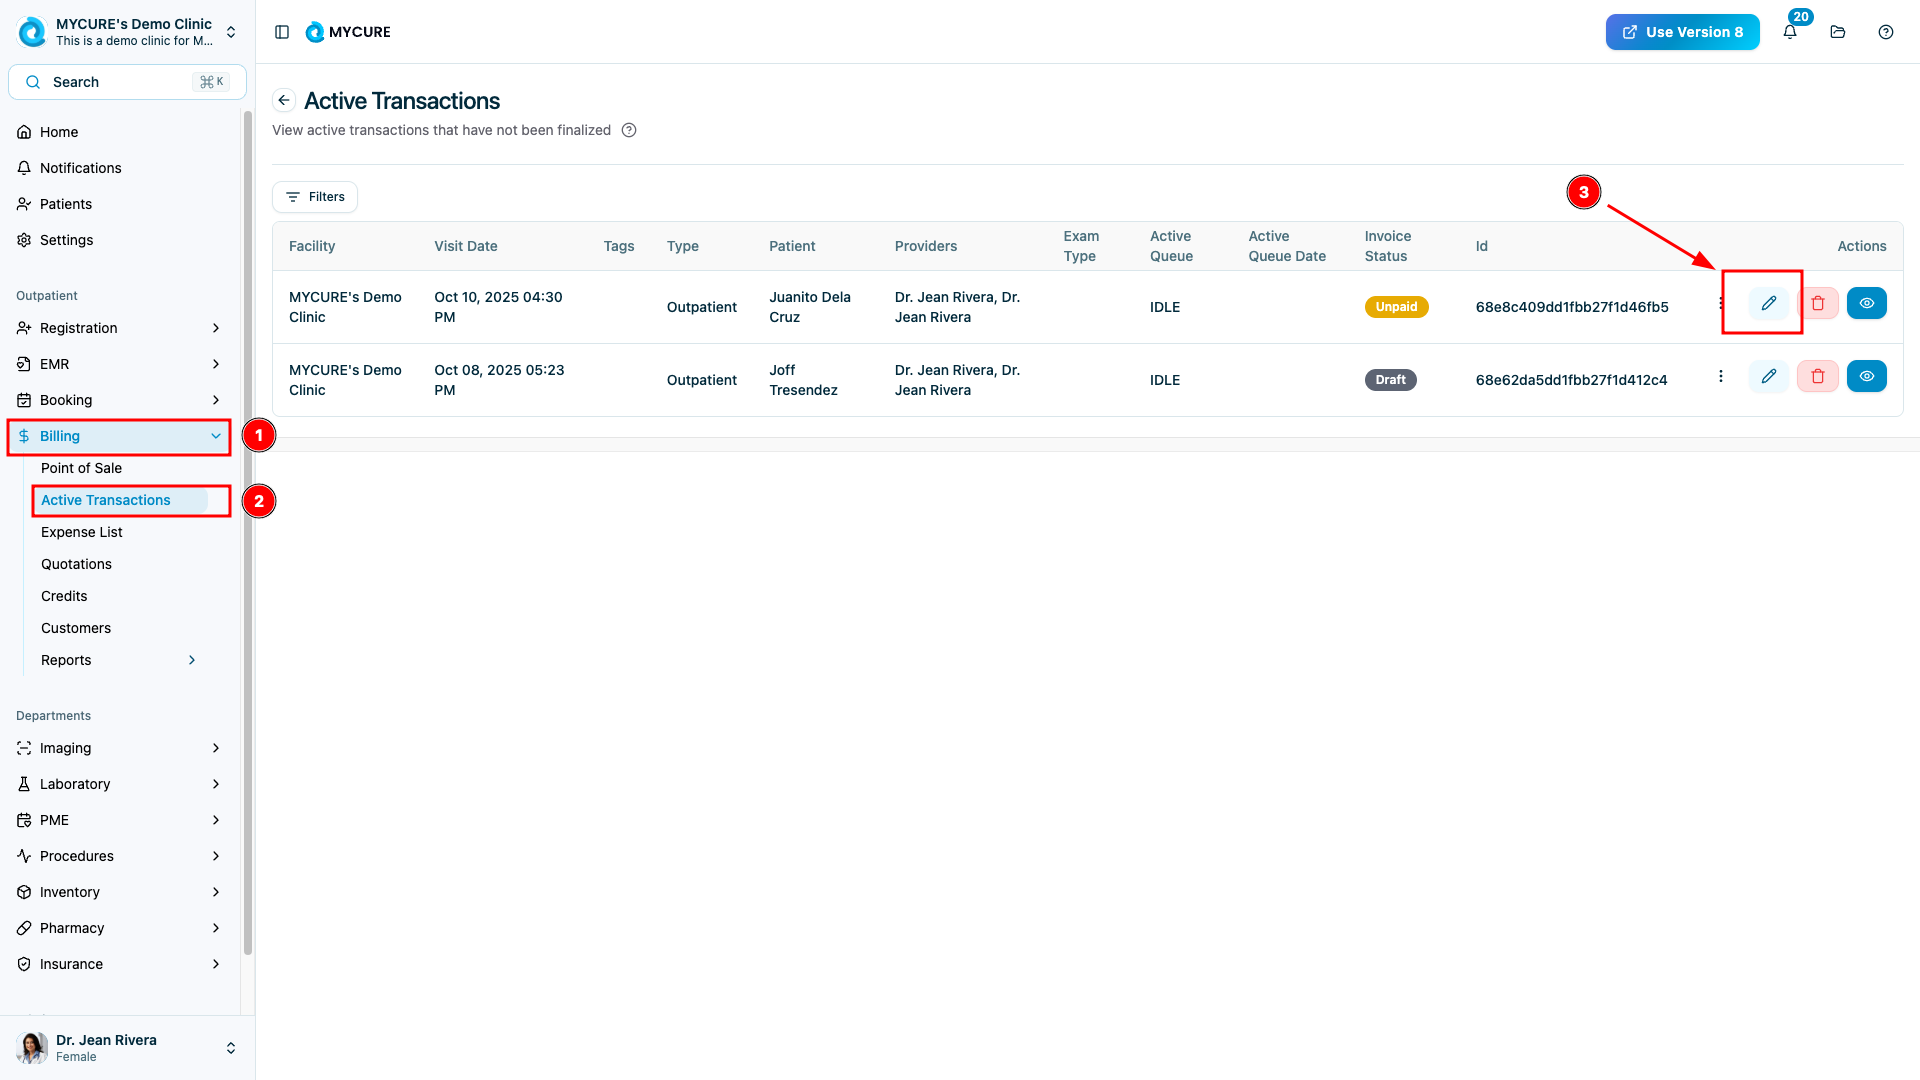
Click Billing from the main menu
Click Active transactions to view pending bills
Select your patient from the list
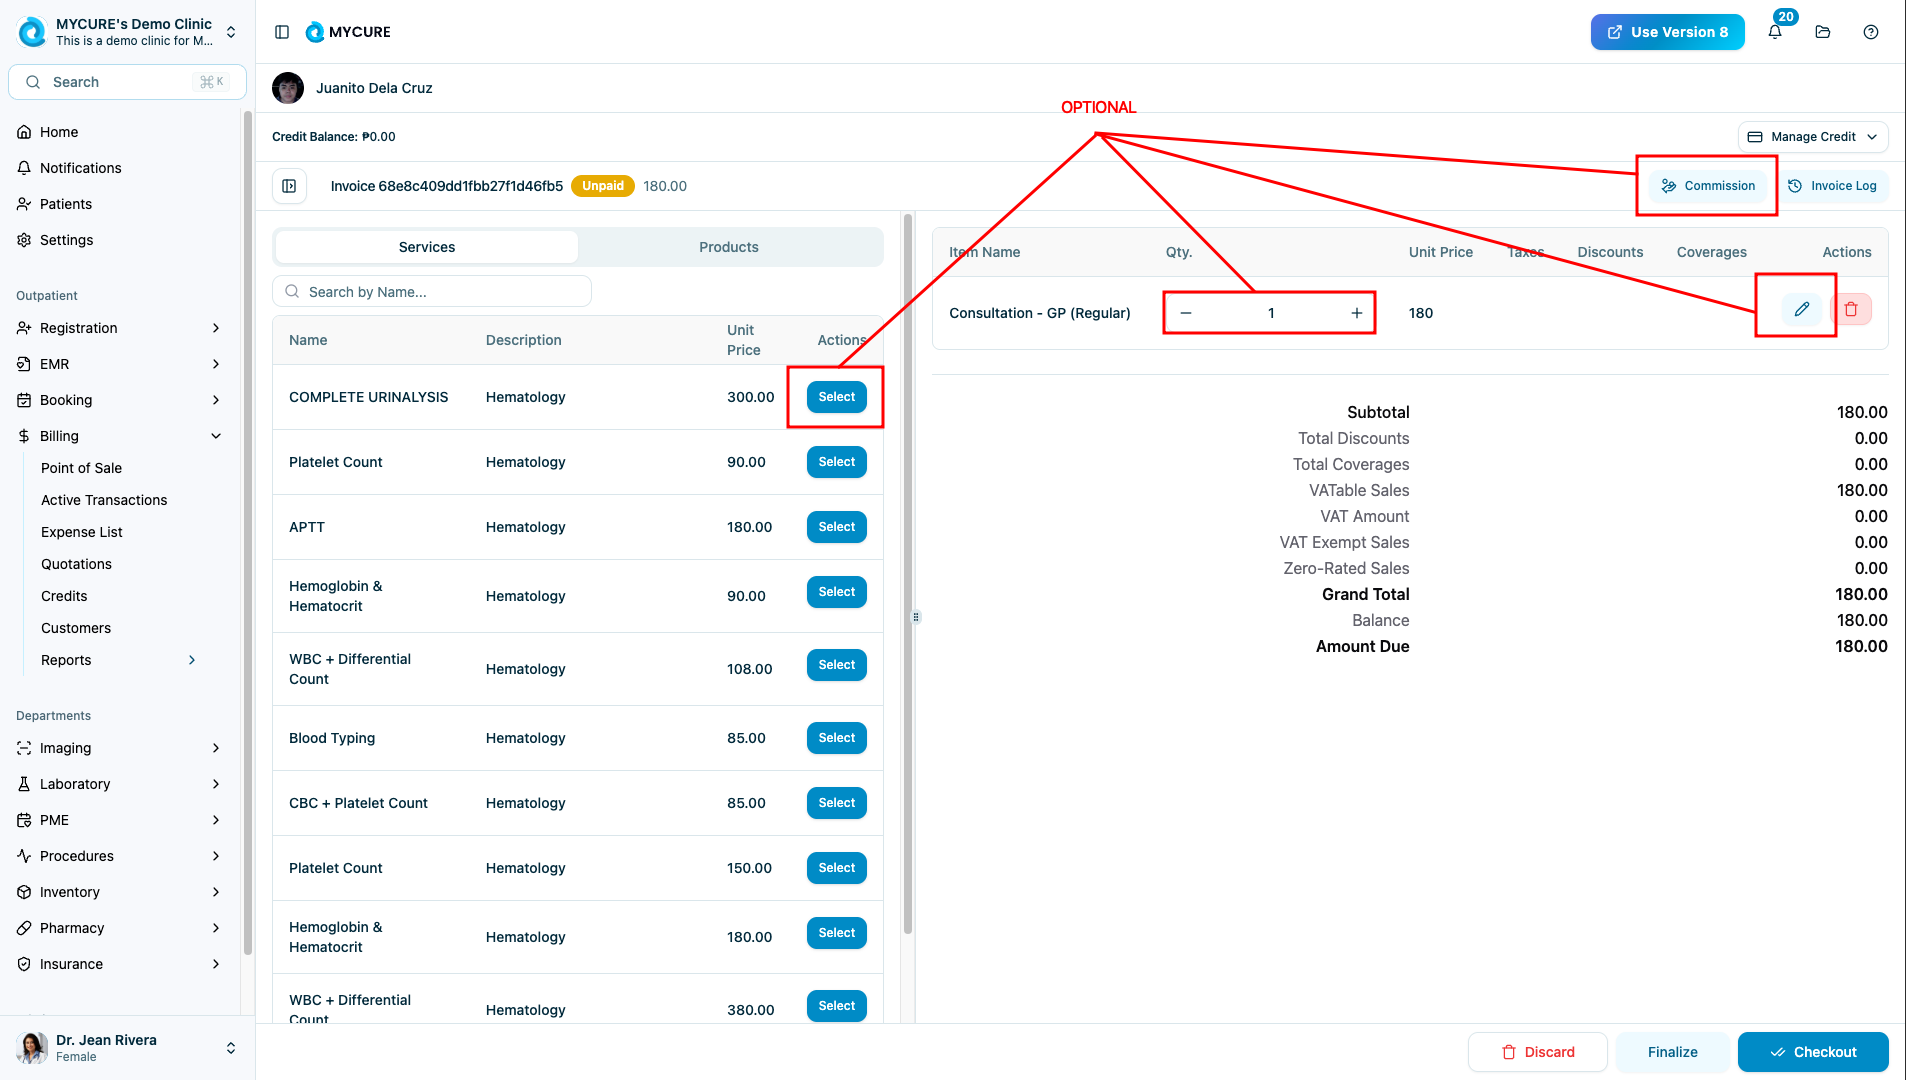
(Optional) Add additional products or services if needed
(Optional) Add Professional Fees (PF) or Commission
(Optional) Edit the quantity of any items
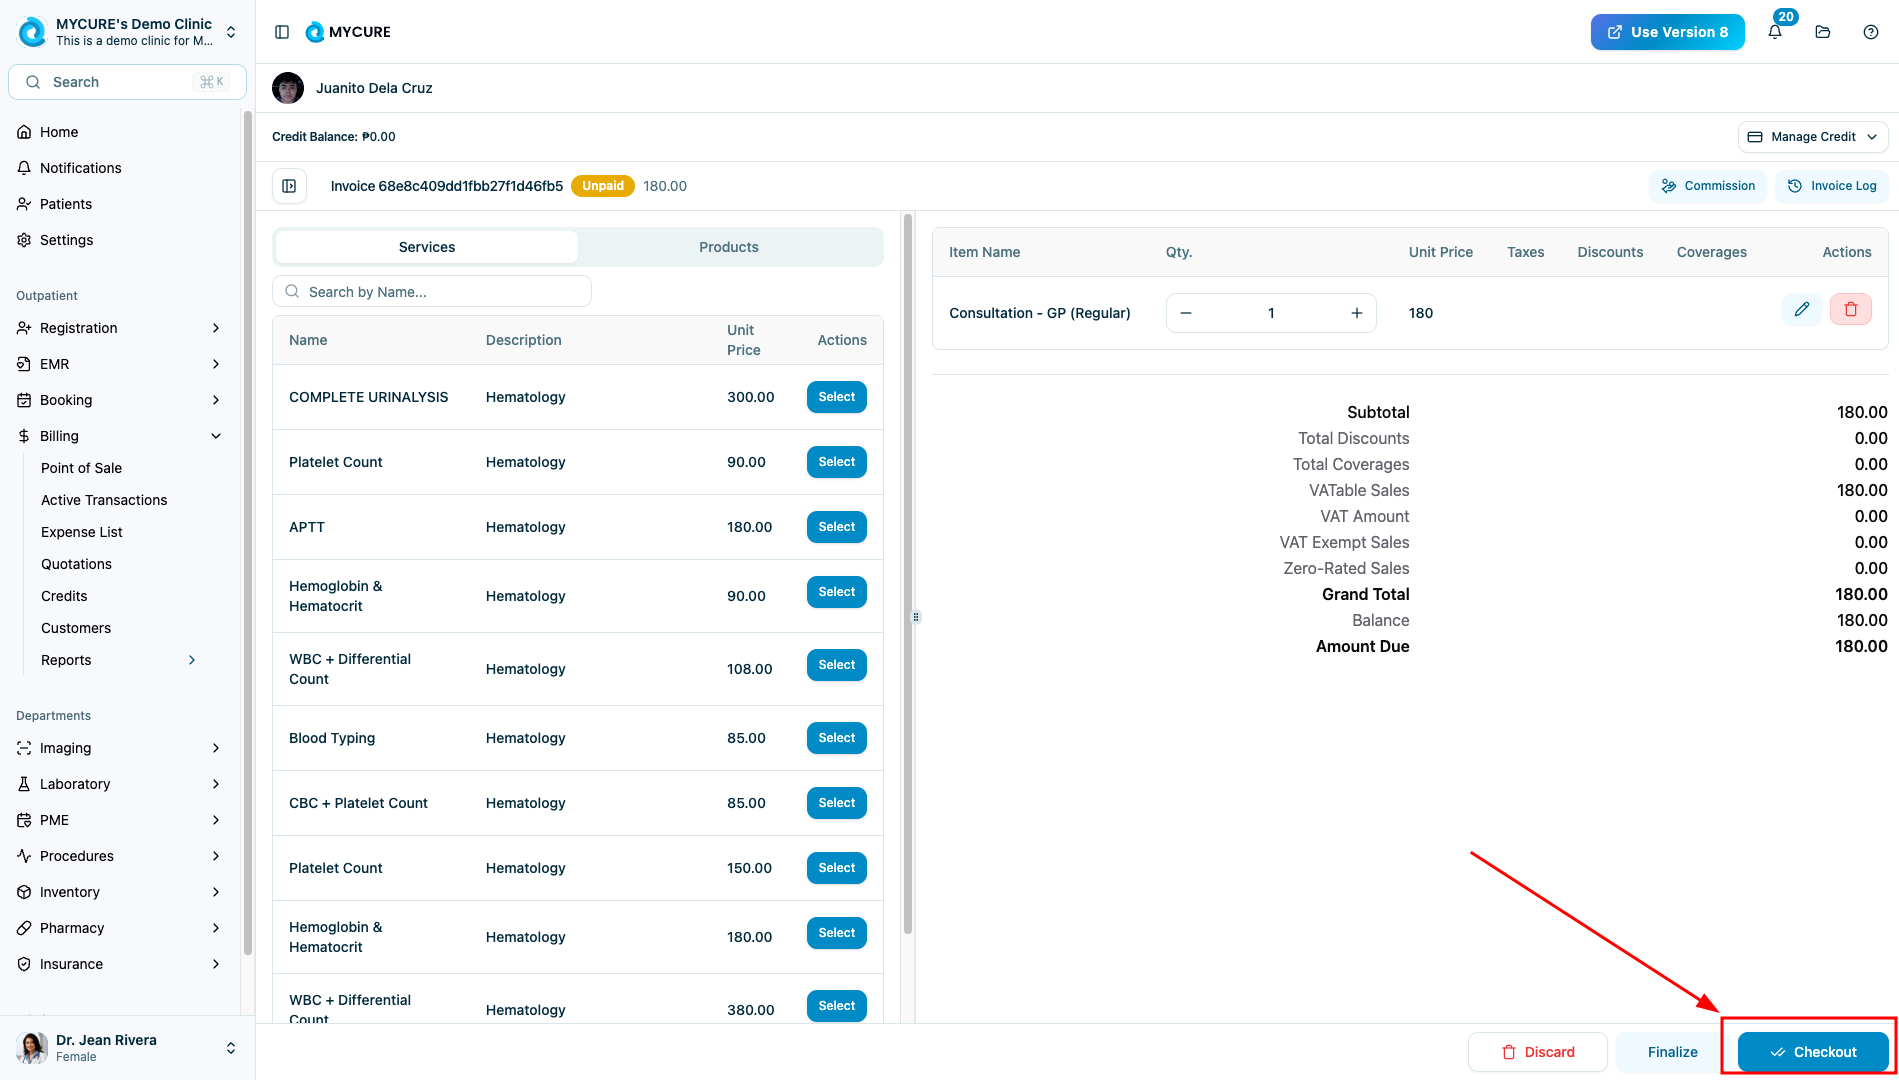
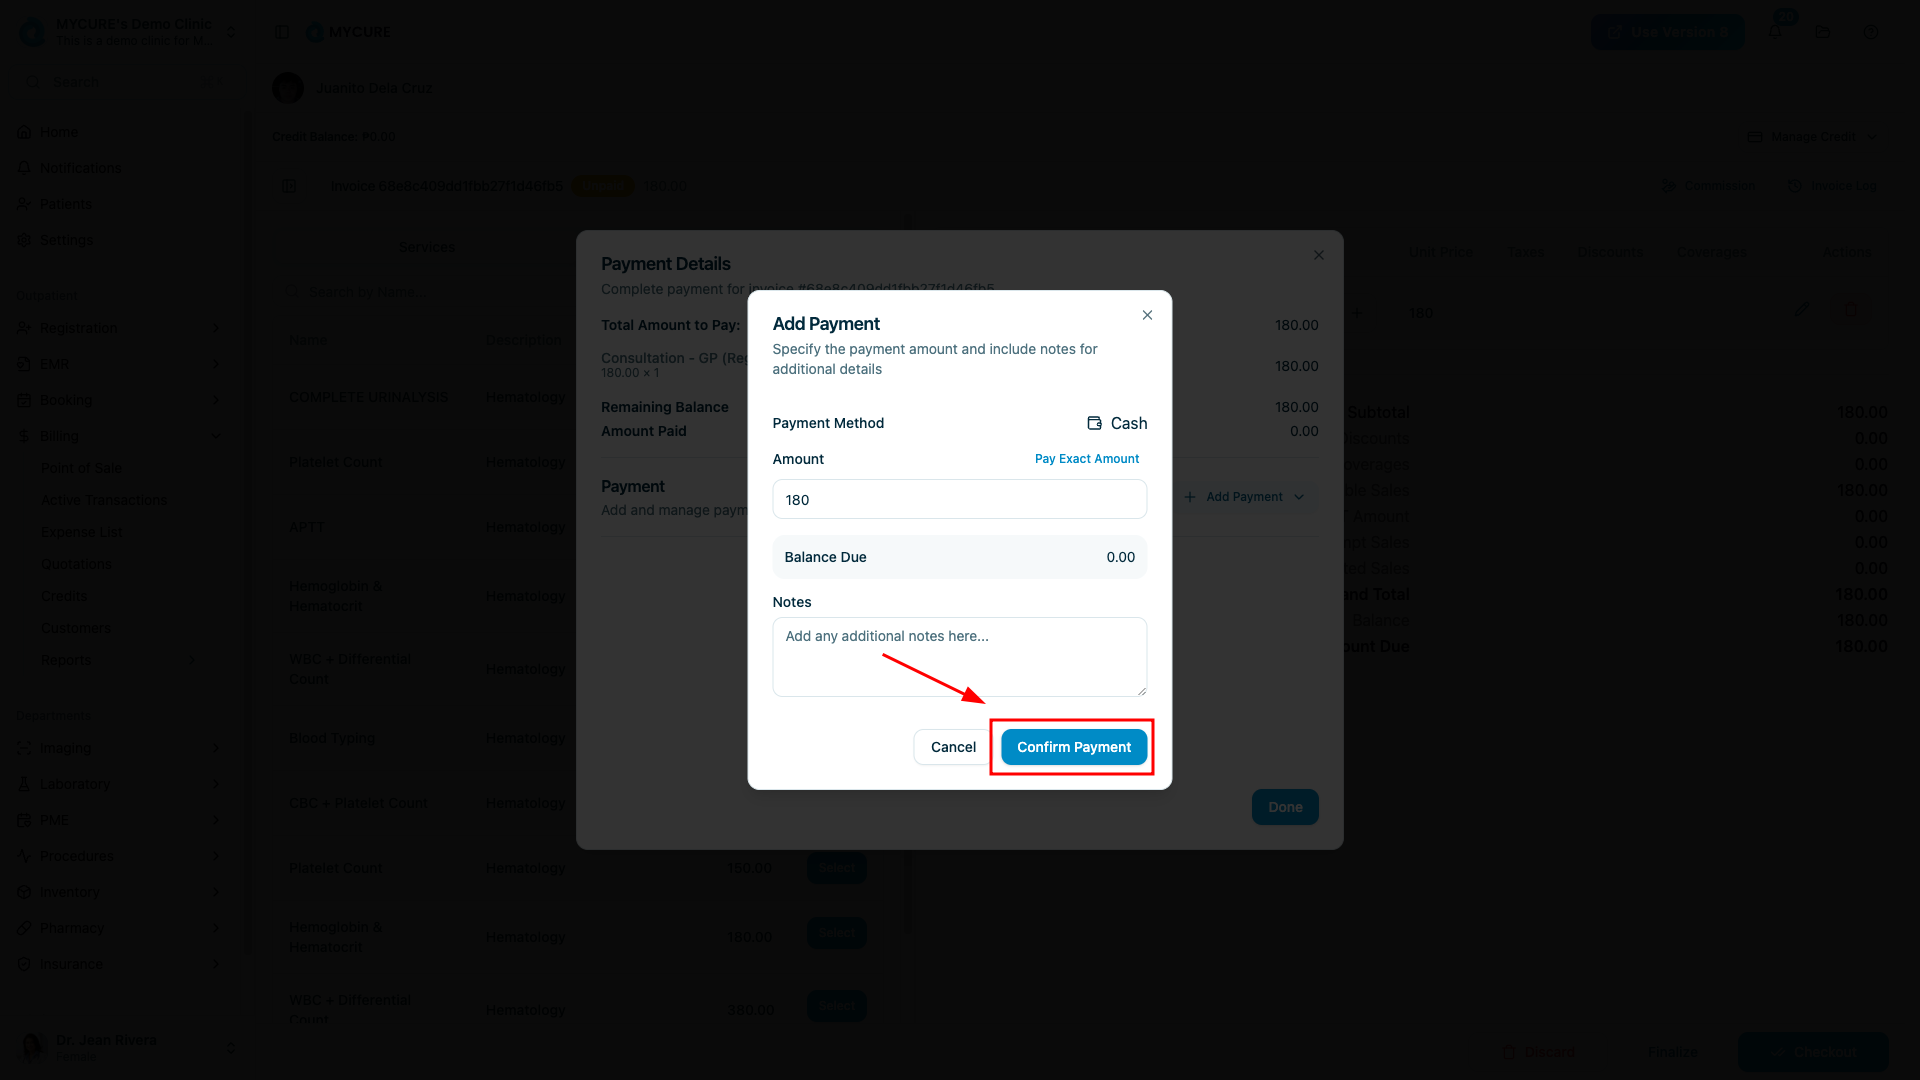
Click Check out to proceed to payment
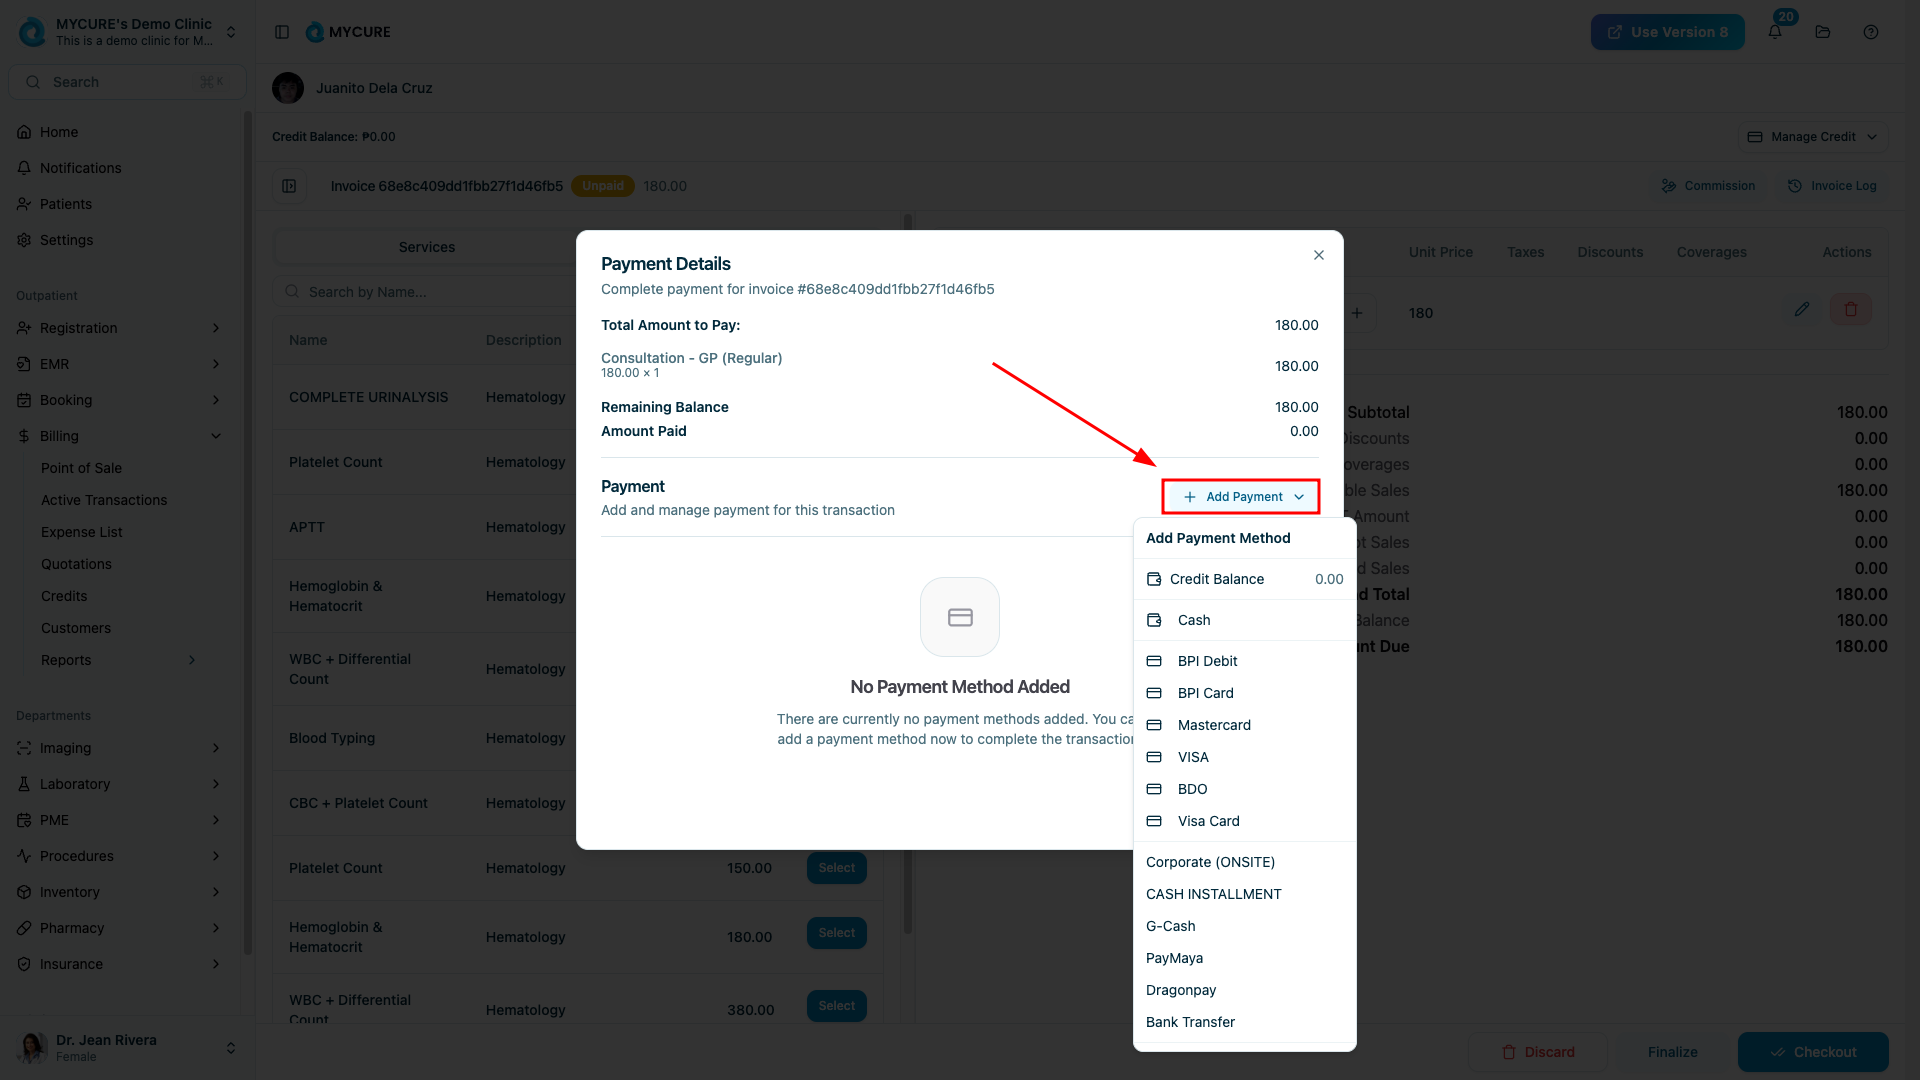
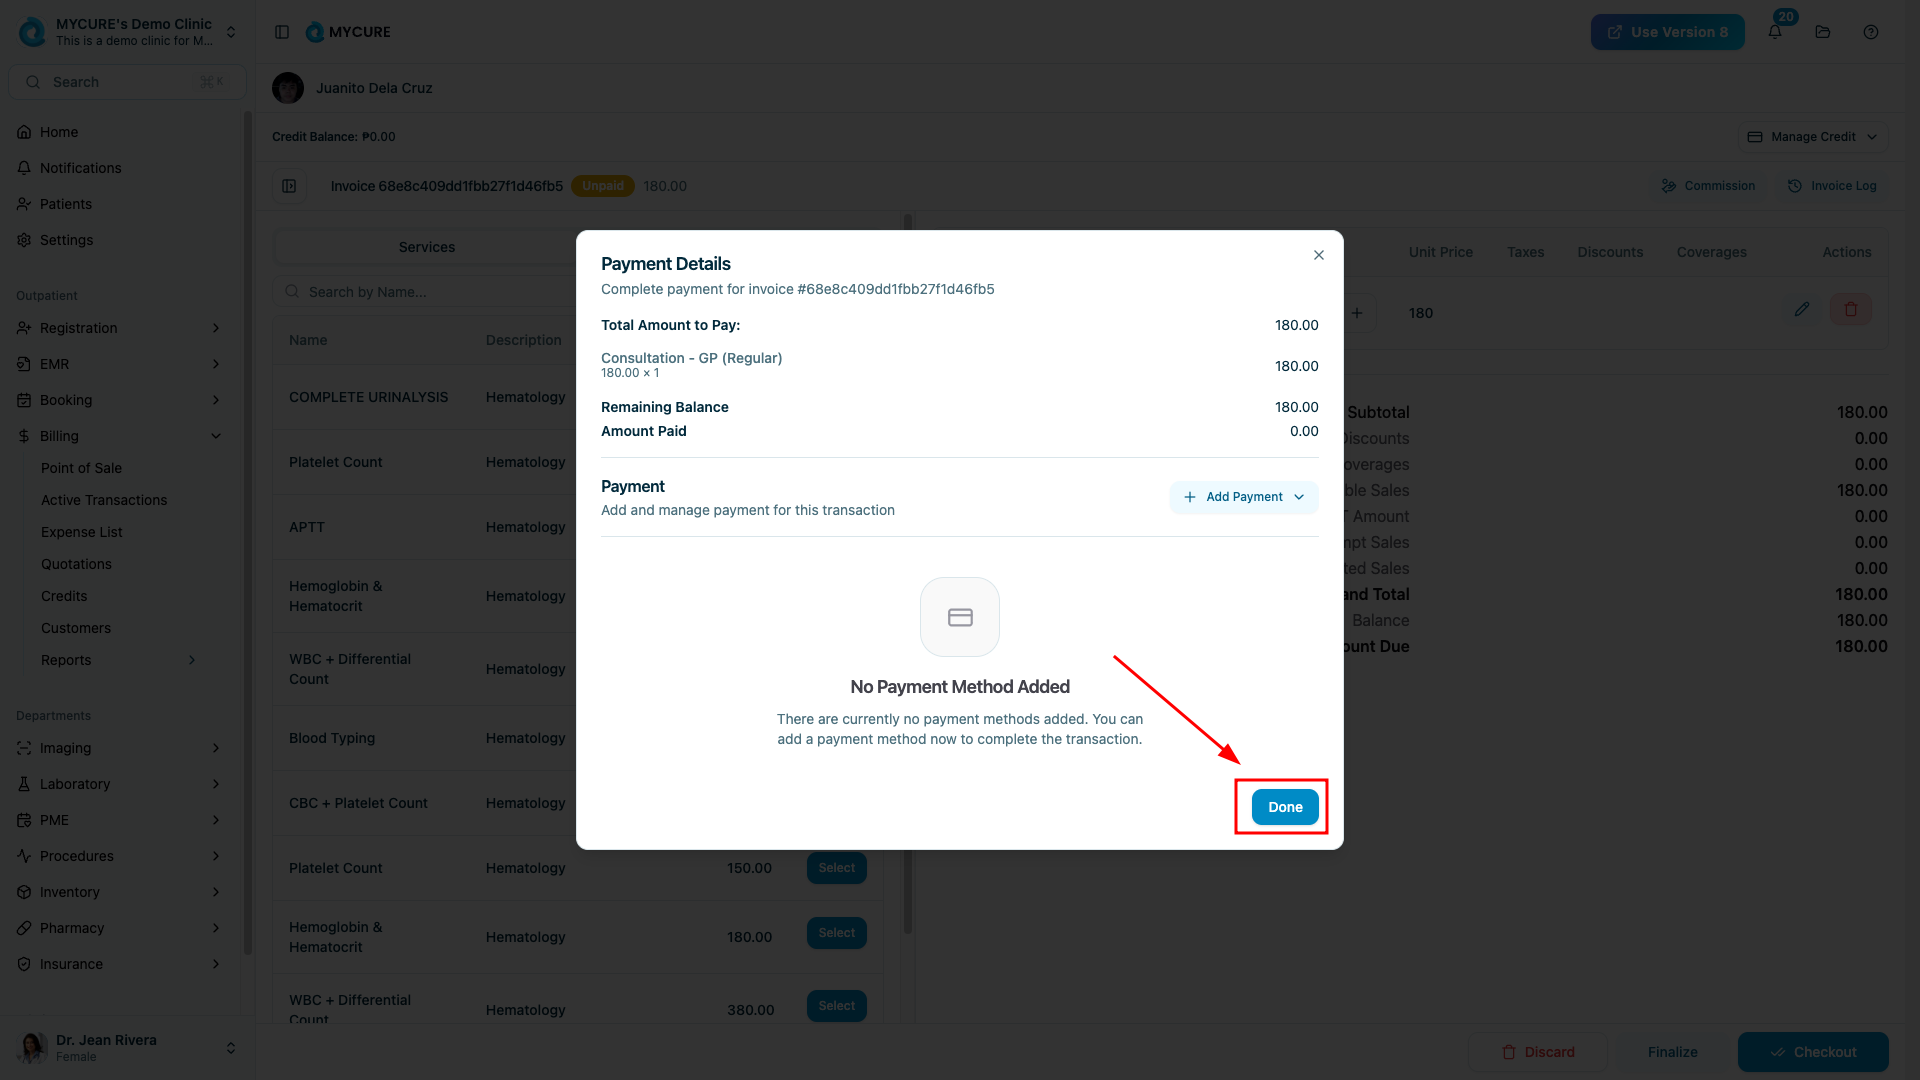
Select the appropriate Payment method from the options then click Done
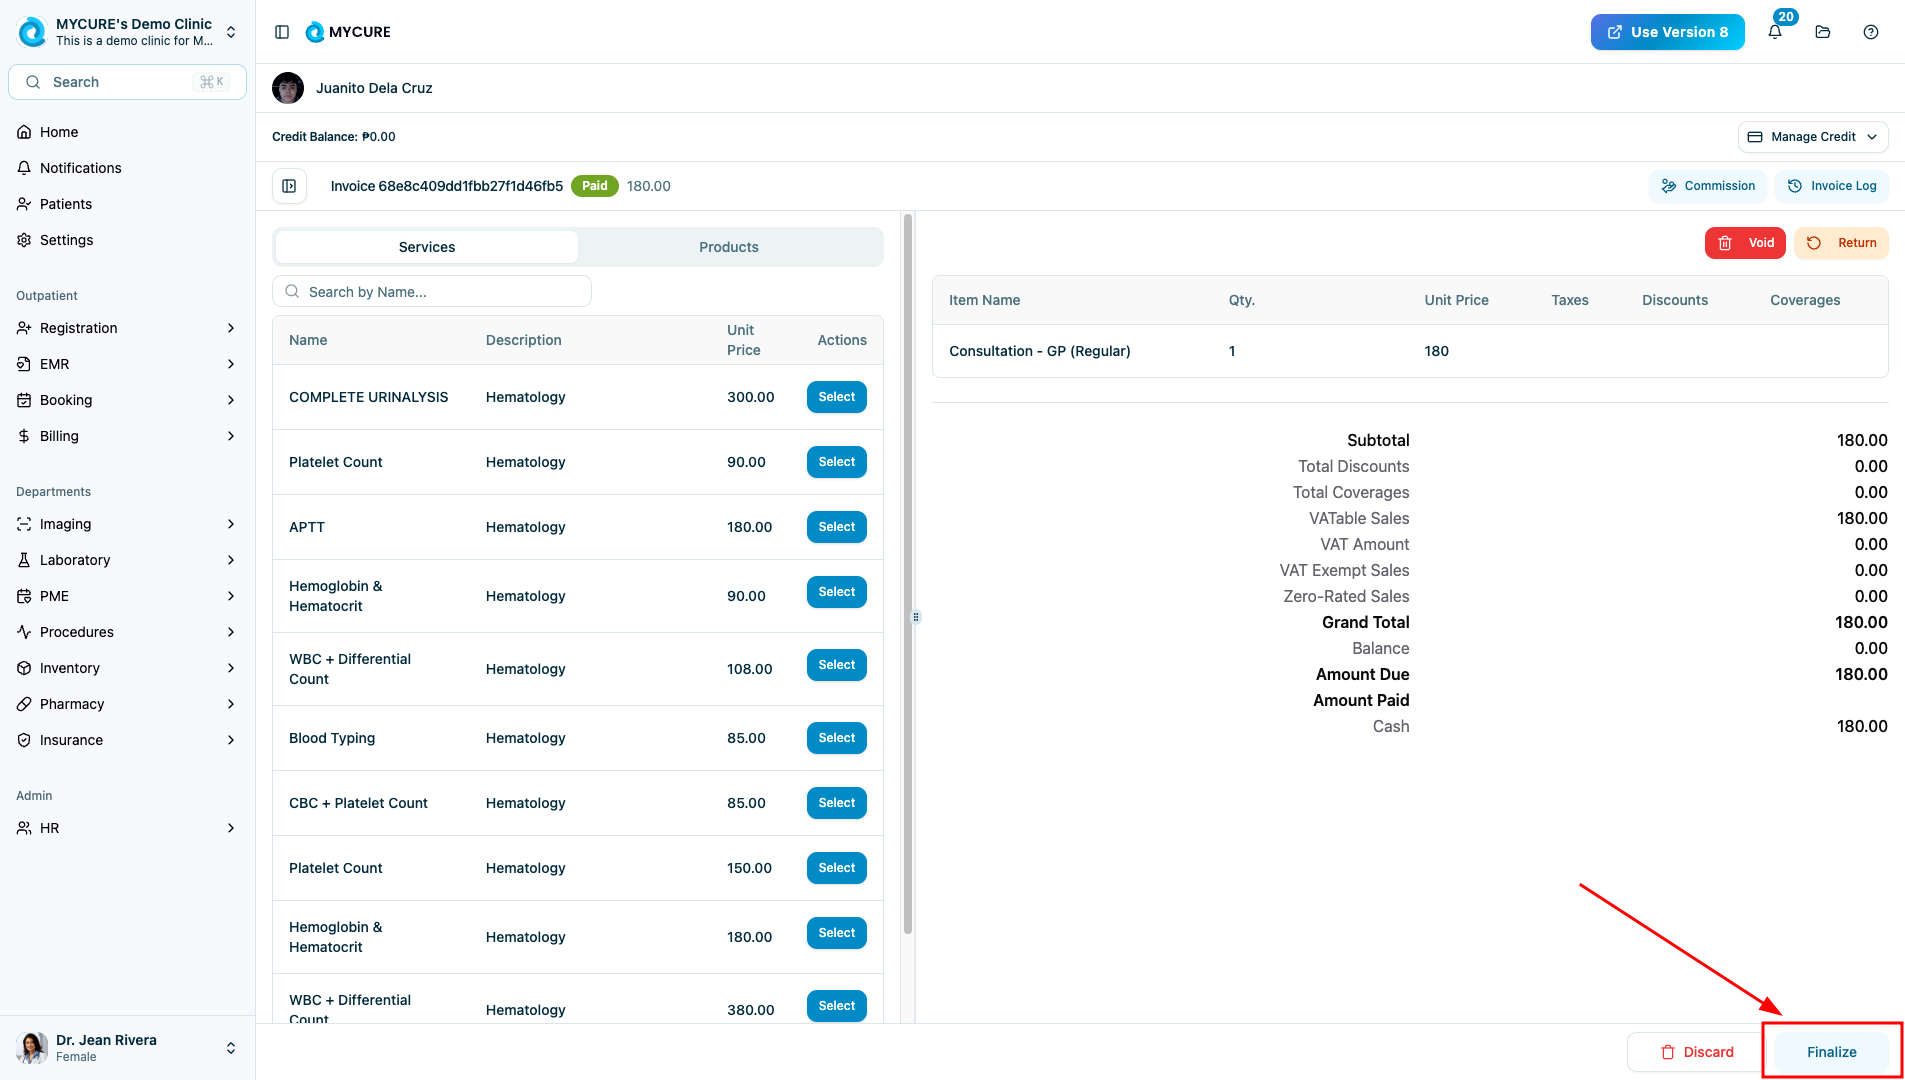
Click Finalize to complete the transaction
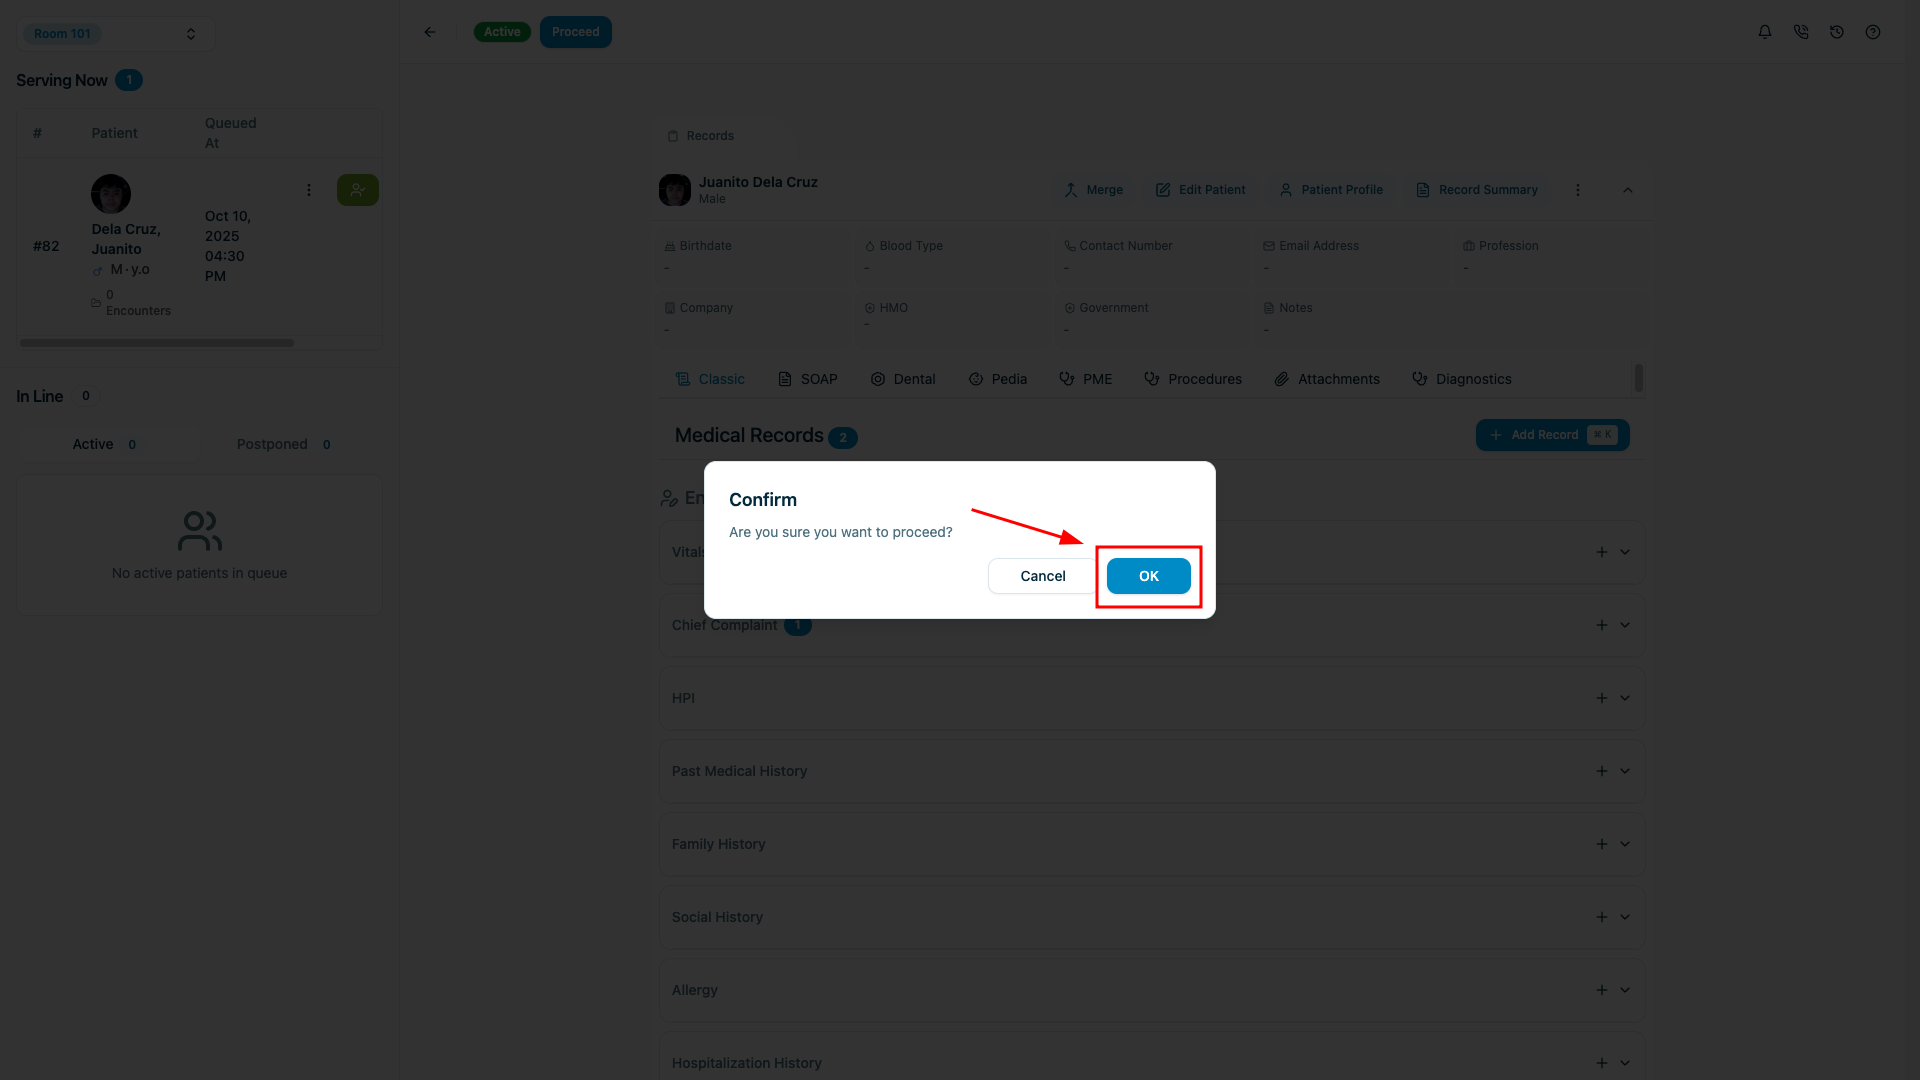
Confirm your action by clicking the OK button in the confirmation dialog
Tips and Common Issues
Tip:
When registering new patients, have their ID or other identification documents ready to ensure accurate information entry.
Note:
The EMR documentation requirements may vary based on your facility's policies and the patient's condition. Ensure you complete all required fields for your specific workflow.
Warning:
Always finalize billing transactions completely. Partial or incomplete transactions can cause reconciliation issues later.
Troubleshooting
Cannot find patient in queue - Check if you've selected the correct queue. The patient may be in a different queue based on their status.
Billing items not appearing - Verify that the patient has completed the necessary service steps before attempting billing.
Payment method unavailable - Ensure your user account has the proper permissions for the selected payment method.
Unable to finalize transaction - Check that all required billing fields are filled in correctly before finalizing.
If you encounter persistent issues, contact support at support@mycure.md or reach out to your clinic administrator.