
MYCURE X - How To Create Products In The Inventory System
10 min read
This tutorial will guide you through the process of adding new products to the MYCURE inventory system. You'll learn how to navigate the different tabs of the product creation form and enter all necessary information to successfully add products to your inventory.
What You'll Learn
How to access the product creation form in the inventory system
How to enter basic product details, medicine properties, stock information, and pricing
How to properly save and submit new product information
How to manage different types of products including medicines and regular items
Before You Begin
You need a MYCURE v10 account with appropriate permissions to access the inventory system
Ensure you have all necessary product information ready, including:
Basic product details (name, description, codes)
Medicine information (if applicable)
Stock levels and thresholds
Pricing information
Supplier details
Steps
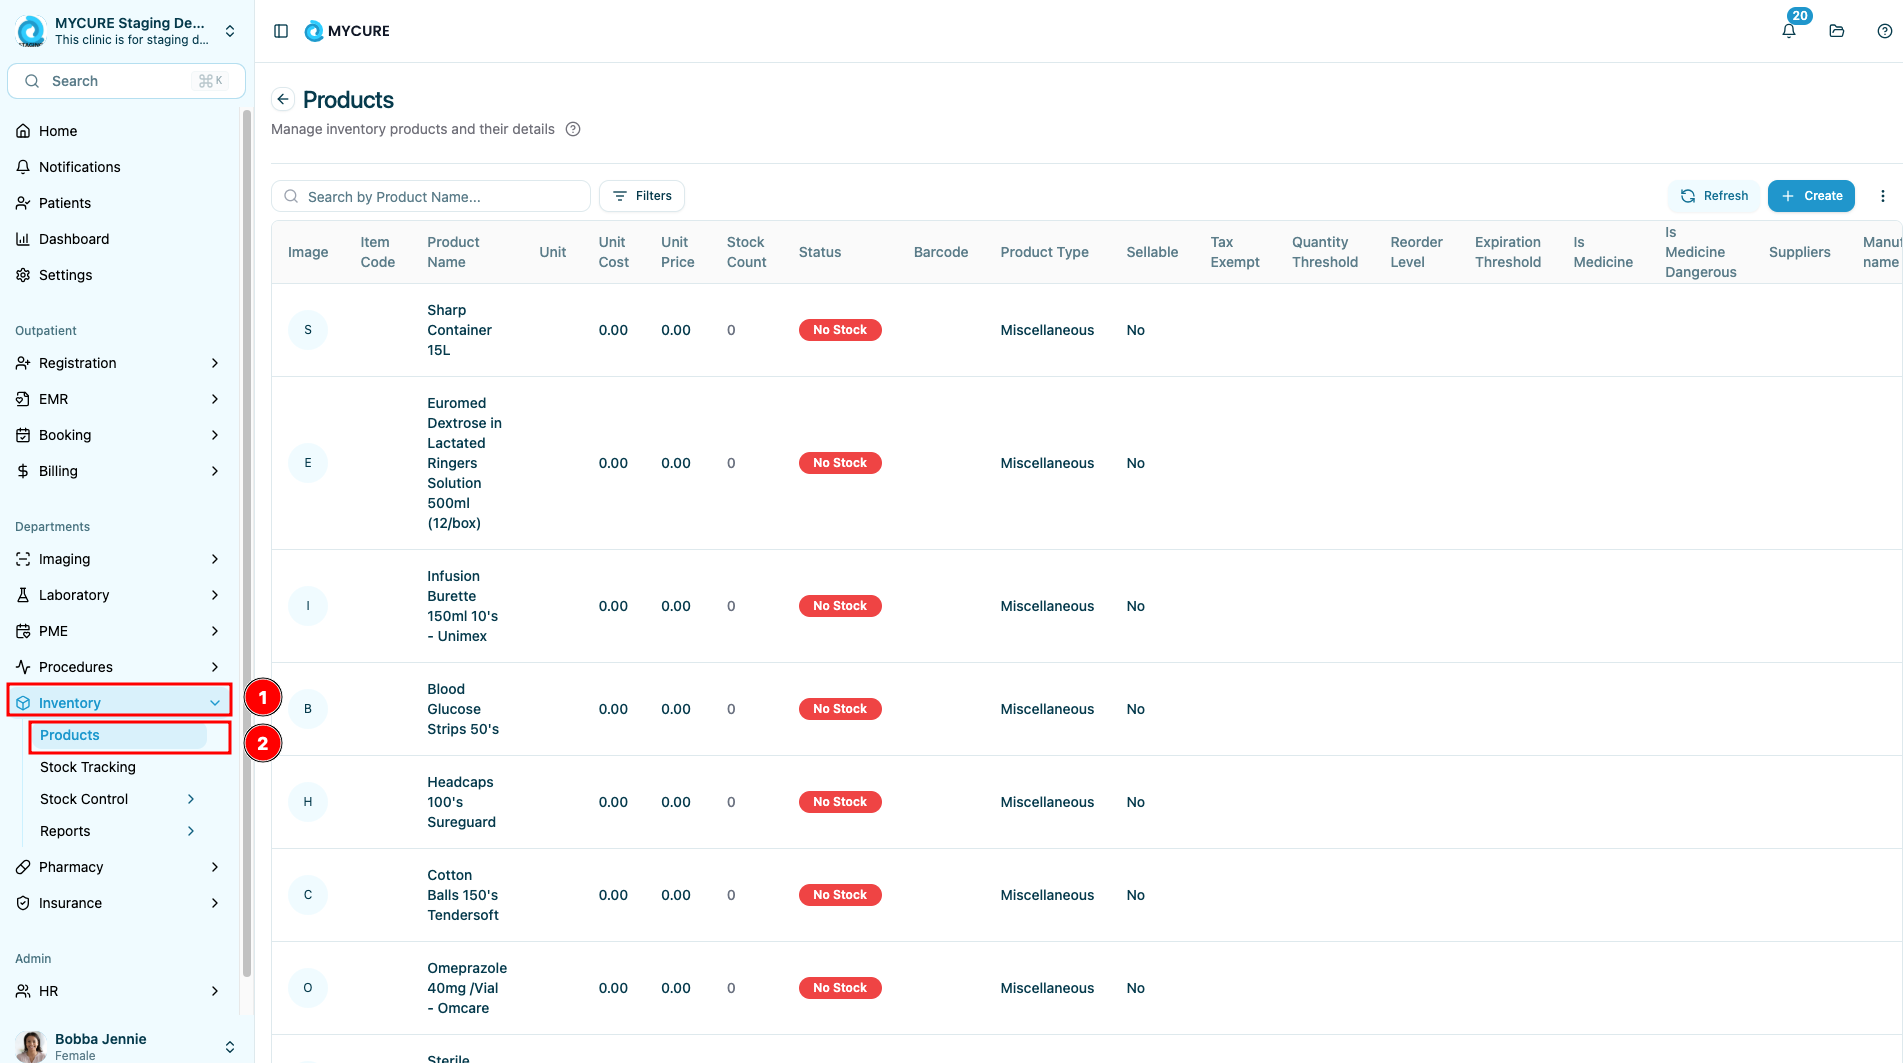
1. Navigate to the Products Page
Log into your MYCURE account
Click on Inventory in the main navigation bar
Select Products from the dropdown menu
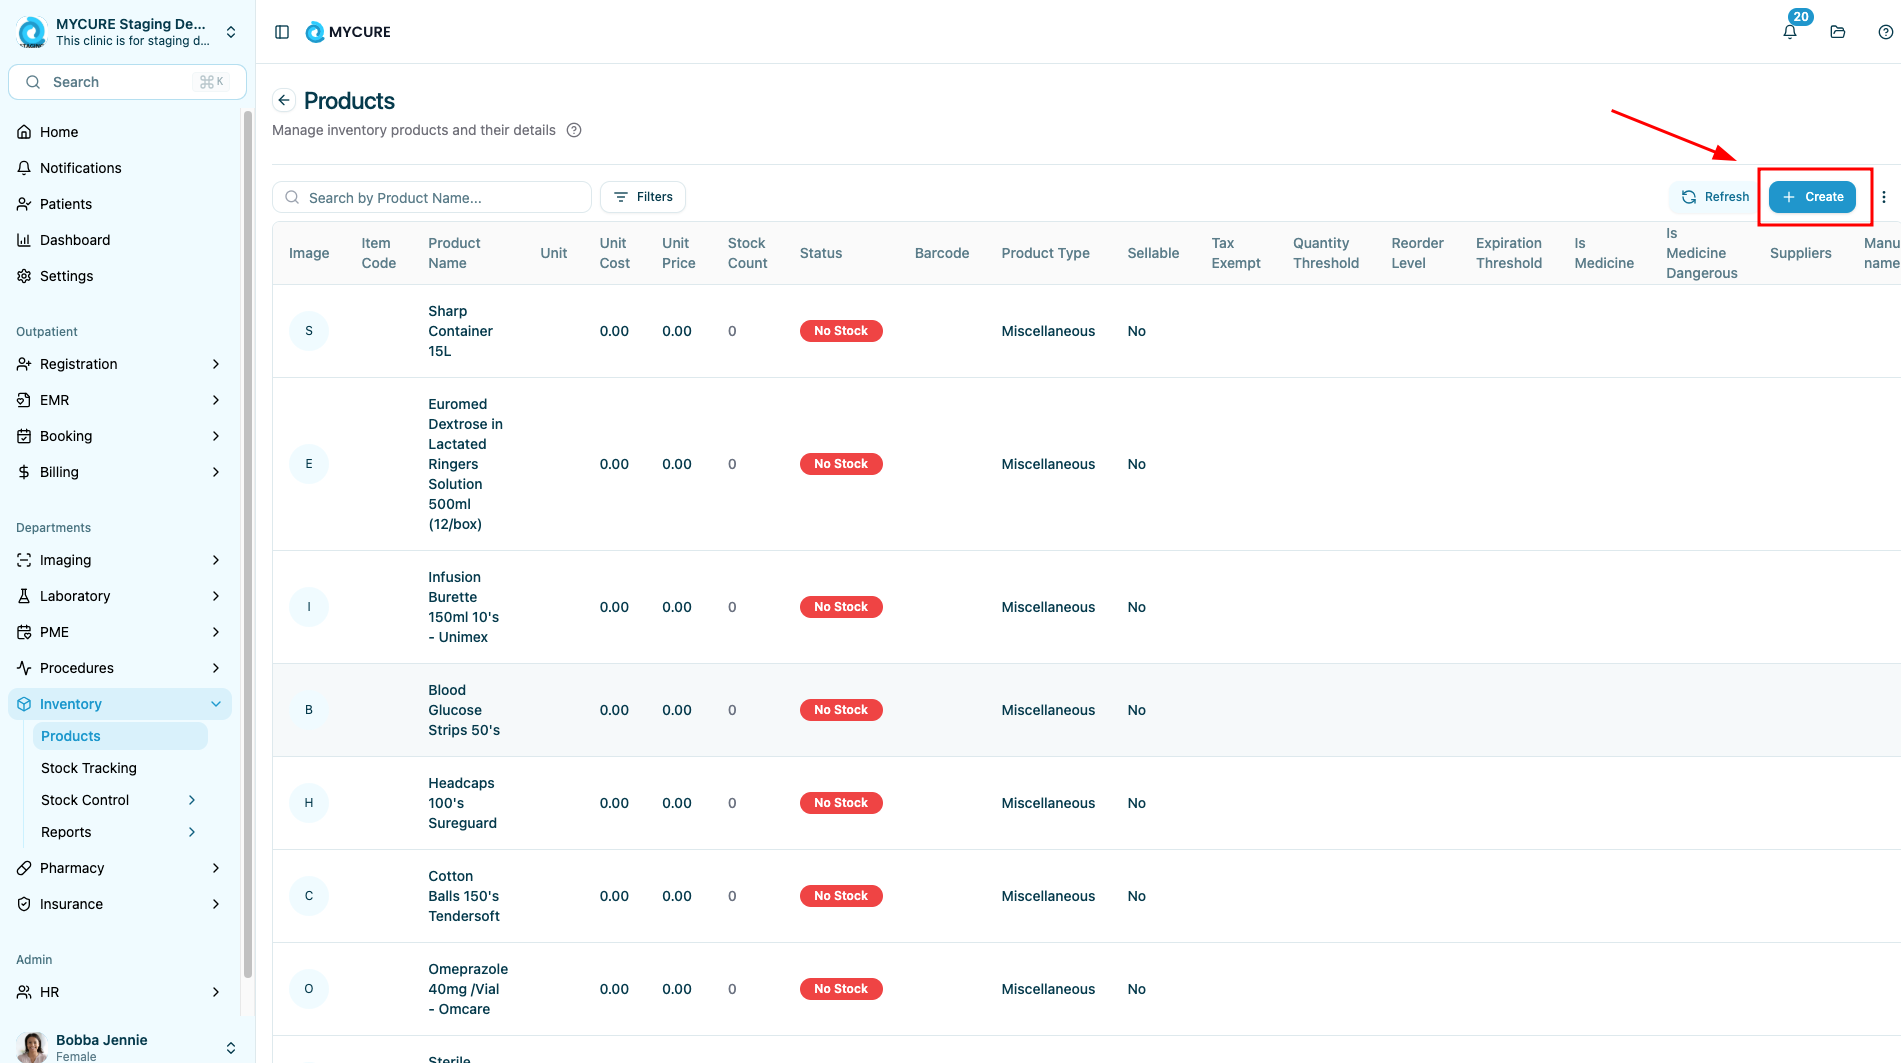
2. Access the Product Creation Form
On the Products page, locate and click the Create button, typically found in the top-right corner of the page
The product creation form will open, showing multiple tabs for organizing different types of product information
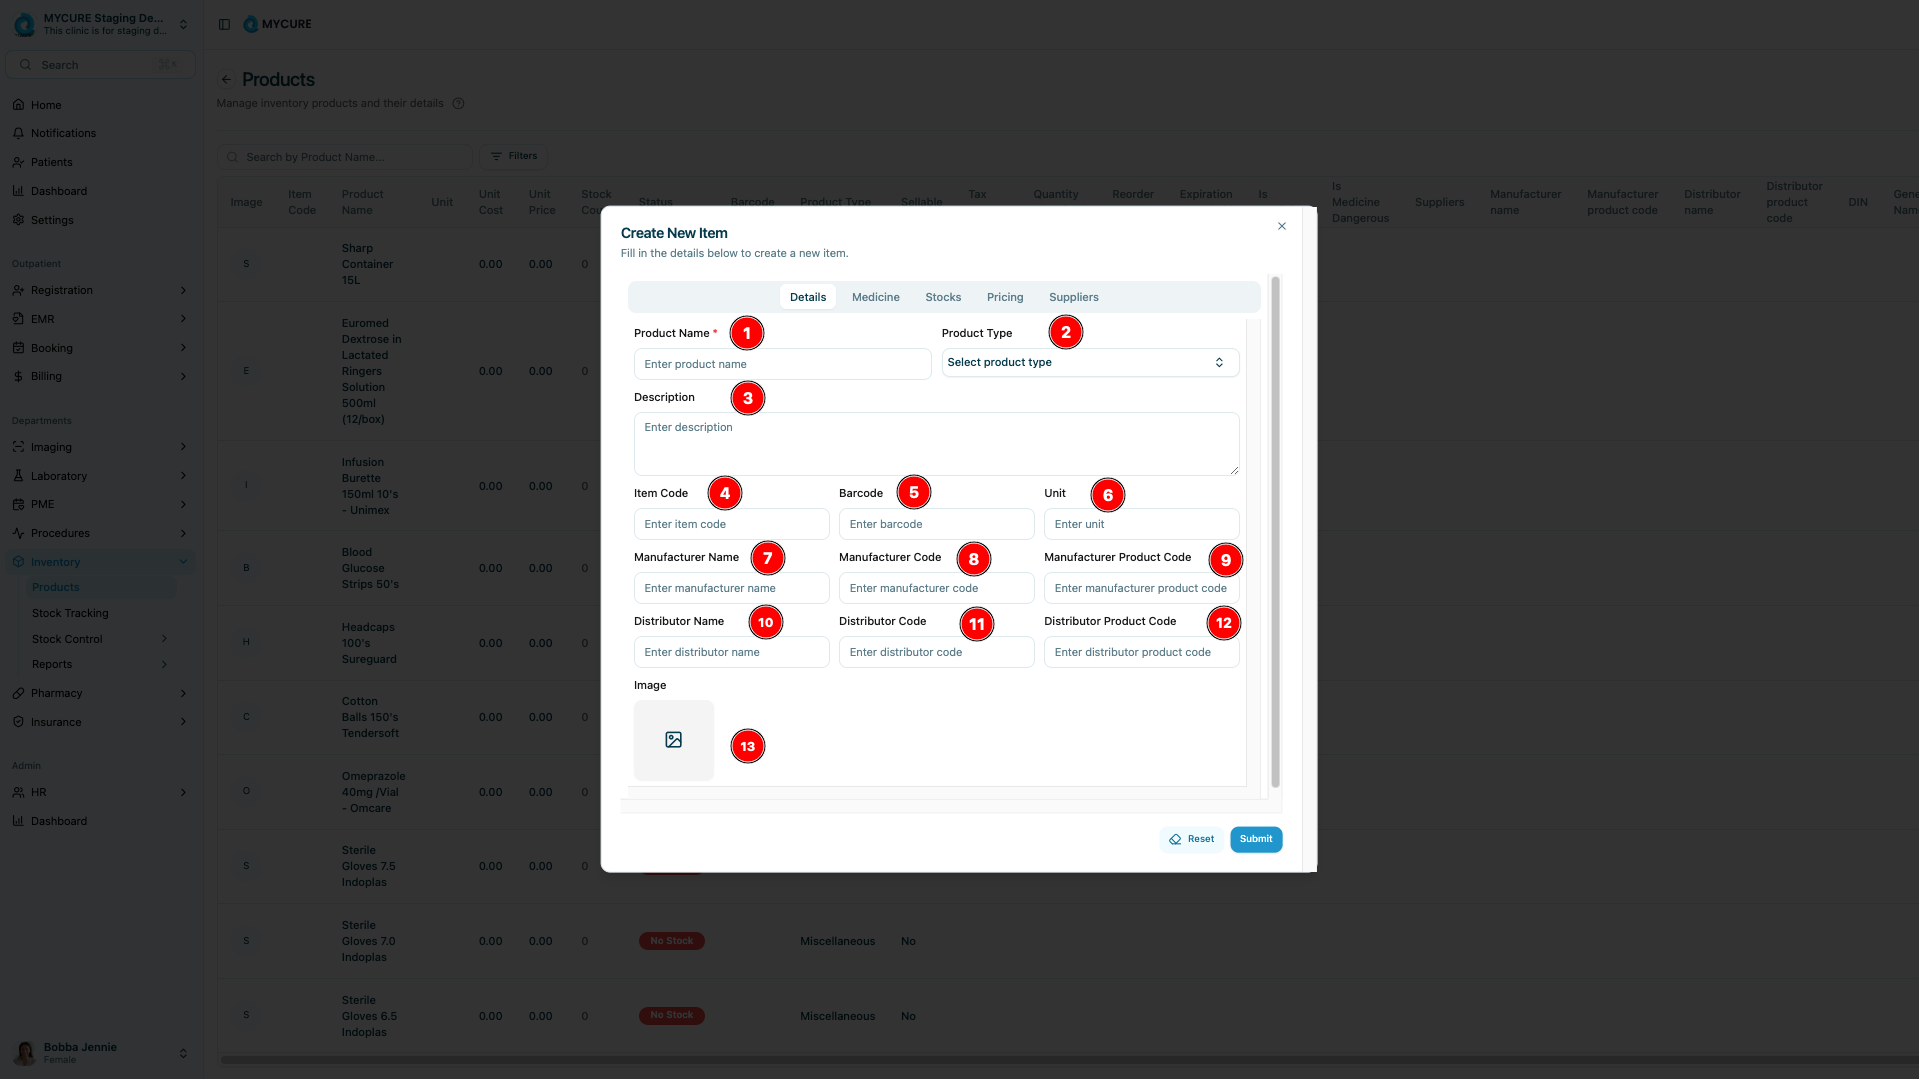
3. Fill Out the Details Tab
Enter the Product Name (required)
Select the appropriate Product Type from the dropdown menu
Enter a detailed Description of the product
Input the Item Code (this is often your internal tracking code)
Add the Barcode if the product has one
Specify the Unit the product is measured in (e.g., box, bottle, tablet)
Enter the Manufacturer Name
Add the Manufacturer Code
Input the Manufacturer Product Code
Enter the Distributor Name
Add the Distributor Code
Input the Distributor Product Code
Click the Upload Image button to add a product image
4. Complete the Medicines Tab (if applicable)
Click on the Medicines tab to proceed
Check the Is Medicine box if the product is a medication
If applicable, check the Is Dangerous Medicine box for controlled substances
Enter the Generic Name of the medicine
Input the DIN (Drug Identification Number)
Specify the Strength of the medicine (e.g., 500mg)

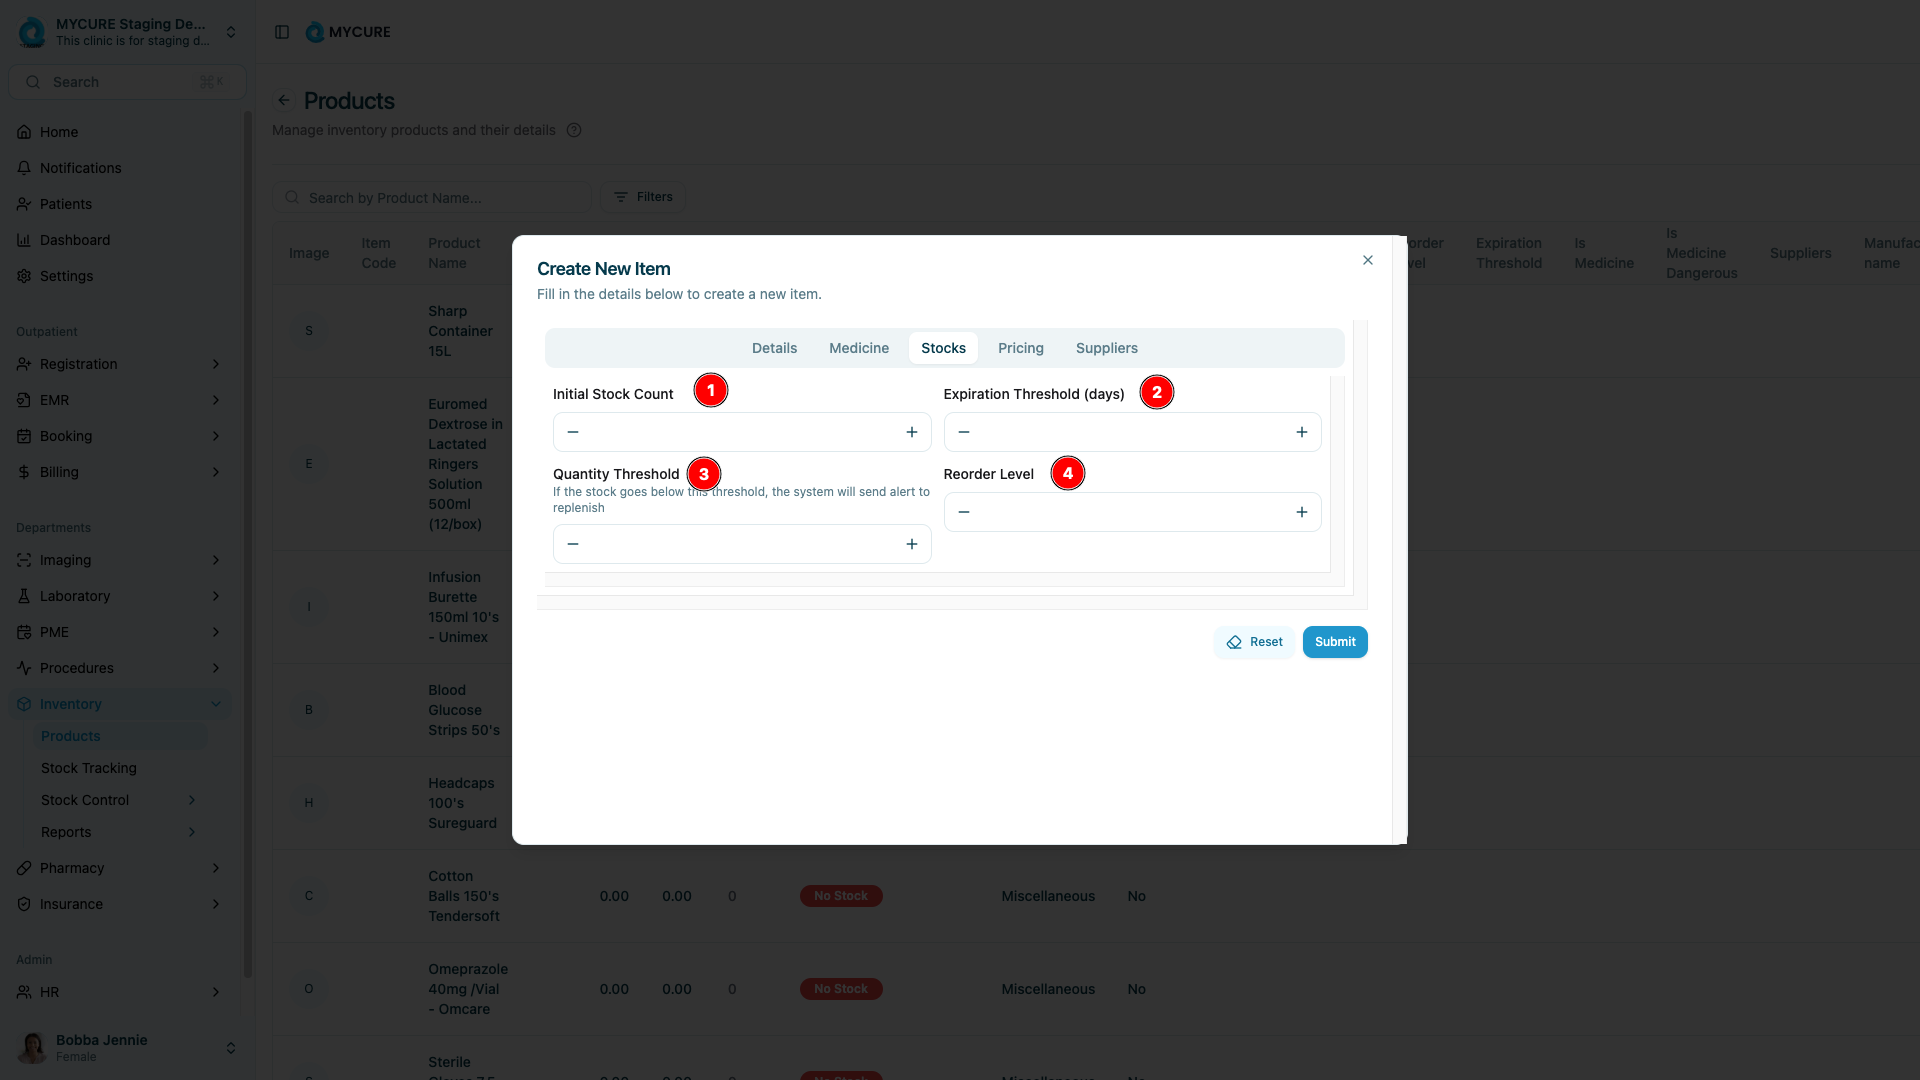
5. Set Up Stock Information
Click on the Stocks tab
Enter the Initial Stock Count to set your starting inventory
Set the Expiration Threshold (days) to be alerted before products expire
Establish the Quantity Threshold for low-stock alerts
Specify the Reorder Level to know when to purchase more inventory
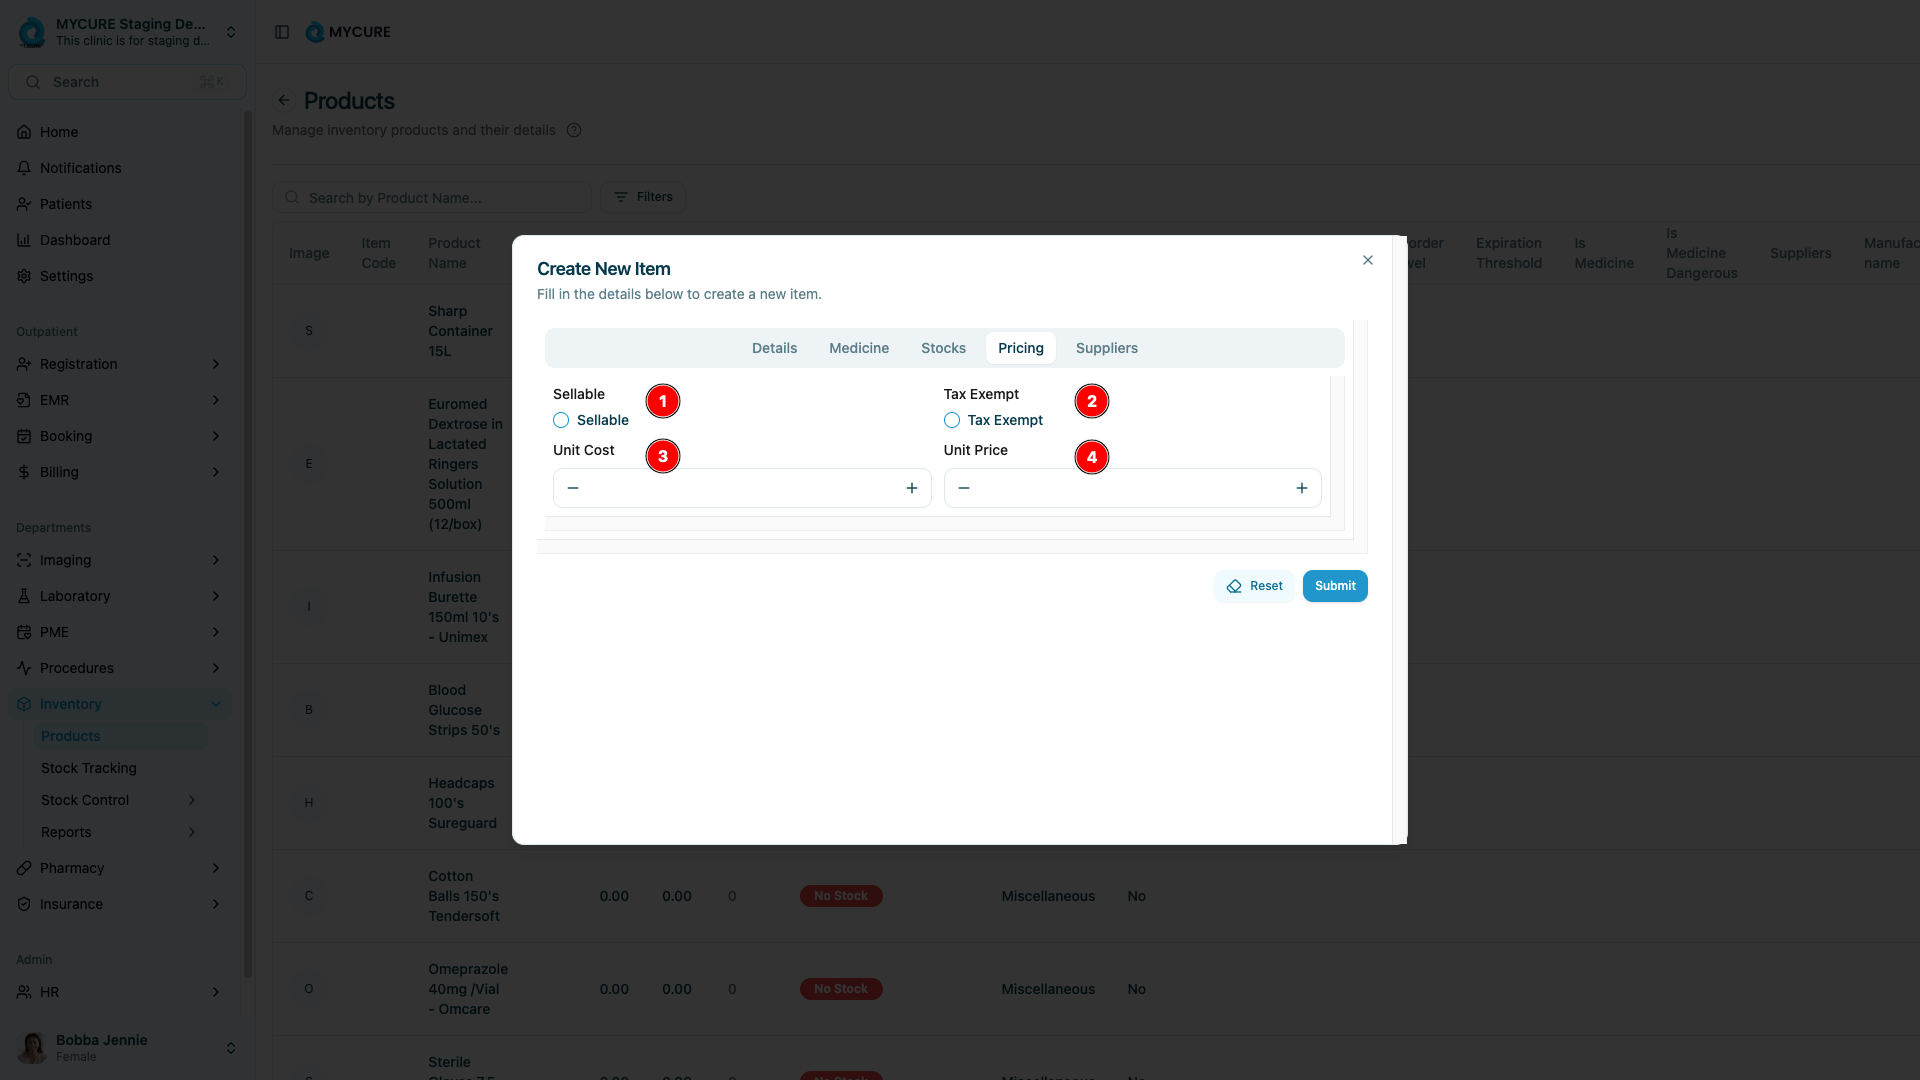
6. Configure Pricing Information
Click on the Pricing tab
Check the Sellable box if the product can be sold to customers/patients
If applicable, check the Tax Exempt box
Enter the Unit Cost (what you pay to acquire the product)
Specify the Unit Price (what customers/patients will pay)
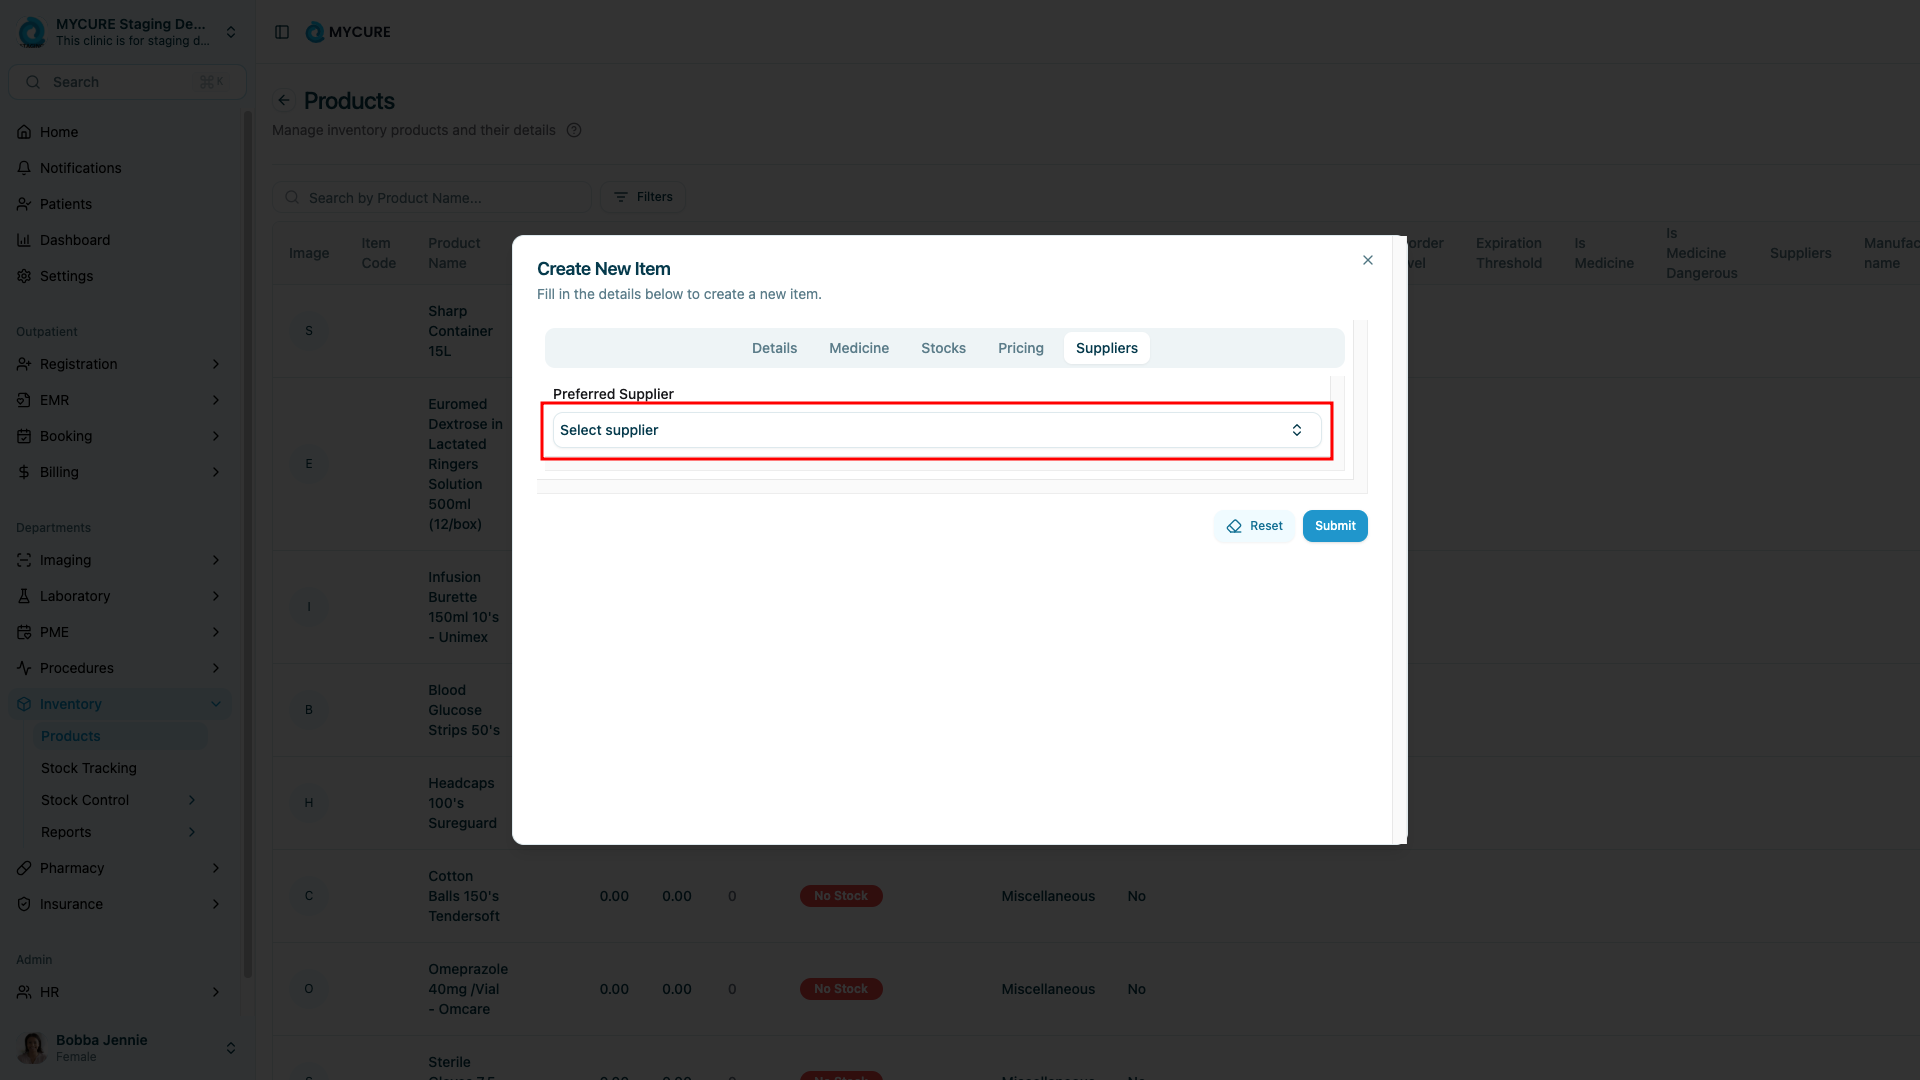
7. Add Supplier Information
Click on the Suppliers tab
Click in the supplier field to open the dropdown or search function
Select or search for your Preferred Supplier from the list
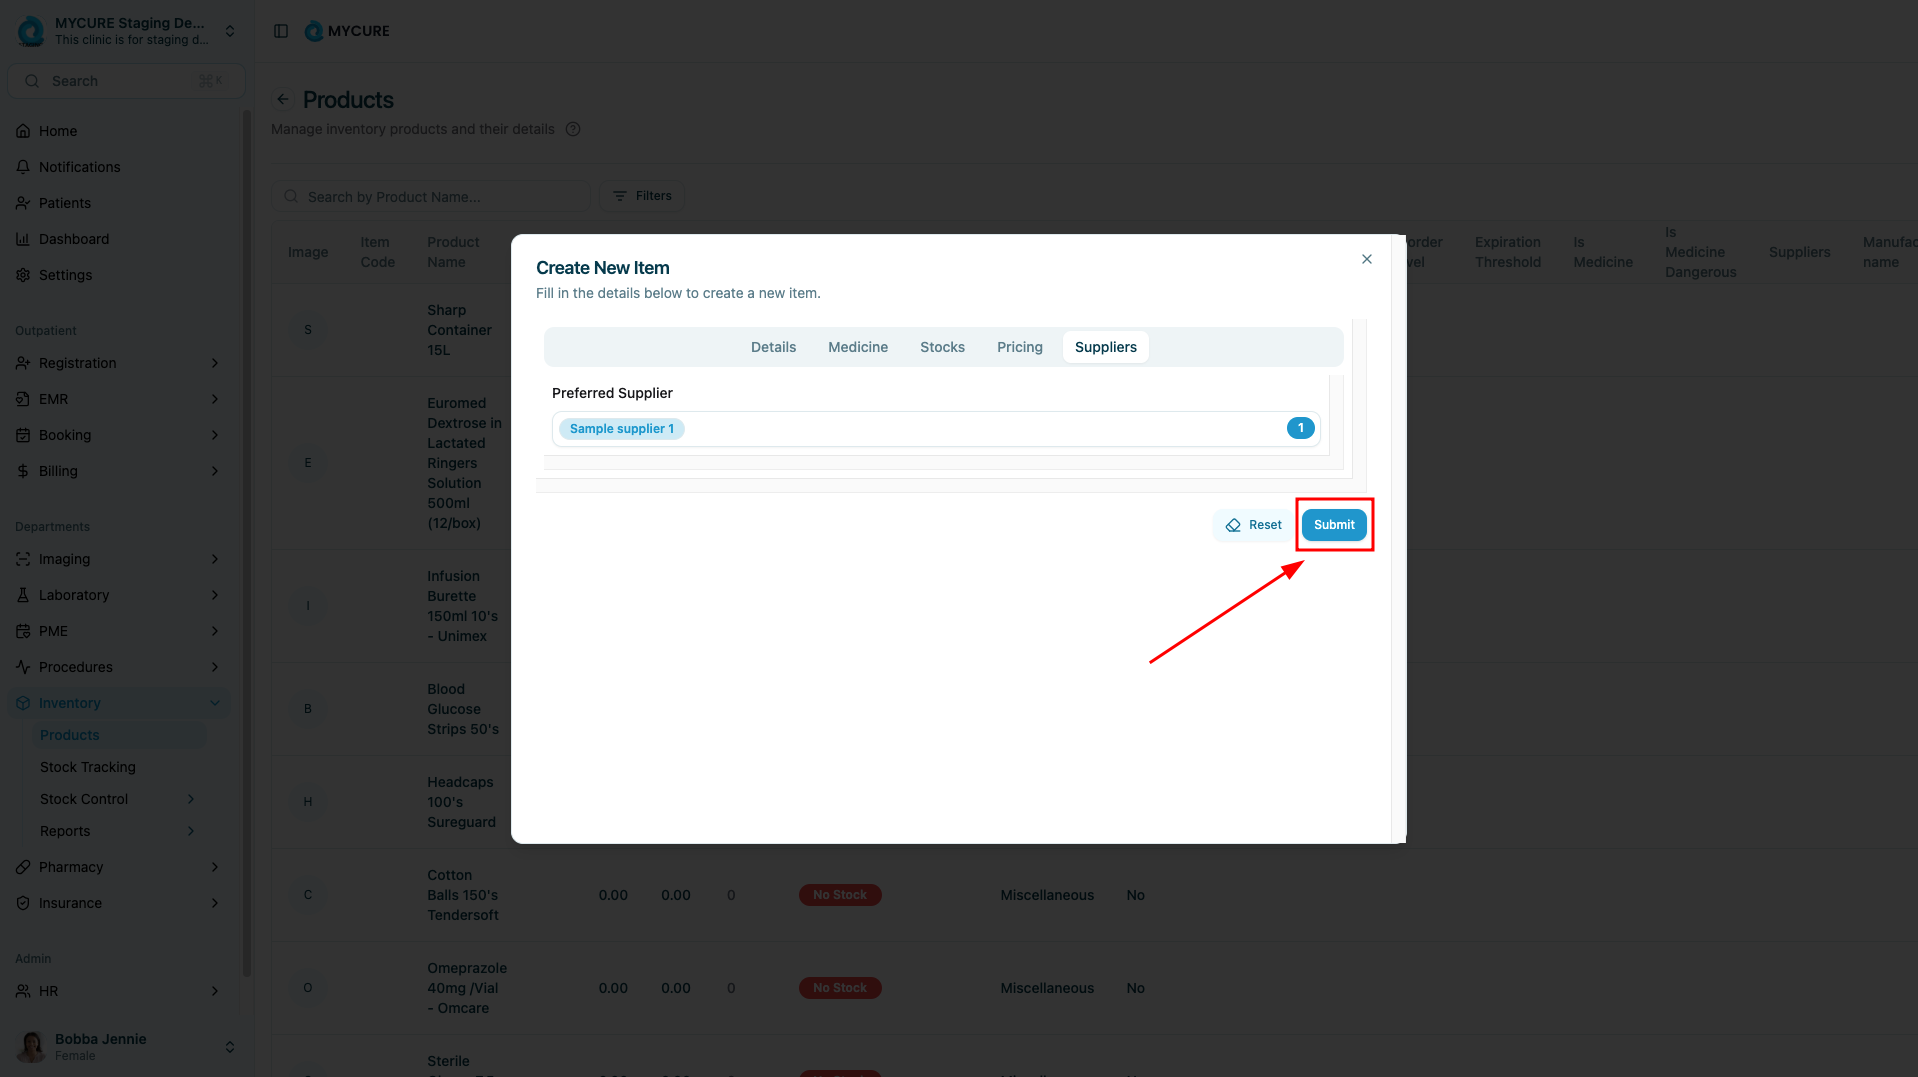
8. Submit the Product
Review all information across all tabs for accuracy
Click the Submit button at the bottom of the form
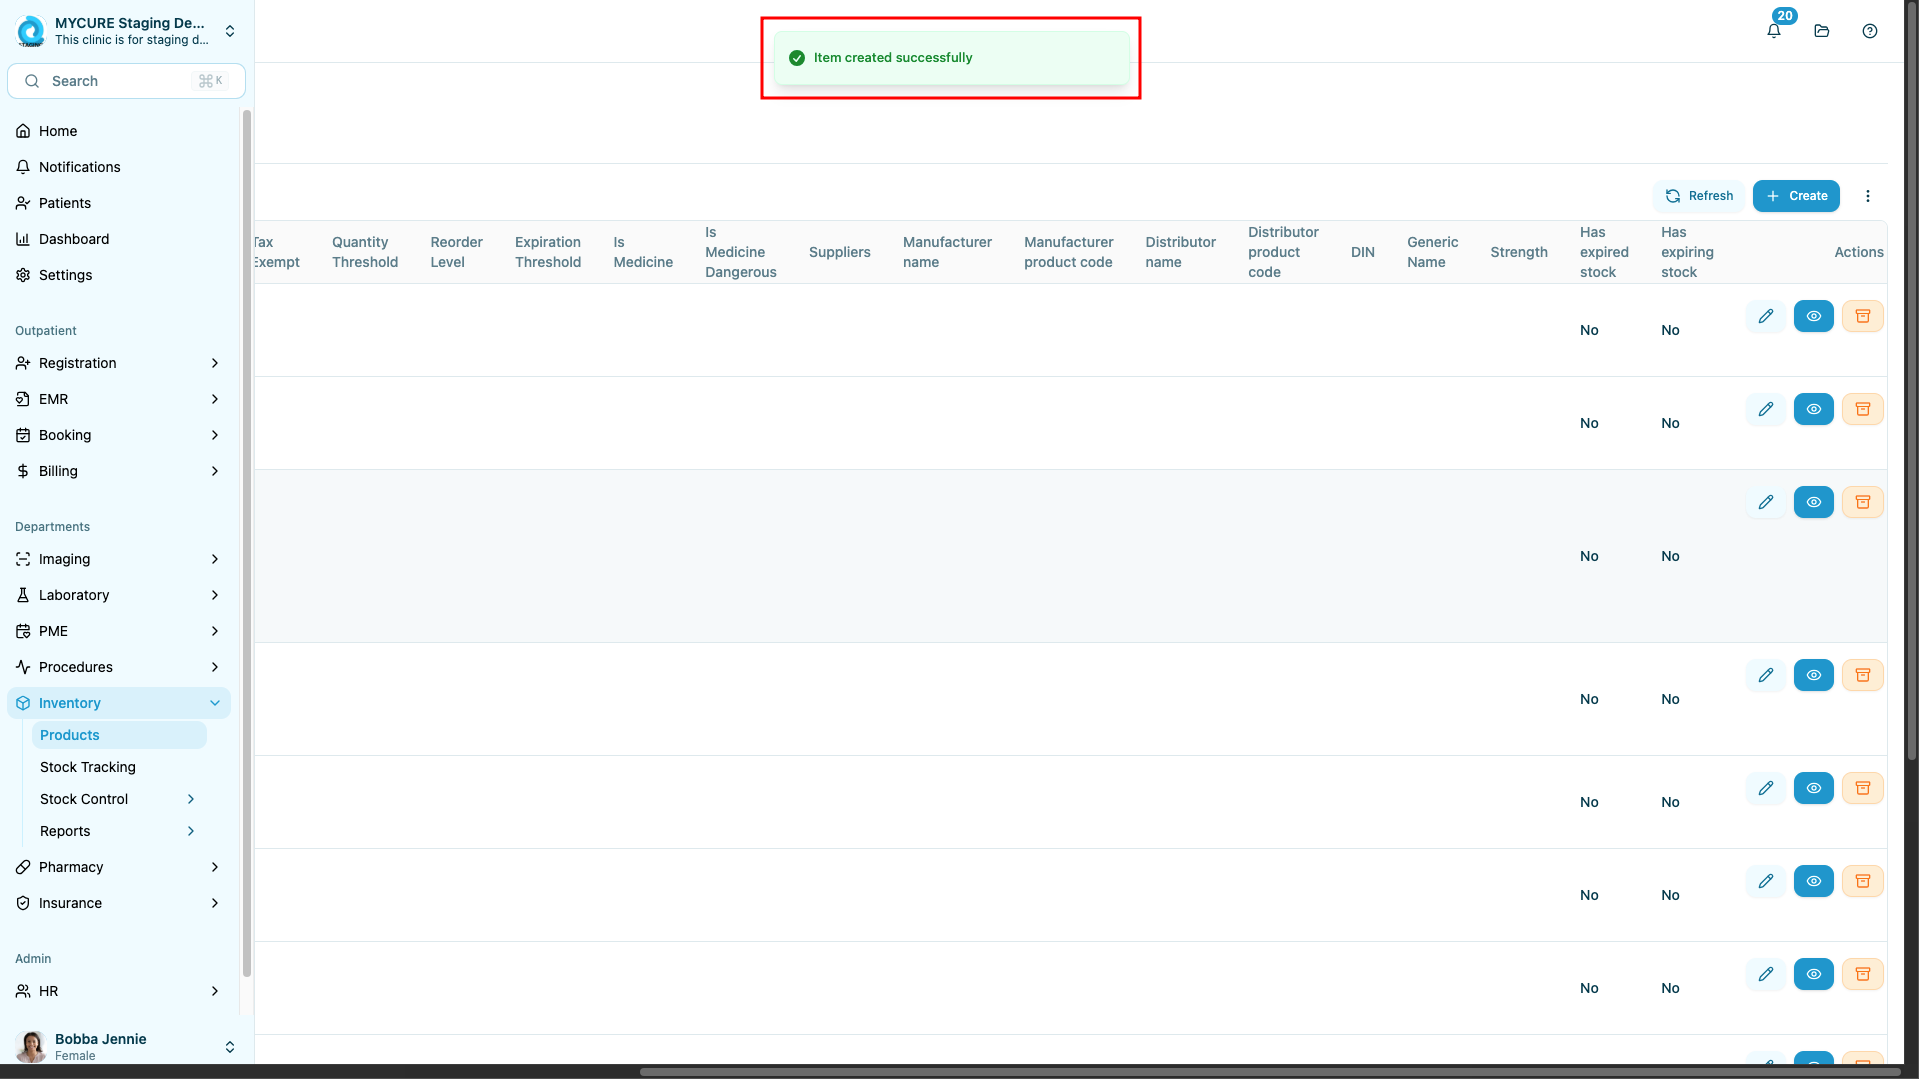
Verify that the system displays a success message
Confirm the product appears in your product list
Tips and Common Issues
Tip:
You can use the Reset button on any tab to clear all information on that tab if you need to start over. However, this only affects the current tab, not all tabs.
Note:
The Medicines tab information is only required if the product is marked as a medicine. For non-medicine products, you can skip this tab.
Warning:
Make sure to save your work by clicking Submit only after completing all required information across all tabs. Navigating away from the form without submitting will cause all entered information to be lost.
Troubleshooting
Product doesn't appear after submission - Check for any error messages that may have appeared. Make sure all required fields are completed, especially in the Details tab.
Can't select a supplier - Ensure suppliers have been previously added to the system. If no suppliers are available, you'll need to create them first via the Suppliers section.
Image upload fails - Verify the image is in a supported format (JPG, PNG, GIF) and under the size limit (typically 5MB).
Stock threshold values not saving - Ensure you're entering numerical values only, without any text or special characters.