
MYCURE X - How To Send PME Records Via Email
5 min read
In this tutorial, you'll learn how to securely share patient medical examination (PME) records by sending them directly from MYCURE as password-protected email attachments. This feature helps healthcare professionals easily and securely share important patient information with authorized recipients.
What You'll Learn
How to navigate to the PME Worklist
How to select and prepare records for email
How to configure email settings including secure PDF passwords
How to send or reset the email composition form
Before You Begin
You must have access to the MYCURE v10 system with appropriate permissions
The PME record you wish to send must be in a finalized state
You should know the recipient's email address
Make sure you have a secure method to communicate the PDF password to the recipient
Steps
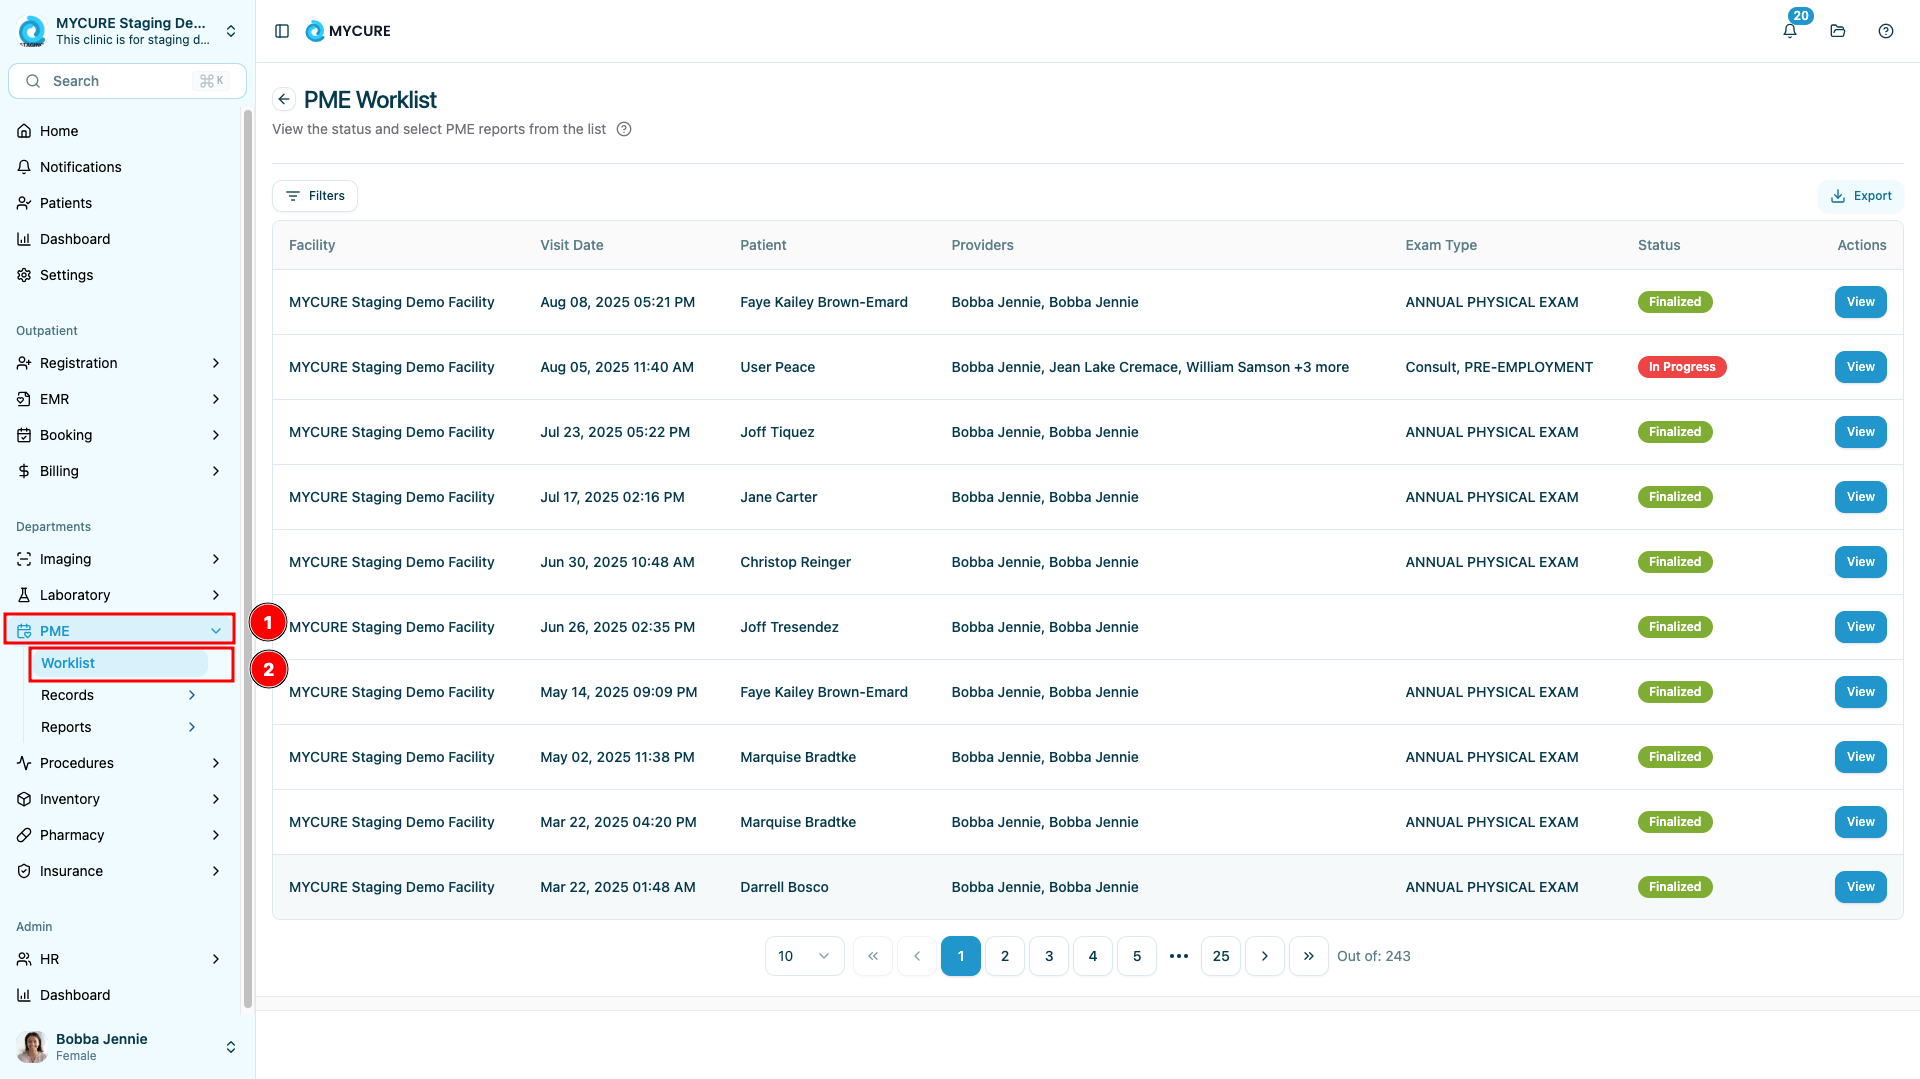
1. Navigate to the PME Worklist
Click on the "PME" option in the main navigation bar of MYCURE. Once the PME module opens, click on the "Worklist" option to view all available patient medical examination records.
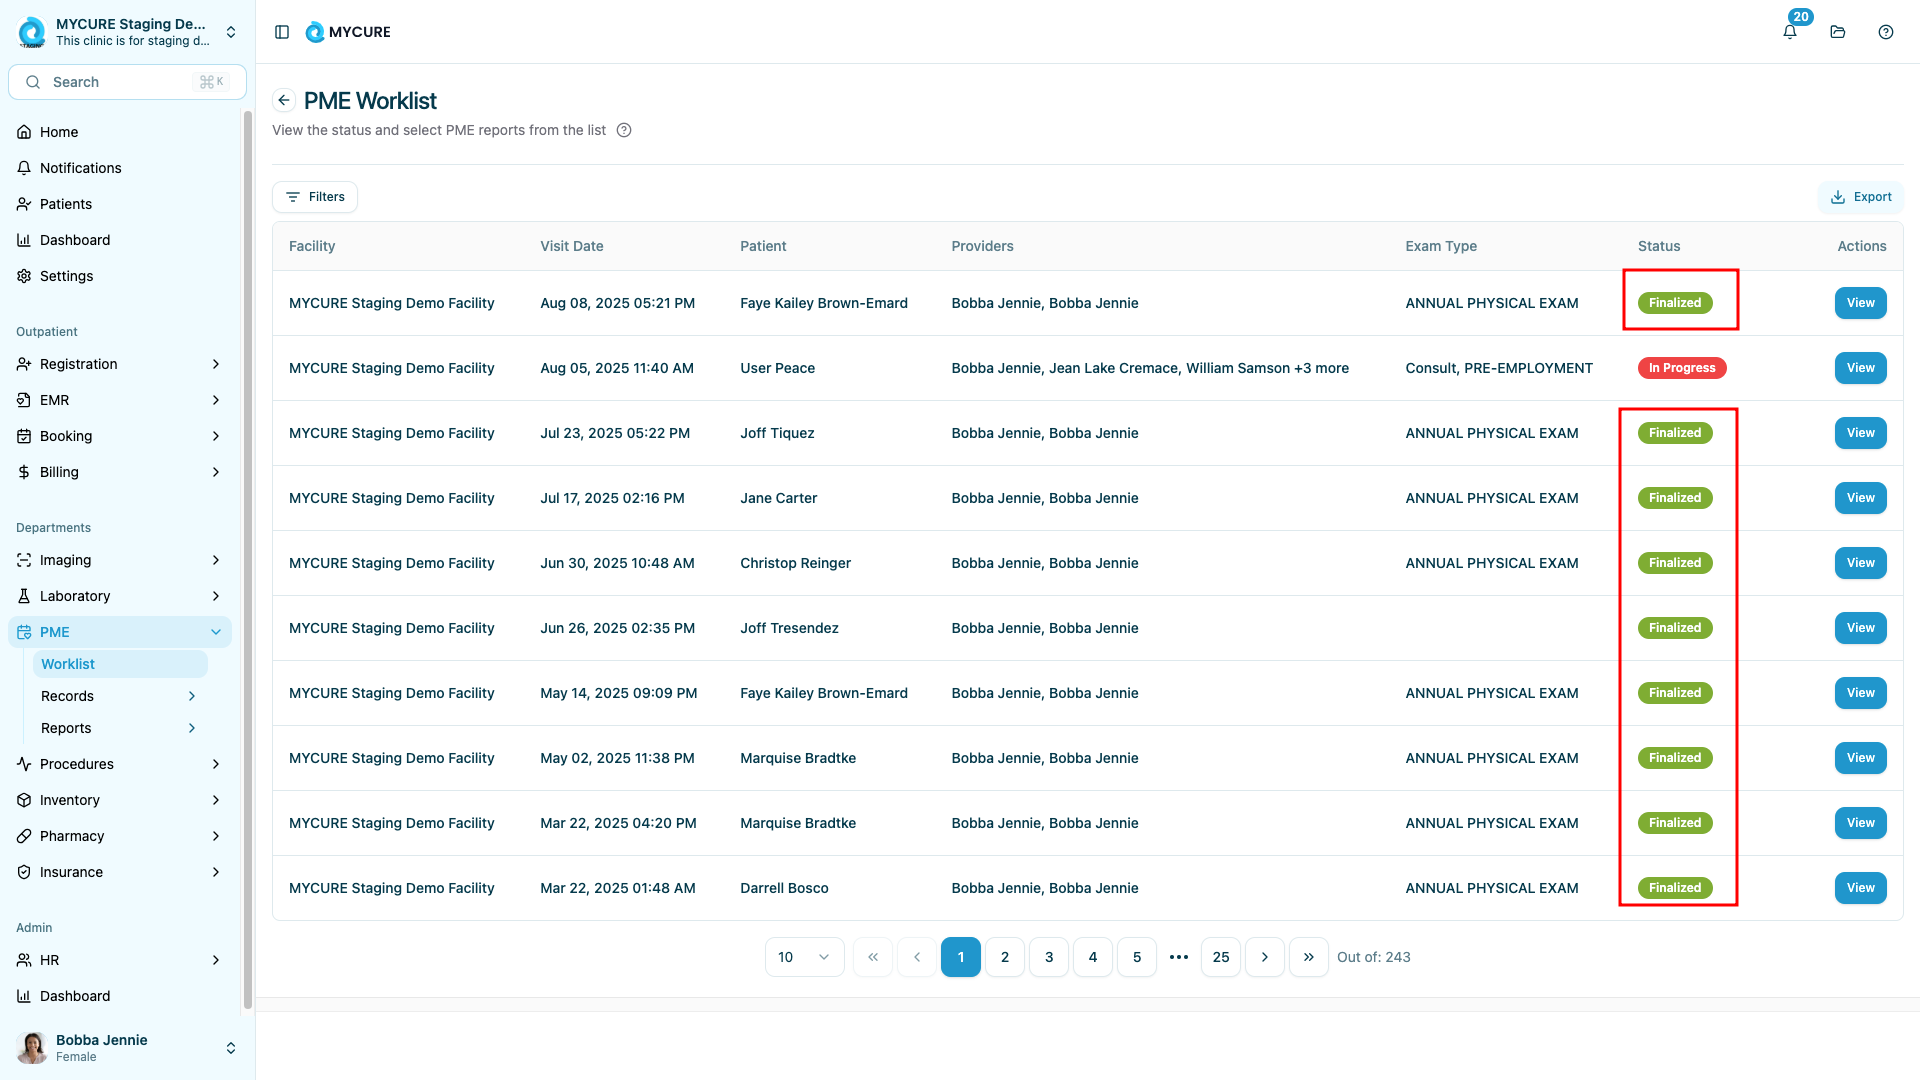
2. Select a Record to Share
Browse through the PME Worklist and locate the finalized record you want to share. Click on the record to select it. Note that only finalized records can be sent via email to ensure that only complete and approved information is shared.
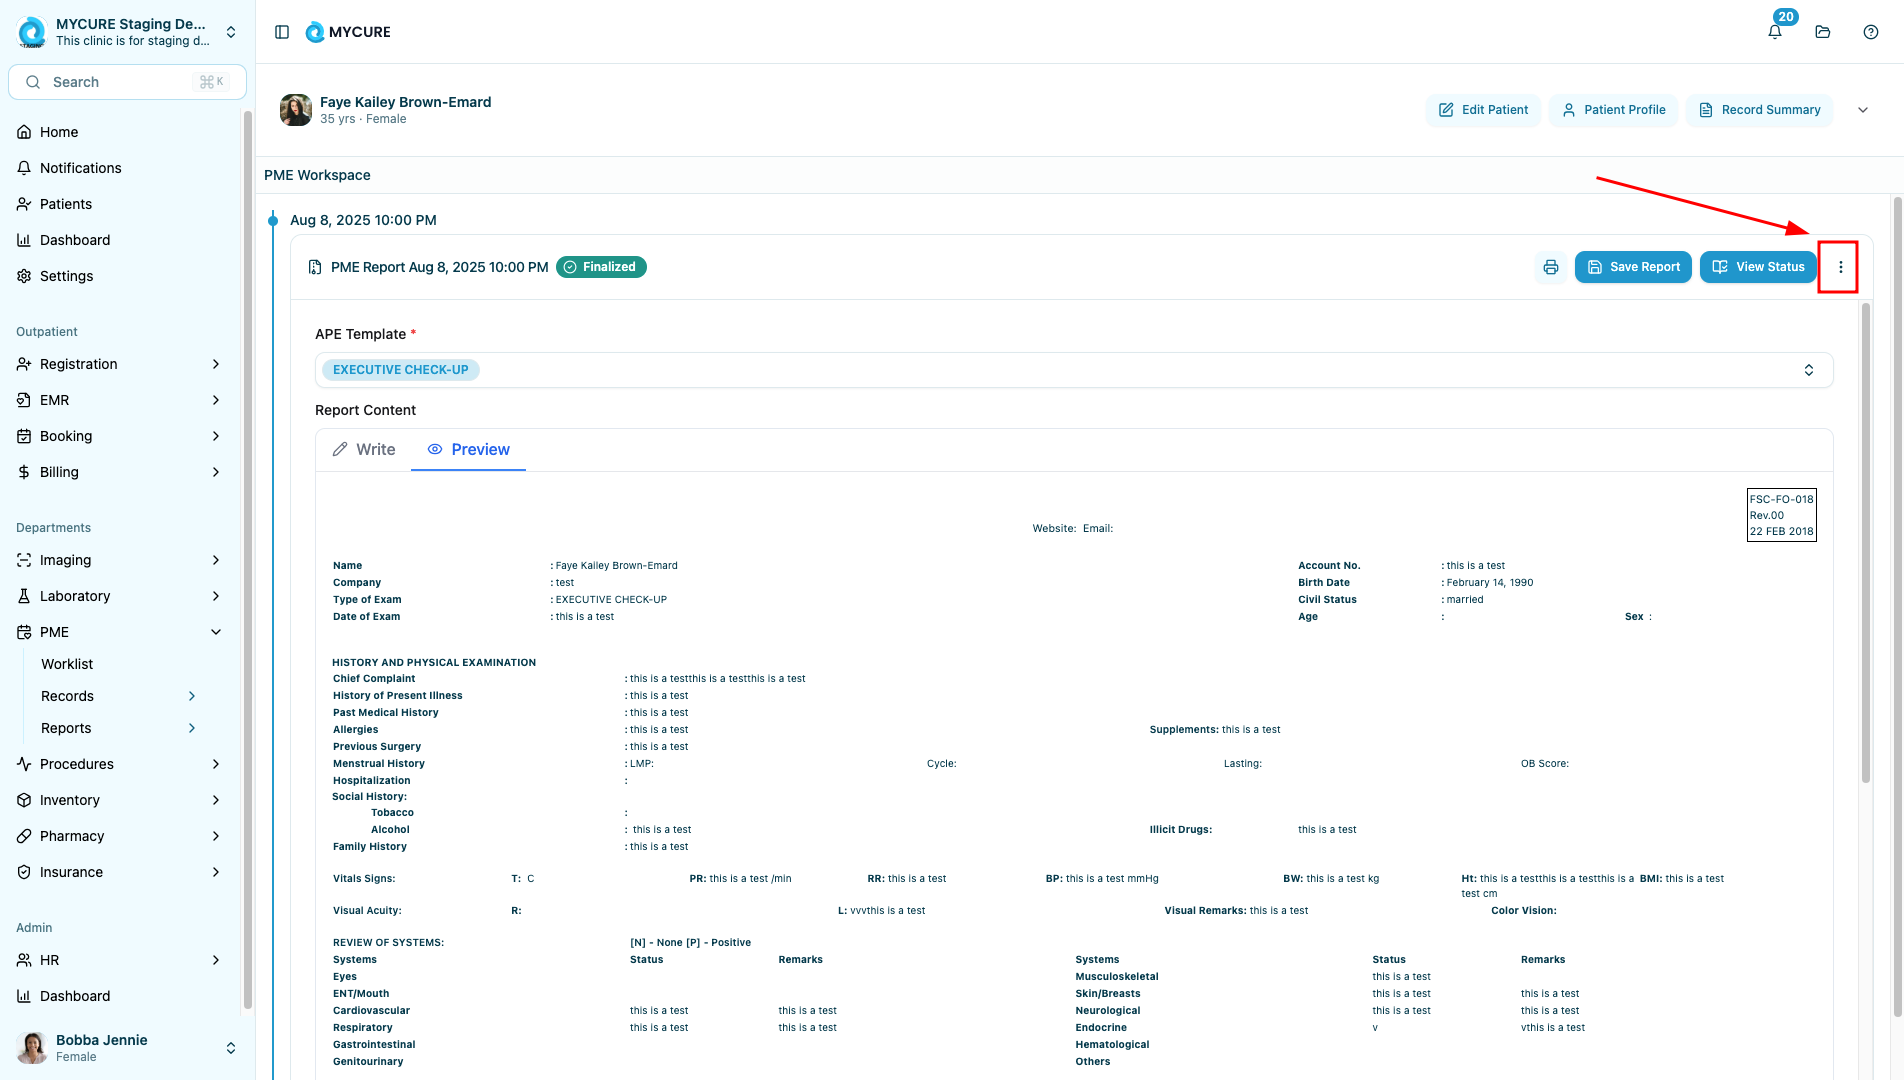
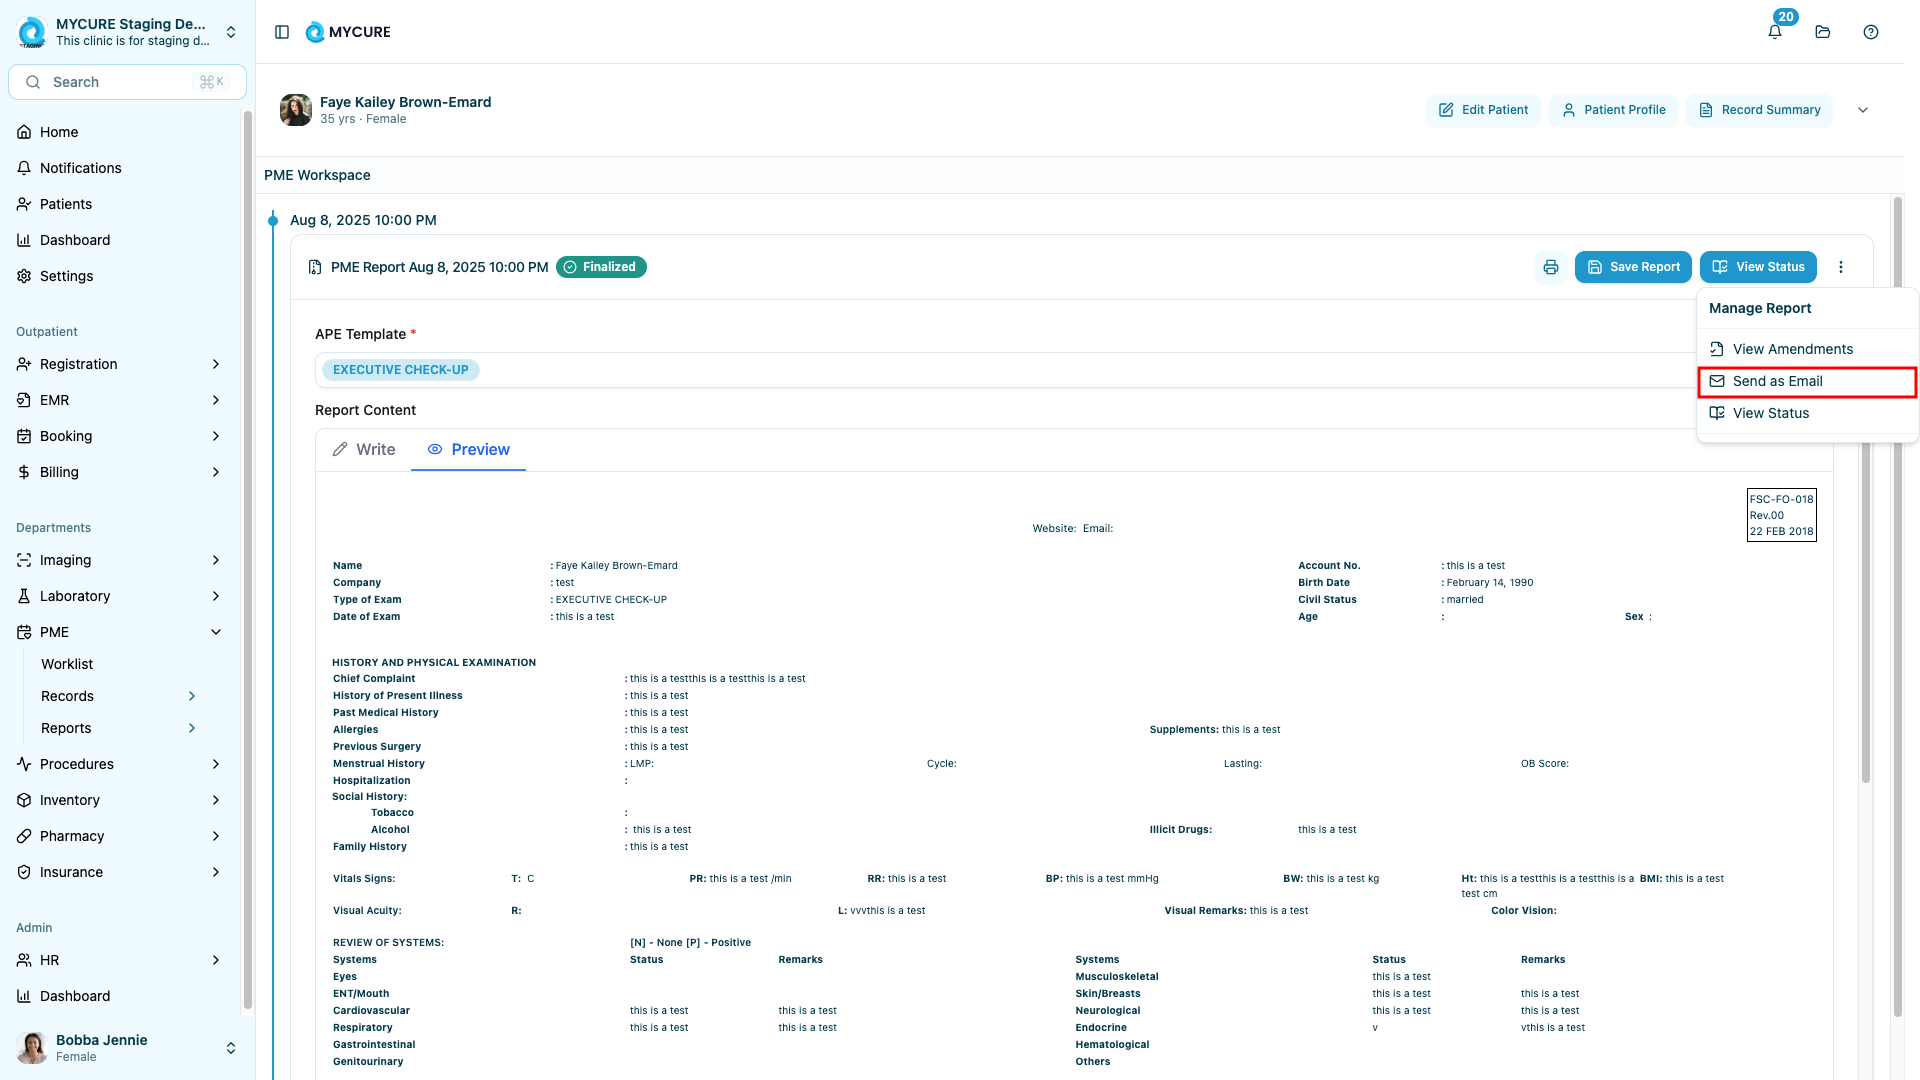
3. Access the Email Function
After selecting the record, look for the three dots button located next to the "View status" button. Click on it to reveal a dropdown menu, then select the "Send as Email" option.
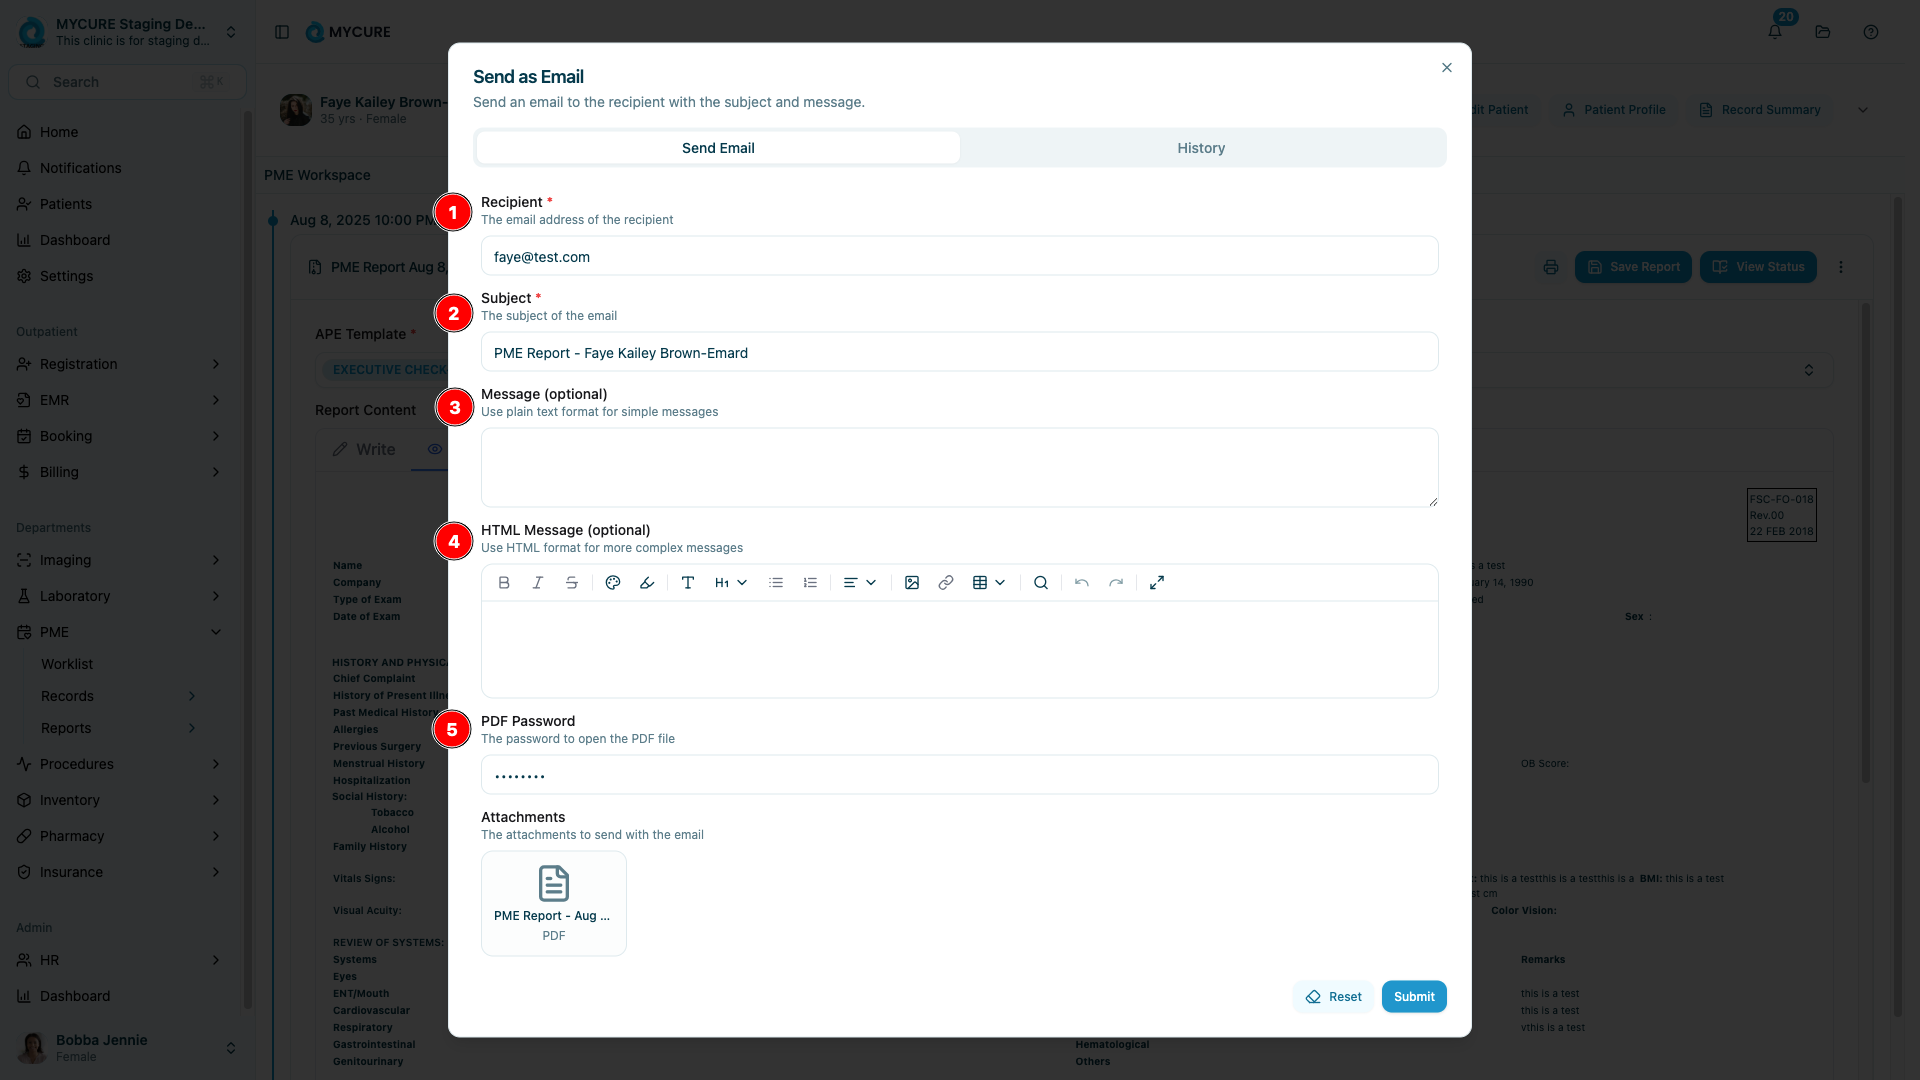
4. Complete the Email Form
Once the email composition form opens, fill in the following fields:
Recipient Email: Enter the recipient's email address
Subject: Verify that the auto-generated subject line is appropriate, or modify it as needed
Message (Optional): Type a plain text message to accompany the record
HTML Message (Optional): If you prefer formatted text, you can enter an HTML-formatted message
PDF Password: Create a secure password that will be used to encrypt the PDF attachment
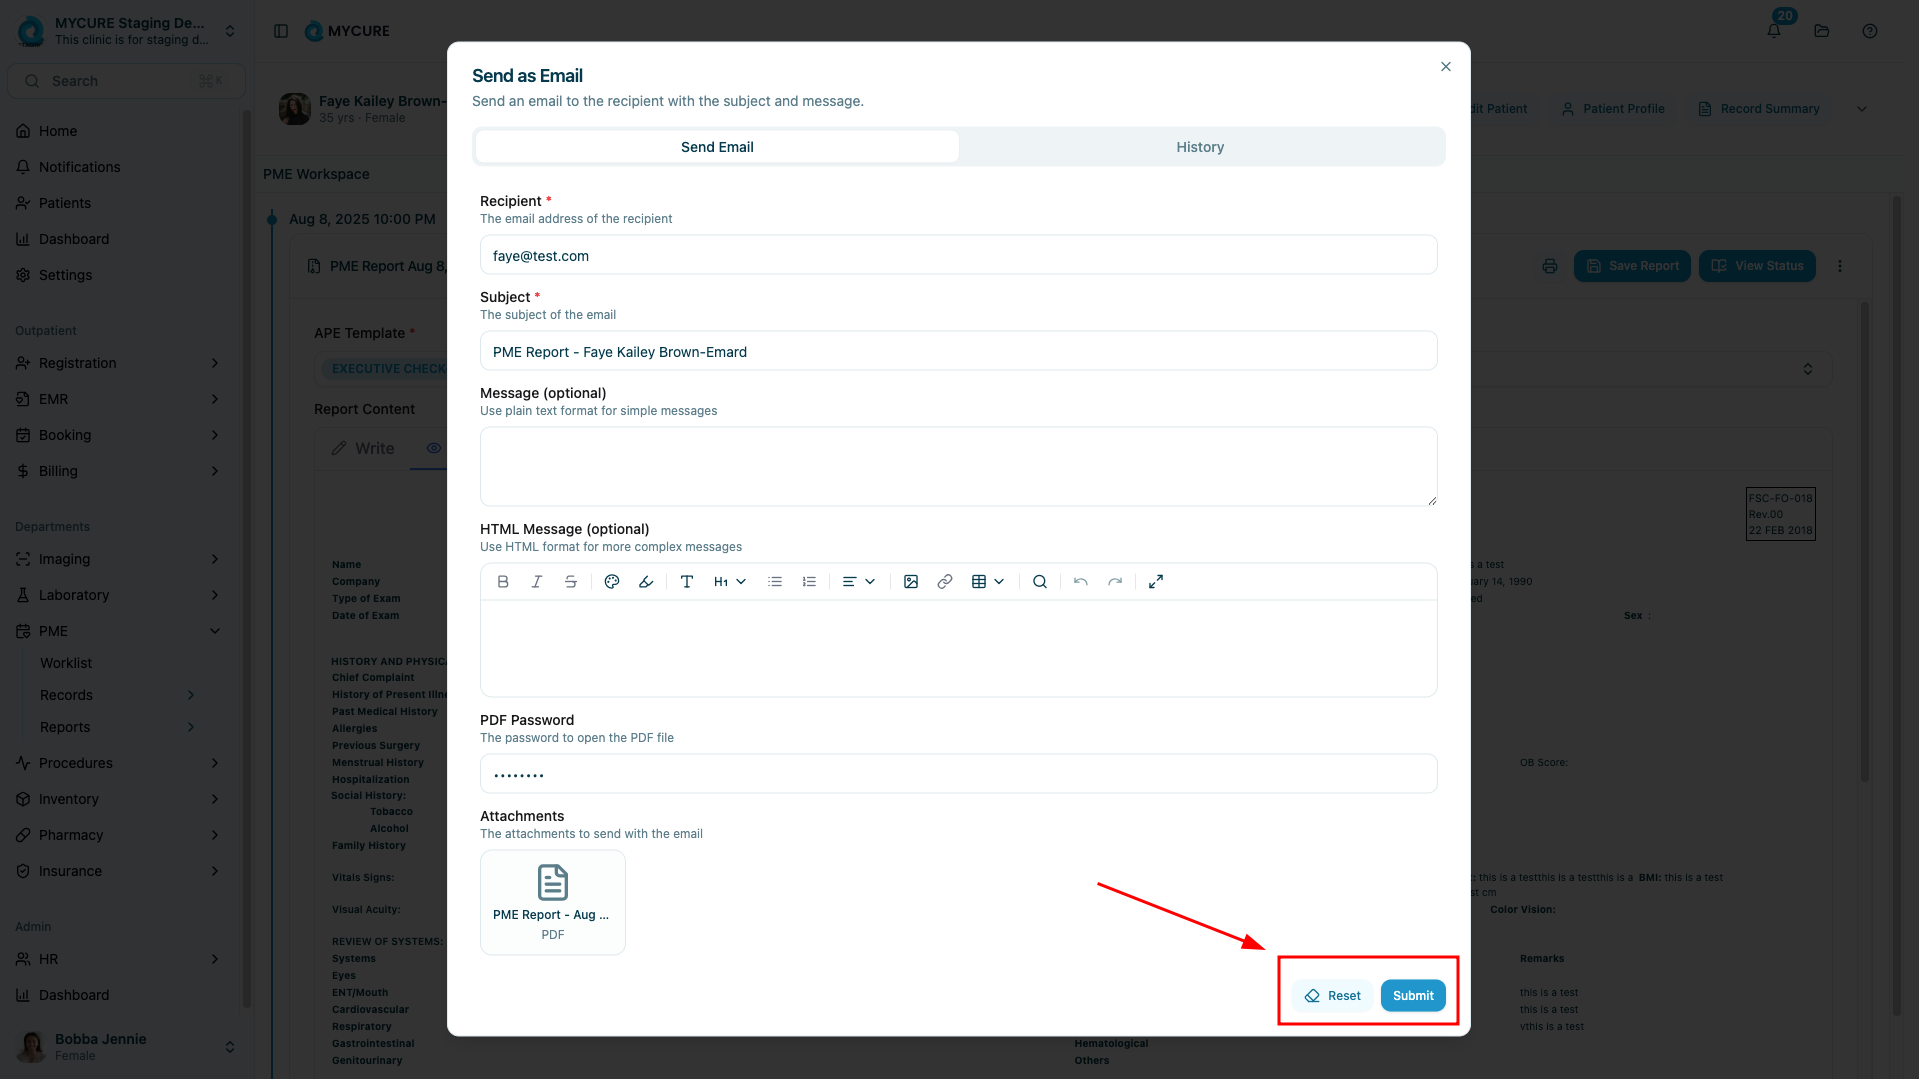
5. Send or Reset the Email
After completing all required fields, you have two options:
Click the Submit button to send the email with the attached record
Click the Reset button if you need to clear the form and start over
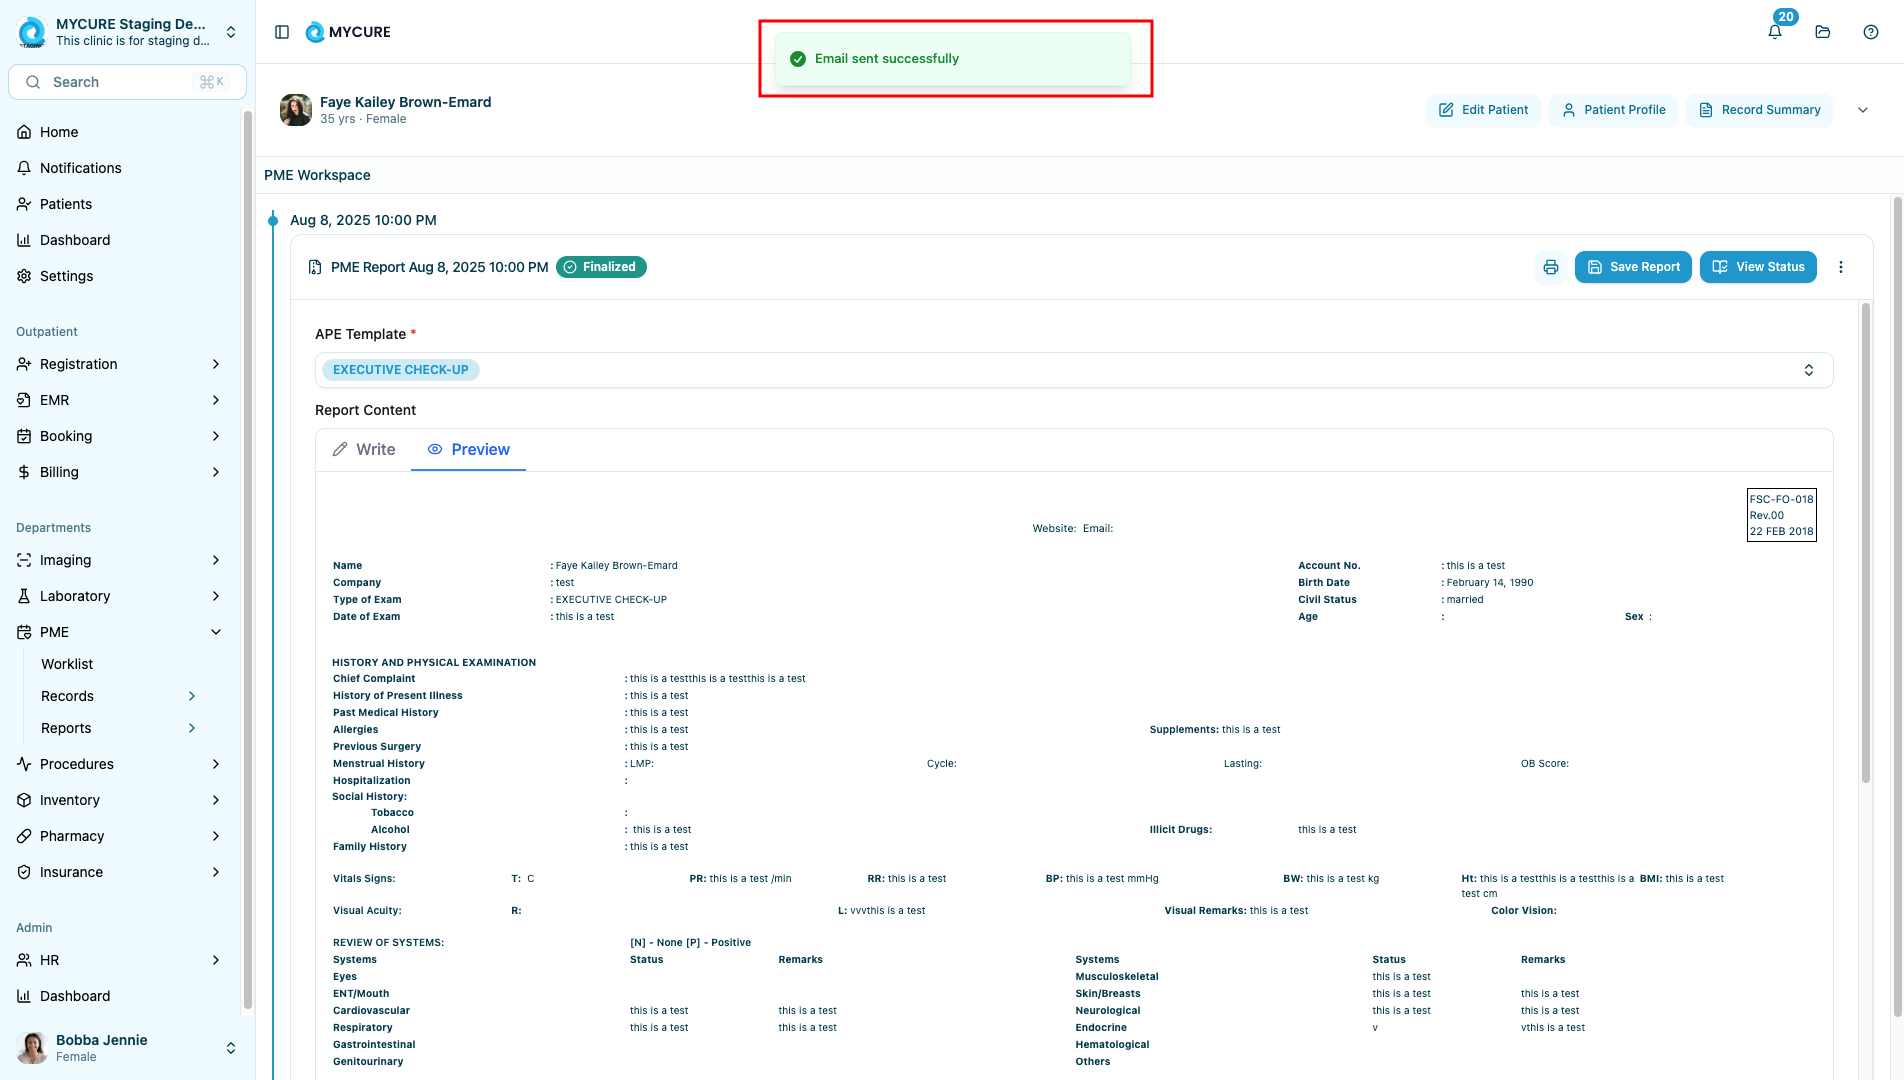
After clicking Submit, the system will process your request and display a confirmation message when the email has been successfully sent.
Tips and Common Issues
Tip:
For better security, use a strong PDF password containing a mix of letters, numbers, and special characters. Remember to share this password with the recipient through a separate secure channel, not in the same email.
Note:
The HTML Message option allows you to create formatted text with links, bold text, and other styling. This is especially useful when you need to highlight specific information or include clickable links.
Warning:
Never include sensitive patient information that is not part of the attached PDF in the email body, as the email content itself is not encrypted. Only the PDF attachment is secured with a password.
Troubleshooting
Email not received by recipient - Check if you entered the correct email address and verify with the recipient if the email might be in their spam folder
Recipient cannot open the PDF - Ensure you have correctly communicated the PDF password to the recipient through a secure channel
Cannot find the Send as Email option - Verify that the record is in a finalized state, as only finalized records can be sent via email
Form reset not working - If the Reset button doesn't clear all fields, try refreshing the page and starting over