
How To Process Patients In The Laboratory Queue
5 min read
This tutorial will guide you through the process of navigating to the laboratory queue and processing patients for laboratory services in MYCURE v10. You'll learn how to generate specimen IDs, print claim stubs, and complete the laboratory accommodation process efficiently.
What You'll Learn
How to navigate to the Laboratory Queue
How to generate specimen IDs for laboratory tests
How to complete the patient laboratory accommodation process
How to set estimated release dates for laboratory results
Before You Begin
You need an active MYCURE v10 account with appropriate Laboratory module access
You should be logged into the MYCURE system
You should have patients already in the laboratory queue awaiting processing
Steps
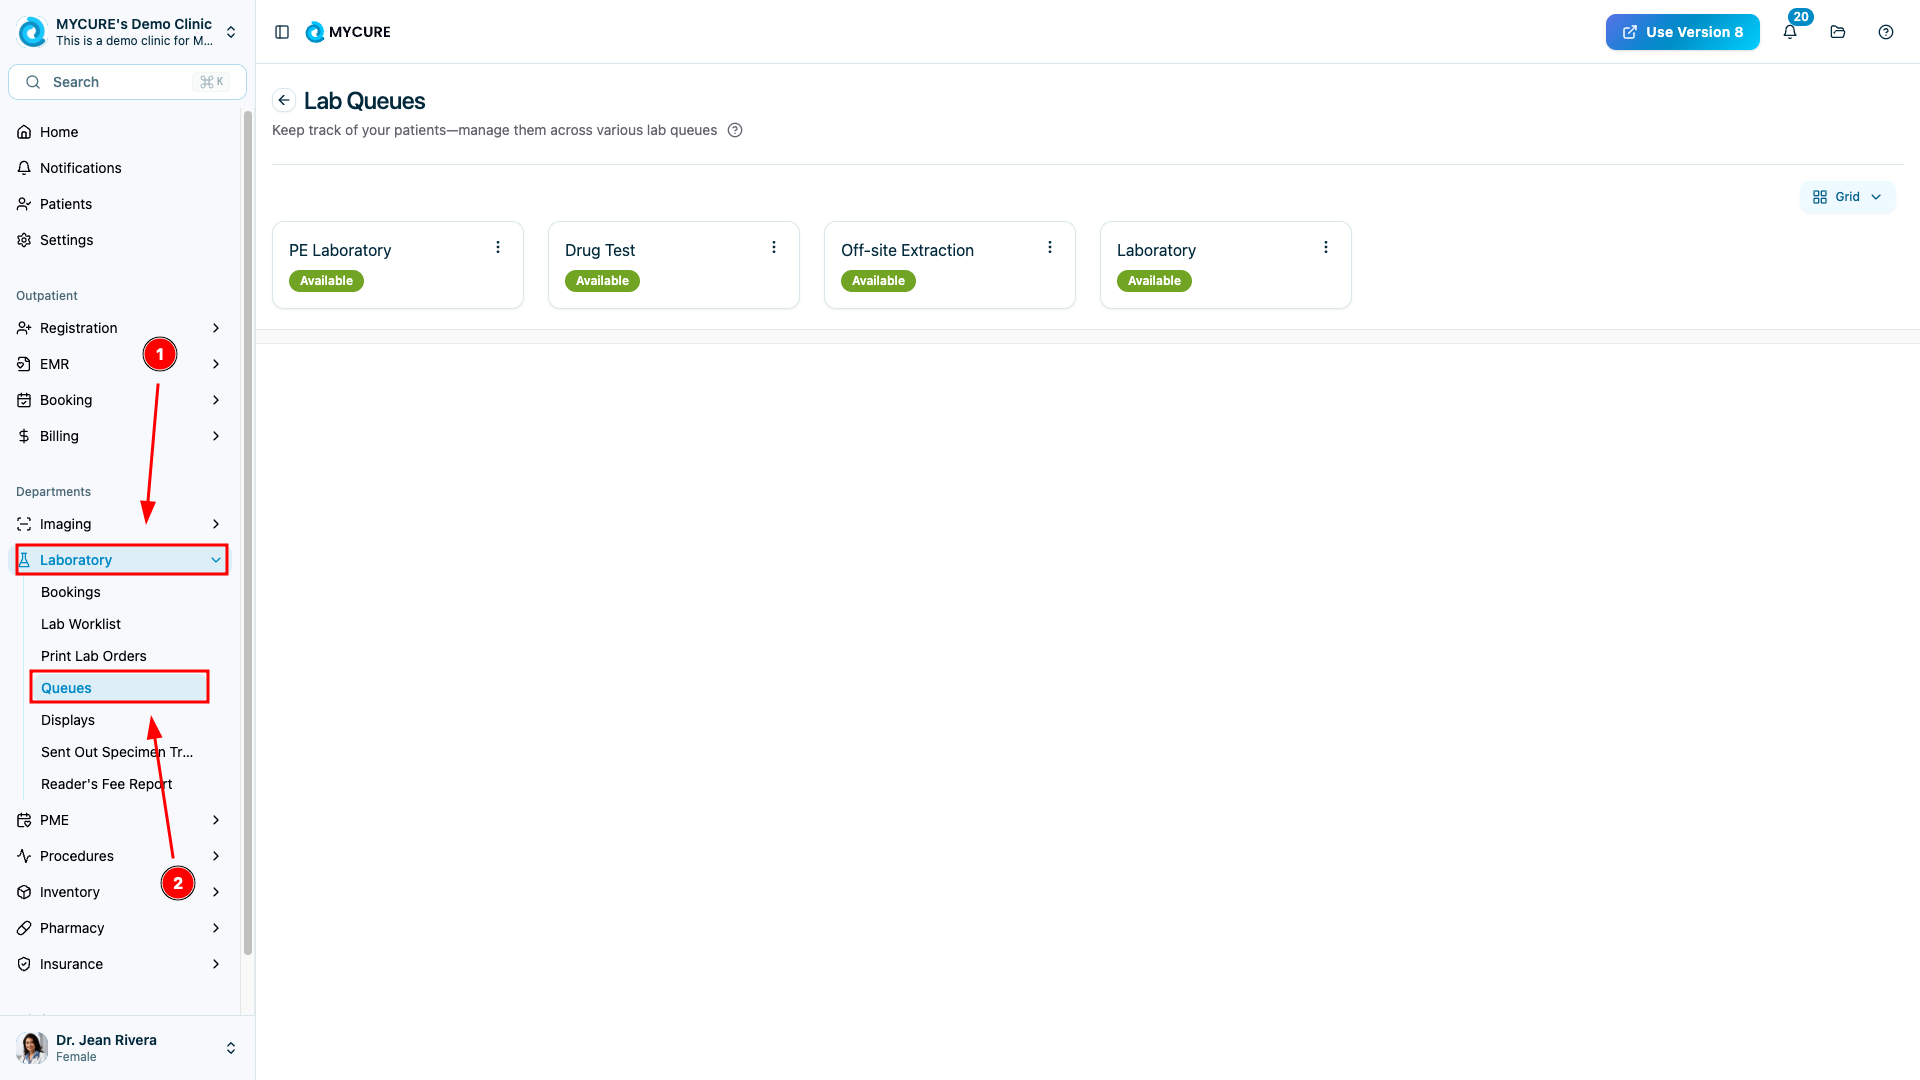
1. Navigate to the Laboratory Queue
Open the Laboratory module by clicking on "Laboratory" in the main navigation bar at the top of the screen. Once the Laboratory module loads, click on the "Queues" option to view the available queues in your system. Select a queue to access list of patients waiting for laboratory services.
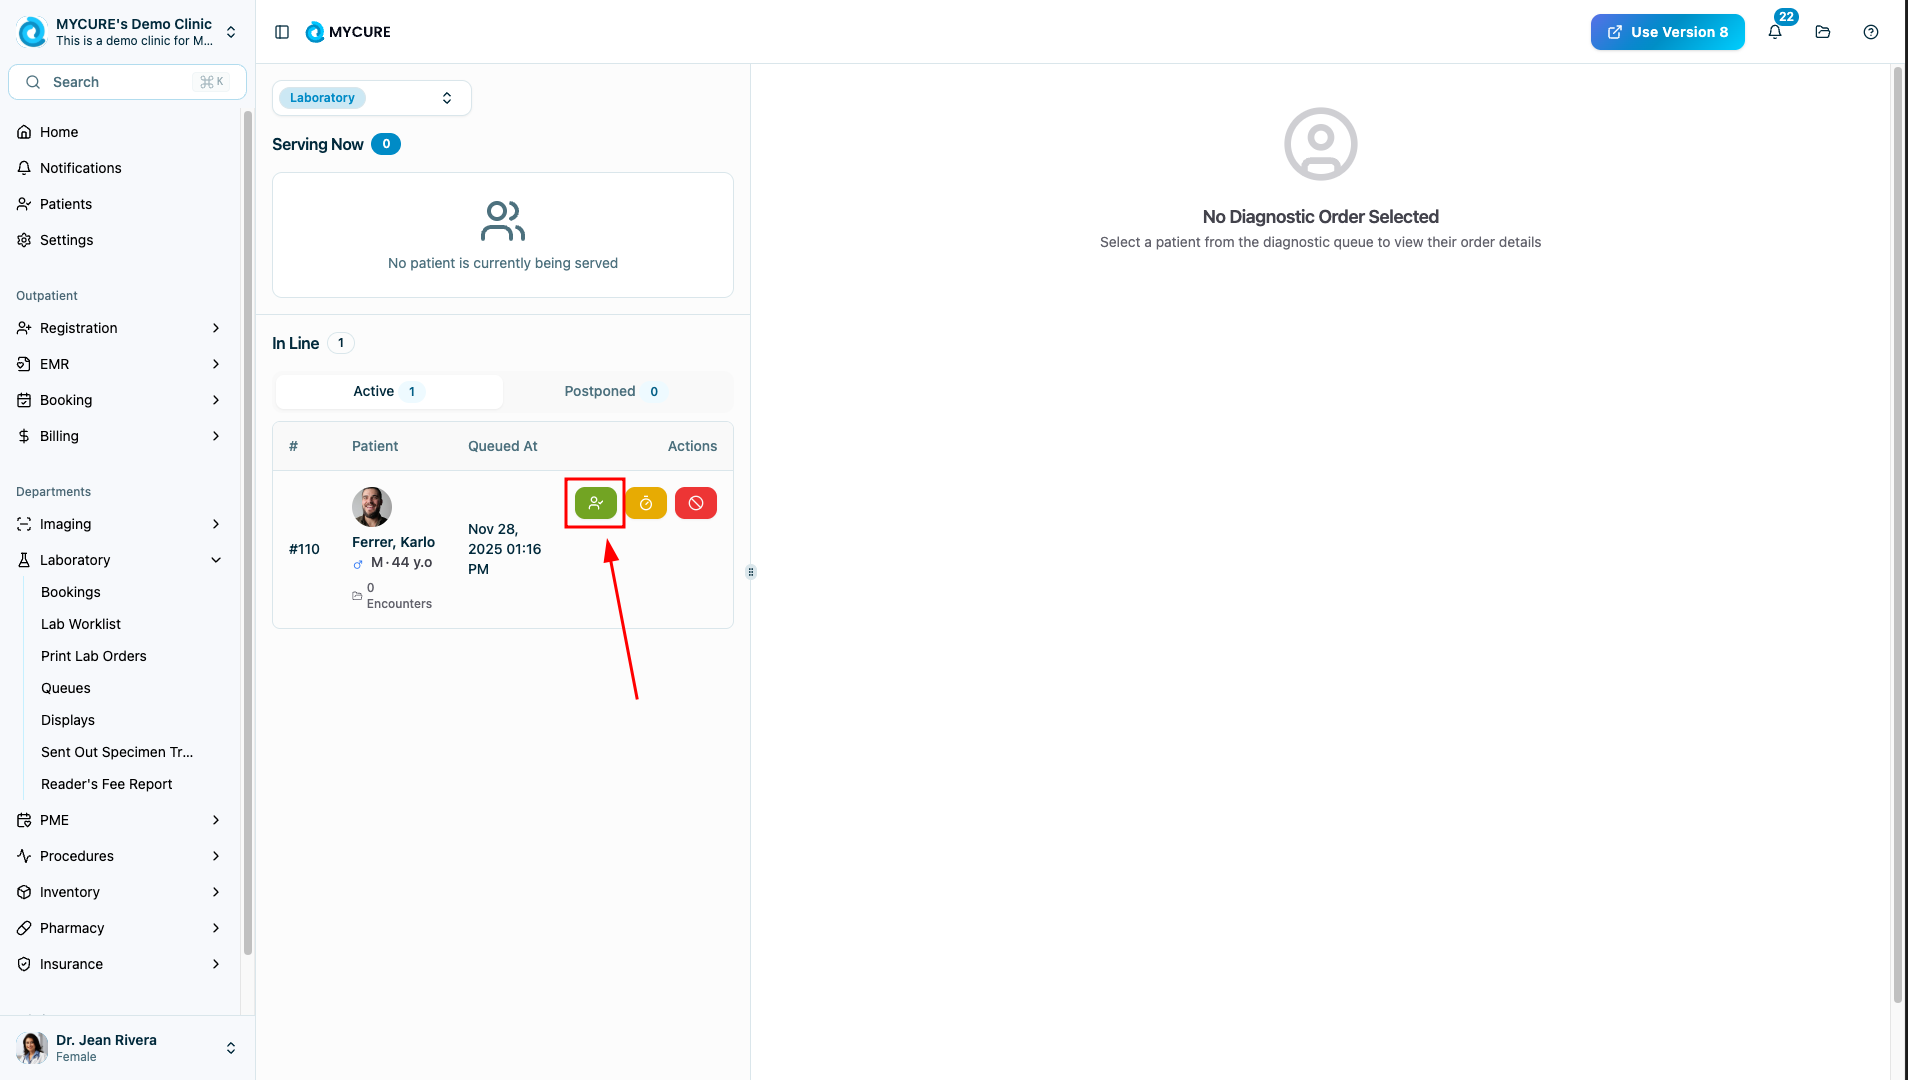
2. Select a Patient to Serve
From the Laboratory Queue list, identify the patient you want to process and click on their entry. This will open the patient's laboratory service record and allow you to begin processing their laboratory tests.
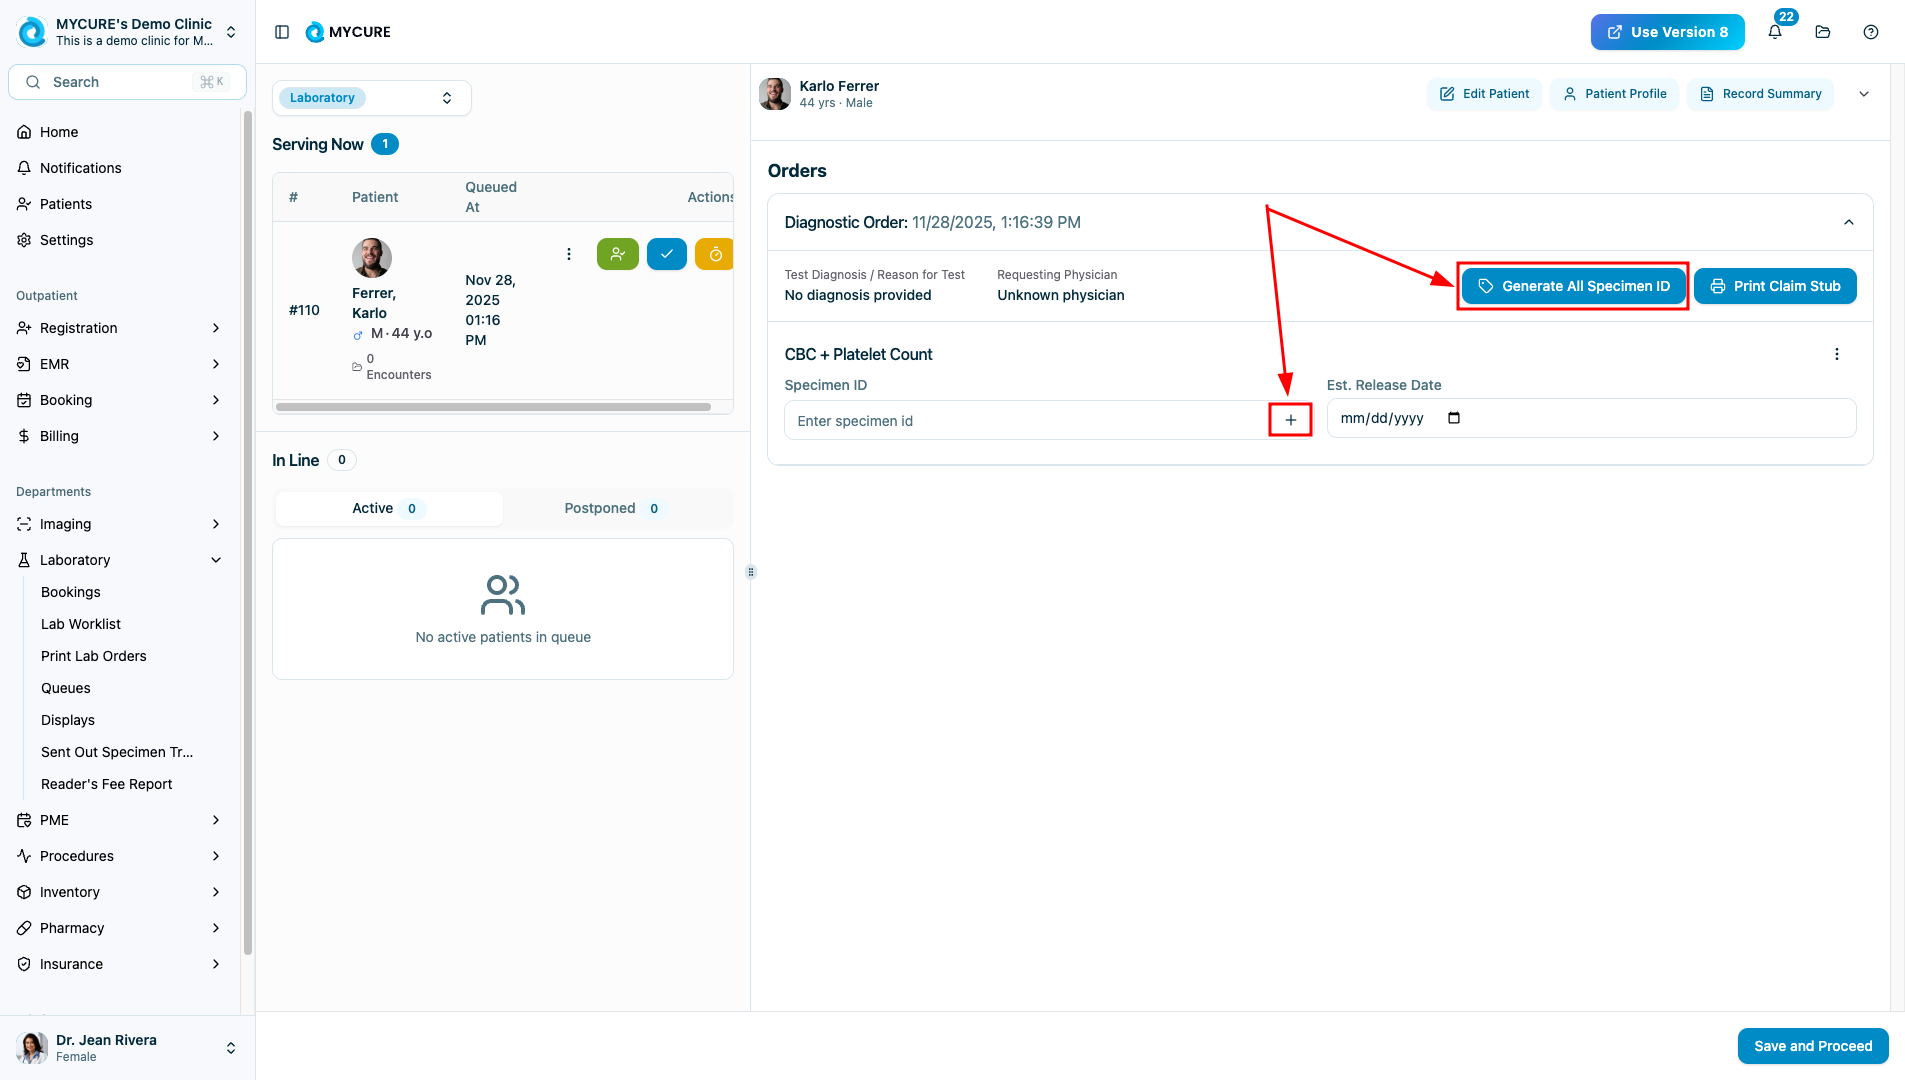
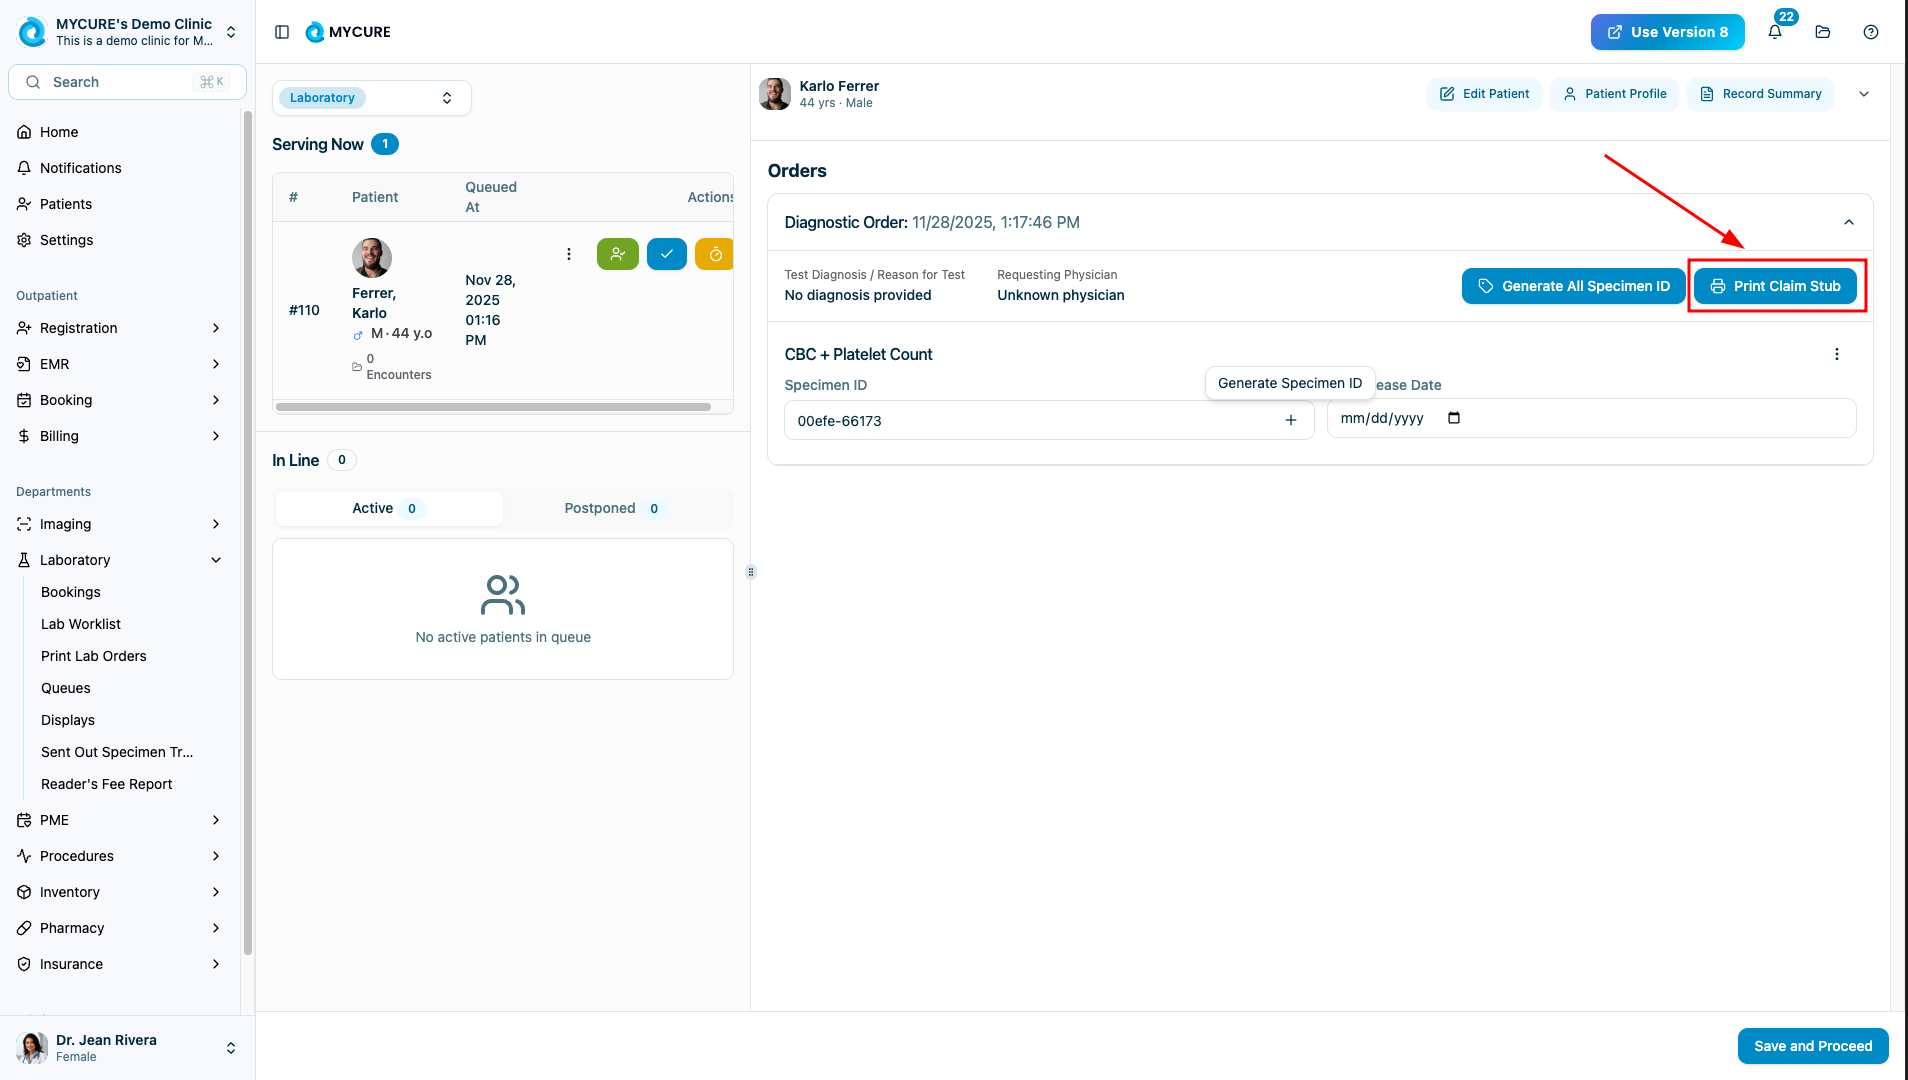
3. Generate Specimen IDs
For each laboratory test that requires a specimen, you need to generate a specimen ID. You can do this in two ways:
Click the "Generate All Specimen ID" button to create IDs for all tests at once
Click the "+" button next to individual tests to generate specimen IDs one by one
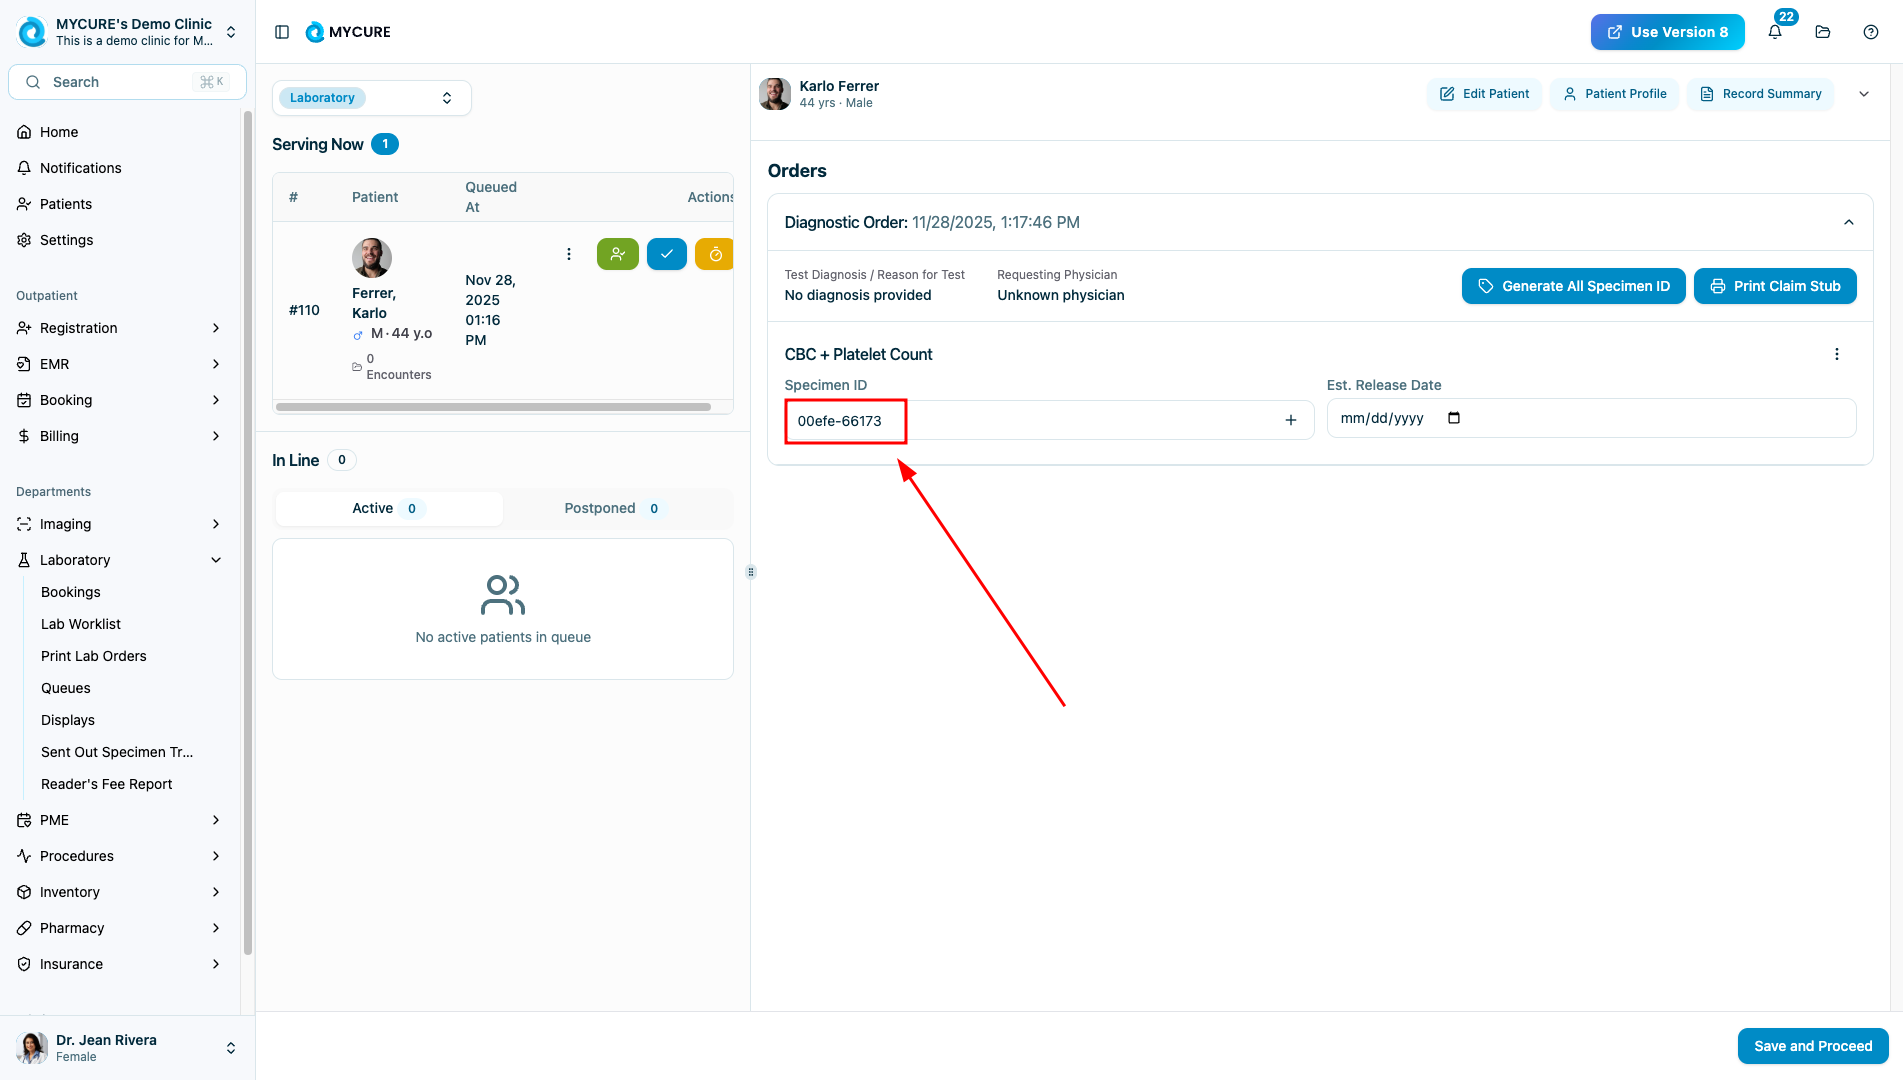
The system will automatically generate unique specimen IDs for tracking purposes.
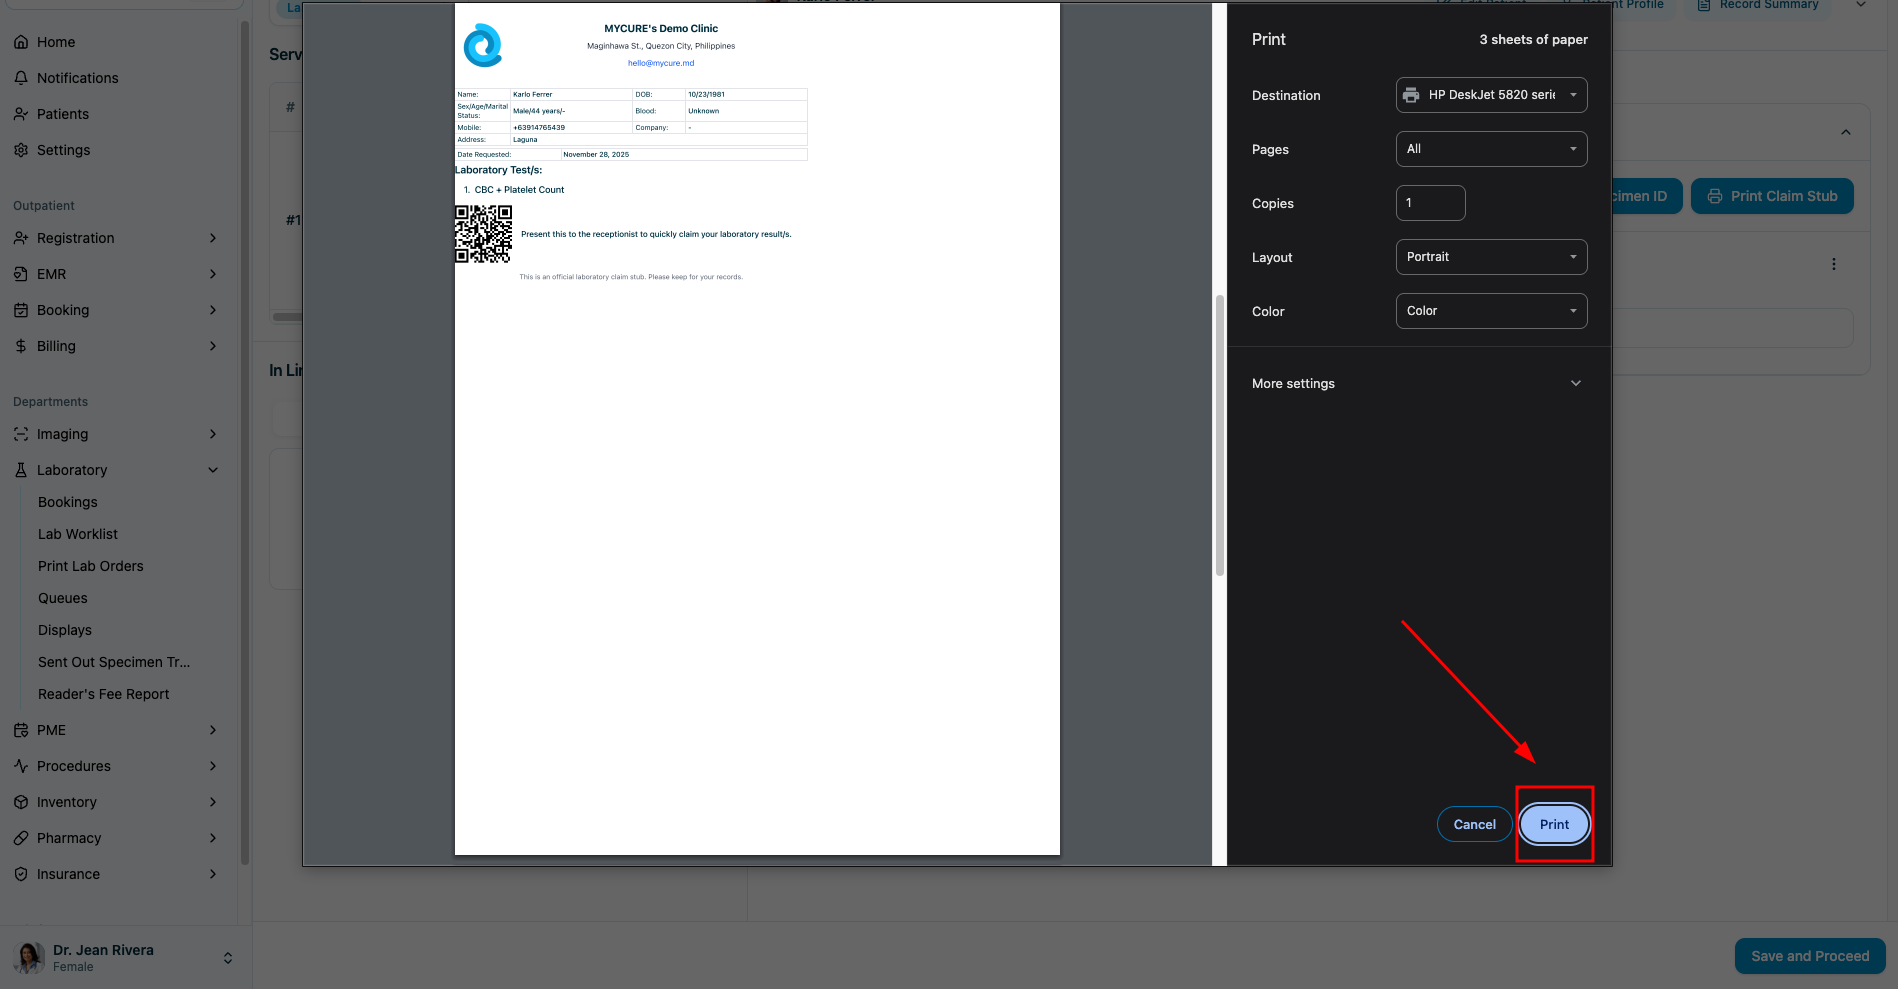
4. Print Claim Stub (Optional)
If your facility provides claim stubs to patients, click the "Print Claim Stub" button. This will generate a printable claim stub that includes:
Patient information
Specimen IDs
Test information
Estimated release date
Note:
Printing a claim stub is optional but recommended to help patients keep track of their laboratory tests and when to expect results.
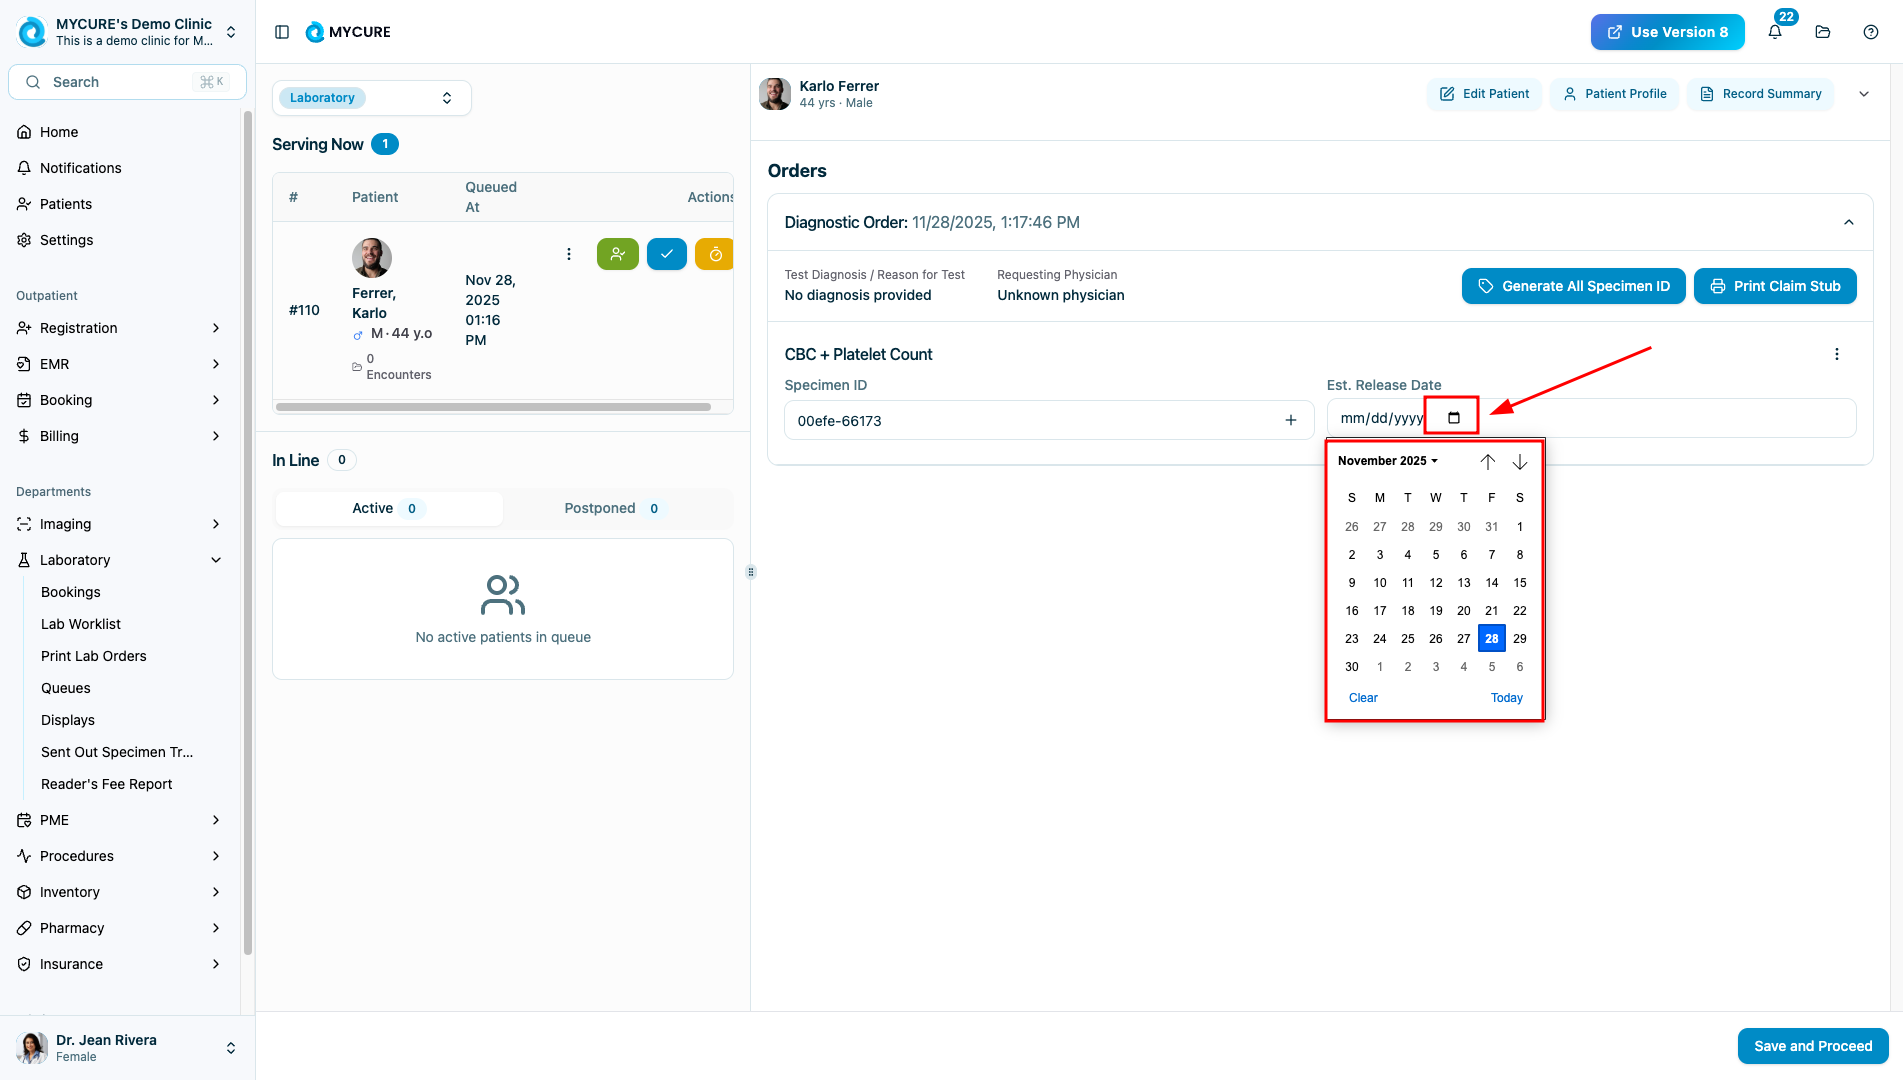
5. Set the Estimated Release Date
Select an appropriate date in the "Est. Release Date" field. This date indicates when the laboratory results are expected to be available to the patient and healthcare providers. Choose a realistic timeframe based on your laboratory's processing capabilities.
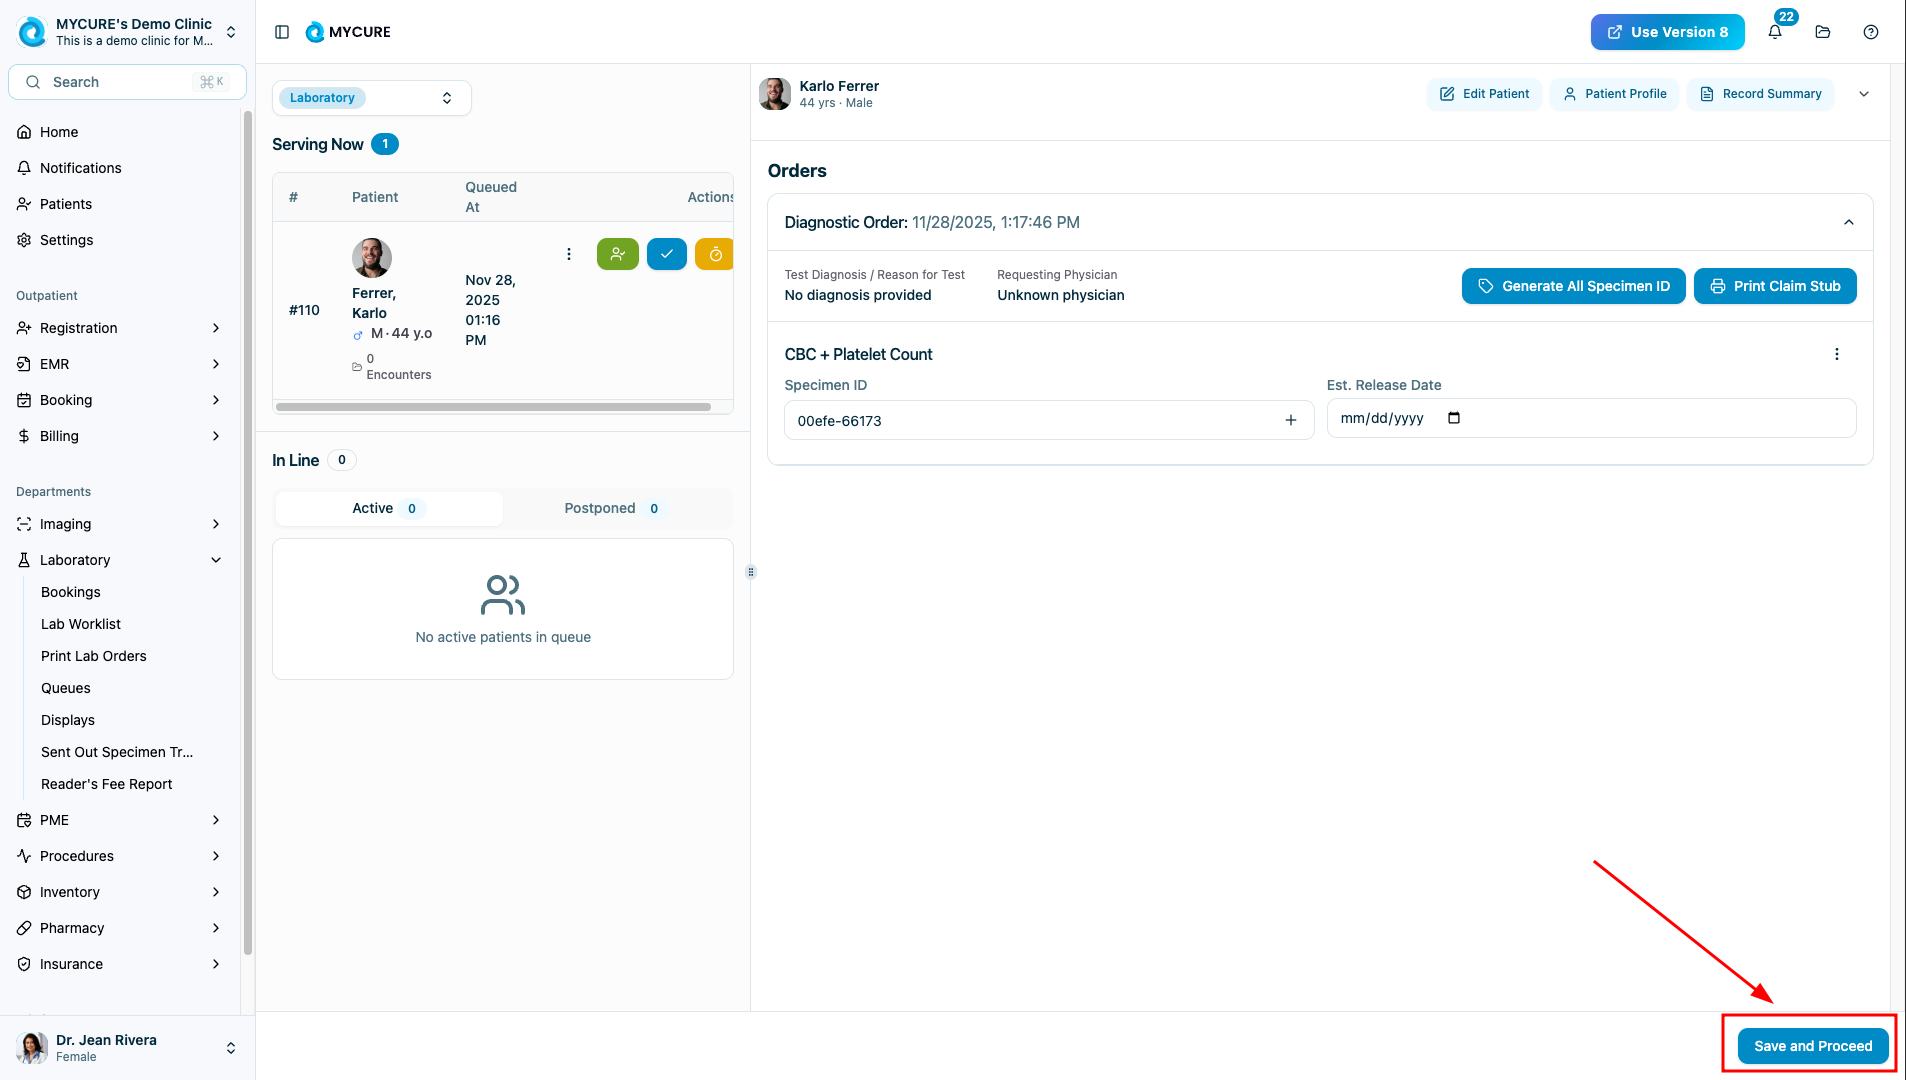
6. Save and Complete the Process
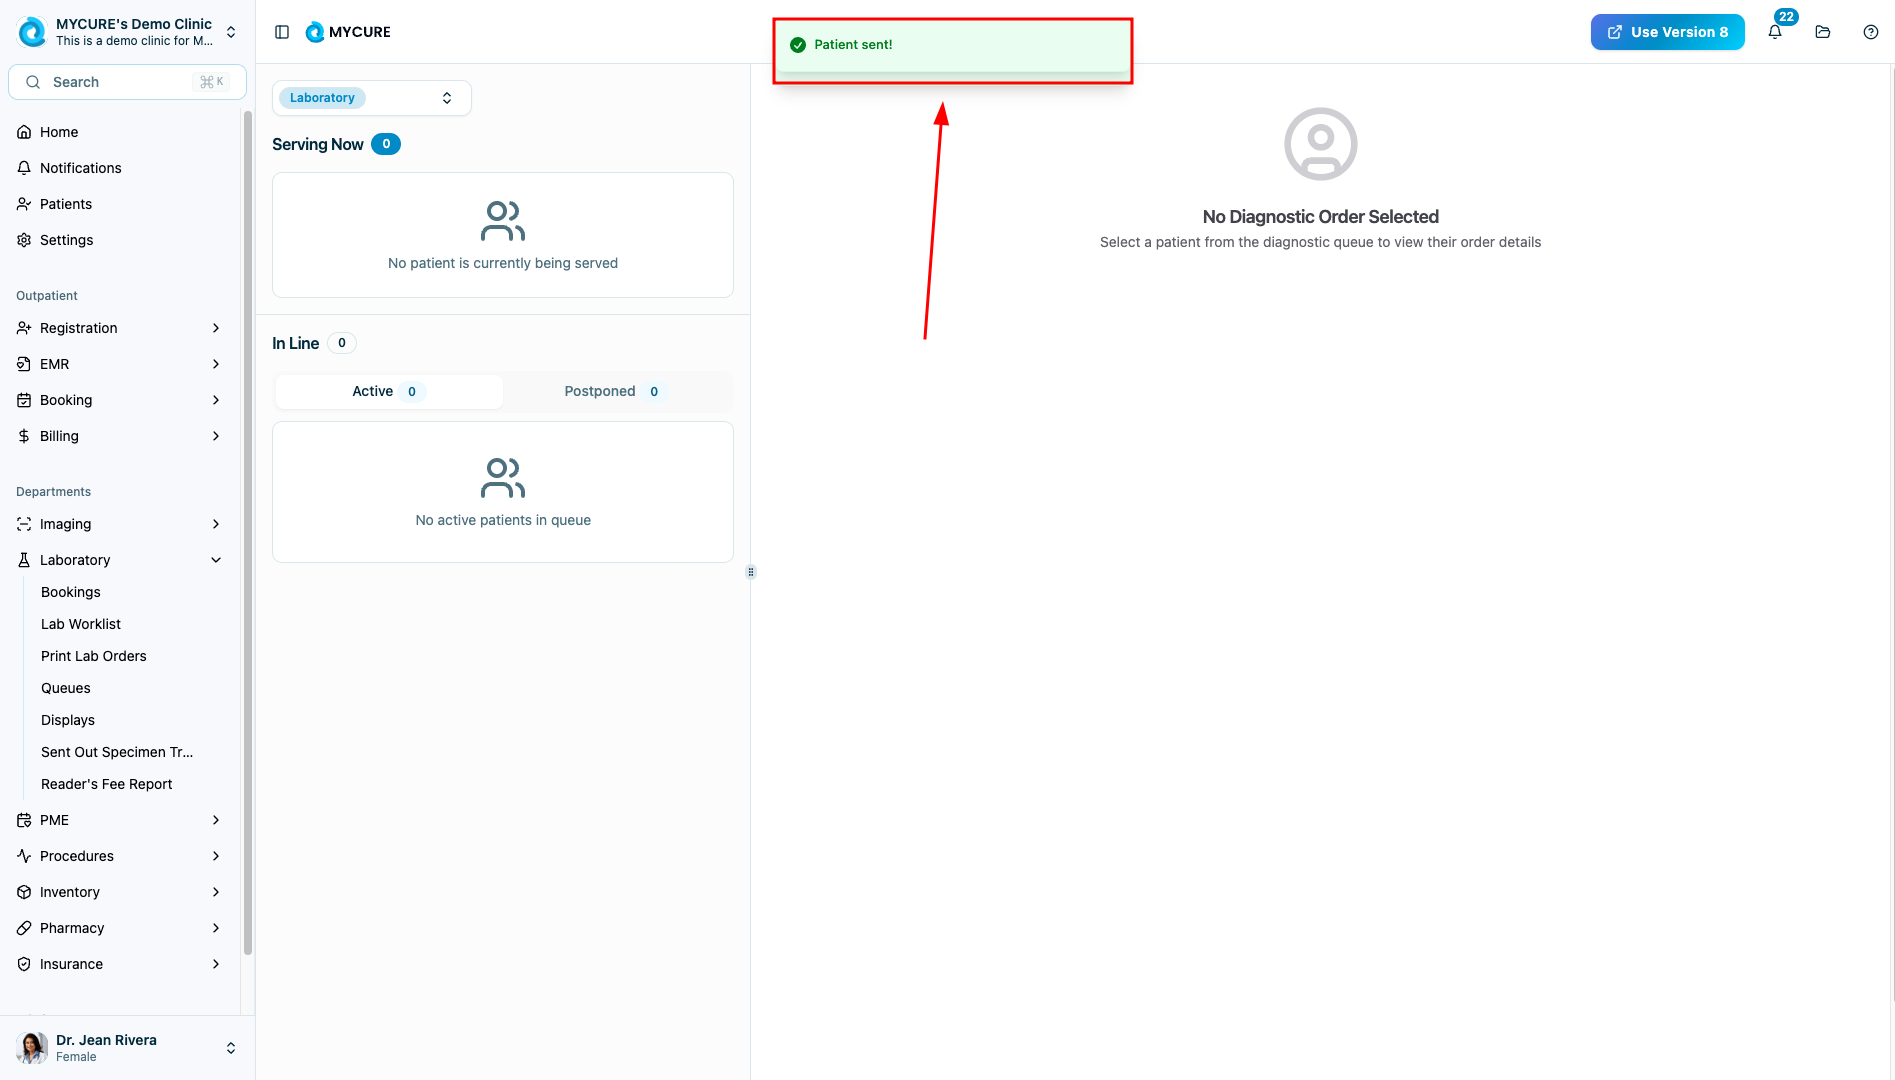
Click the "Save and proceed" button to save all the information you've entered. When prompted with a confirmation dialog, click "Ok" to finalize the laboratory accommodation process. The system will complete the process and return you to the Laboratory Queue.
Tips and Common Issues
Tip:
If you have multiple patients to process, work through them in order of arrival time to maintain efficient queue management.
Note:
The estimated release date should account for weekends, holidays, and any special processing requirements for specific tests.
Warning:
Always ensure you've generated specimen IDs for all required tests before completing the process. Missing specimen IDs can cause tracking issues.
Troubleshooting
Claim stub doesn't print - Check your printer connection and settings in MYCURE. Try printing again or contact support if the issue persists.
Cannot generate specimen IDs - Verify that all required test information is complete. If the issue continues, refresh the page and try again.
System doesn't save after clicking "Save and proceed" - Check your internet connection and ensure all required fields are filled out correctly.