
How To Access And Use The Readers Census Feature
5 min read
The Readers Census feature in MYCURE v10 provides a comprehensive way to track and monitor imaging reports and reader activities. This tutorial will guide you through accessing the Readers Census, applying filters to find specific data, and exporting information for reporting purposes.
What You'll Learn
How to navigate to the Readers Census feature
How to use filters to narrow down your data
How to export data in your preferred format
Before You Begin
You need an active MYCURE v10 account with appropriate permissions
You should have access to the Imaging module
Basic familiarity with MYCURE's navigation interface
Steps
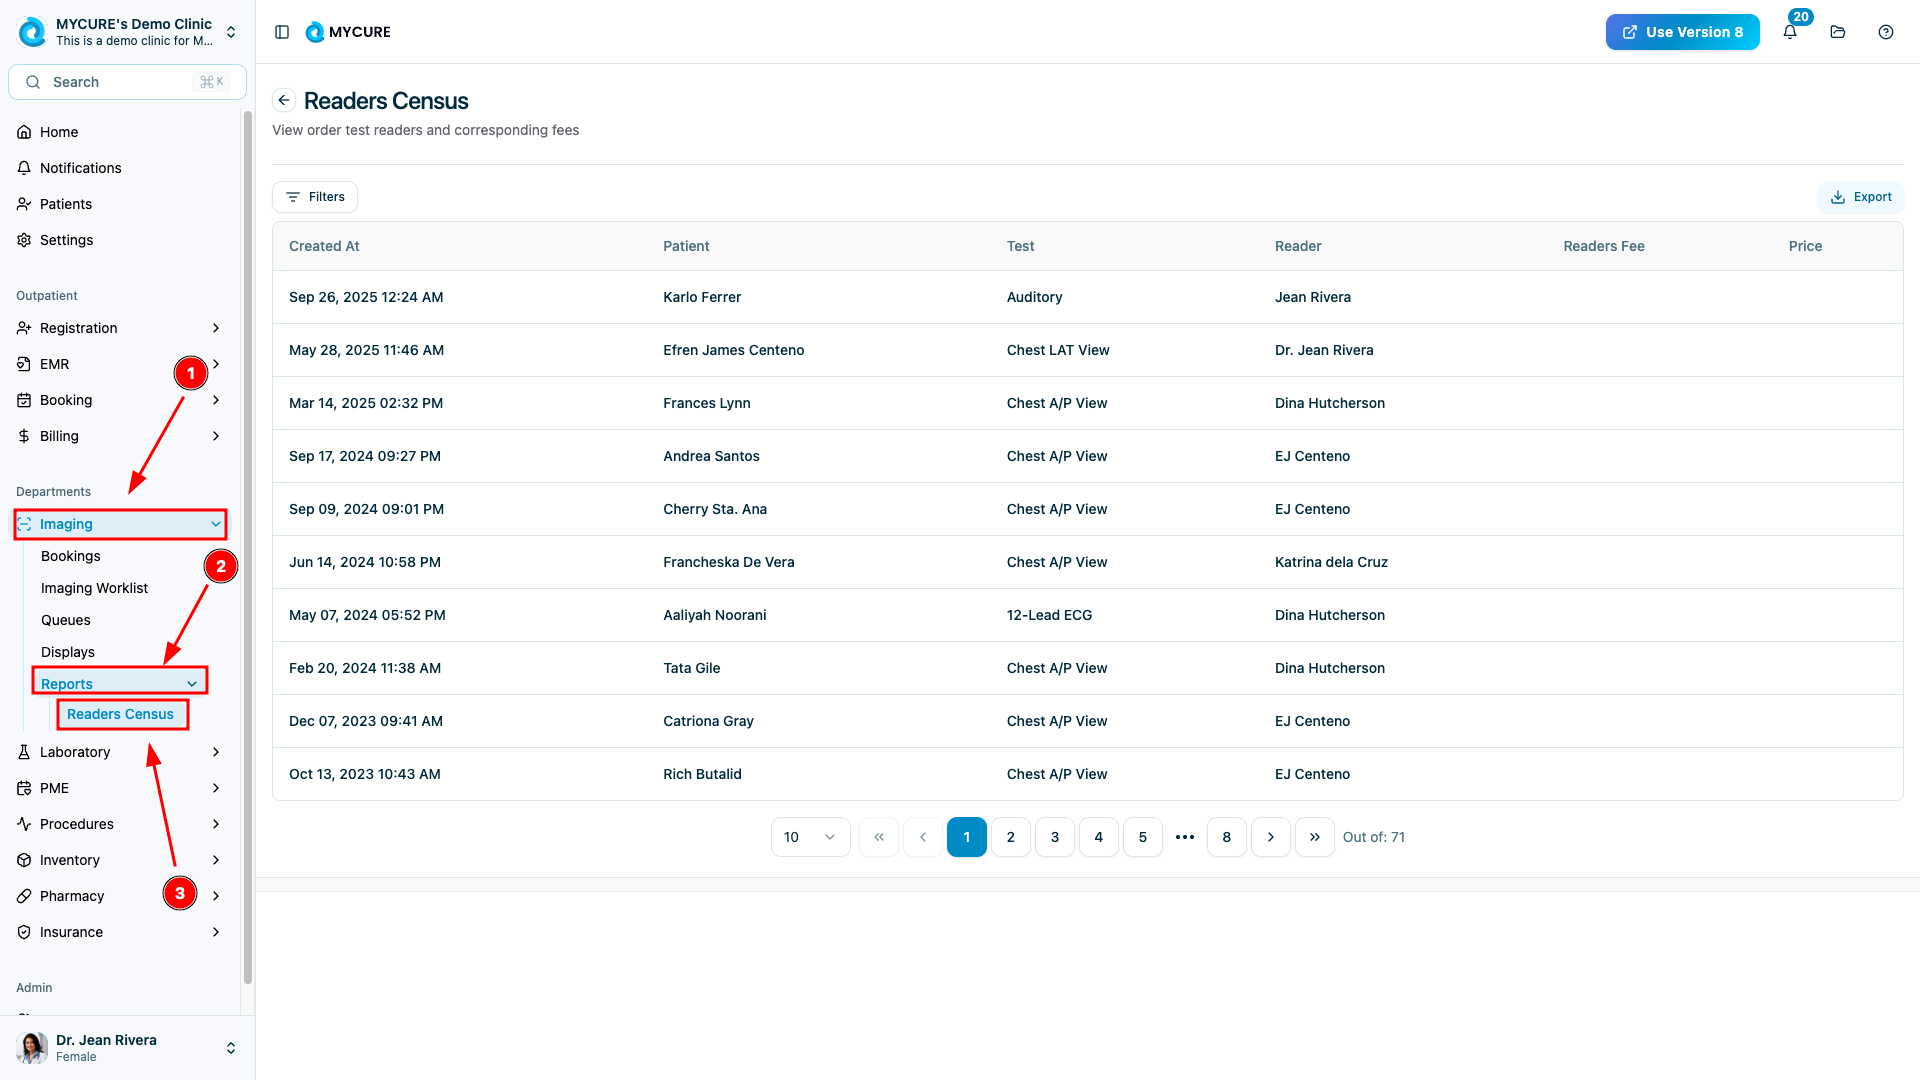
1. Accessing the Readers Census
To access the Readers Census feature:
Sign in to your MYCURE account
From the main dashboard, locate and click on the "Imaging" option in the main navigation bar
In the Imaging module, click on "Reports"
From the available report options, select "Readers Census"
Note:
The Readers Census displays all reader activity by default when first accessed. This includes all sections, statuses, patients, and test types.
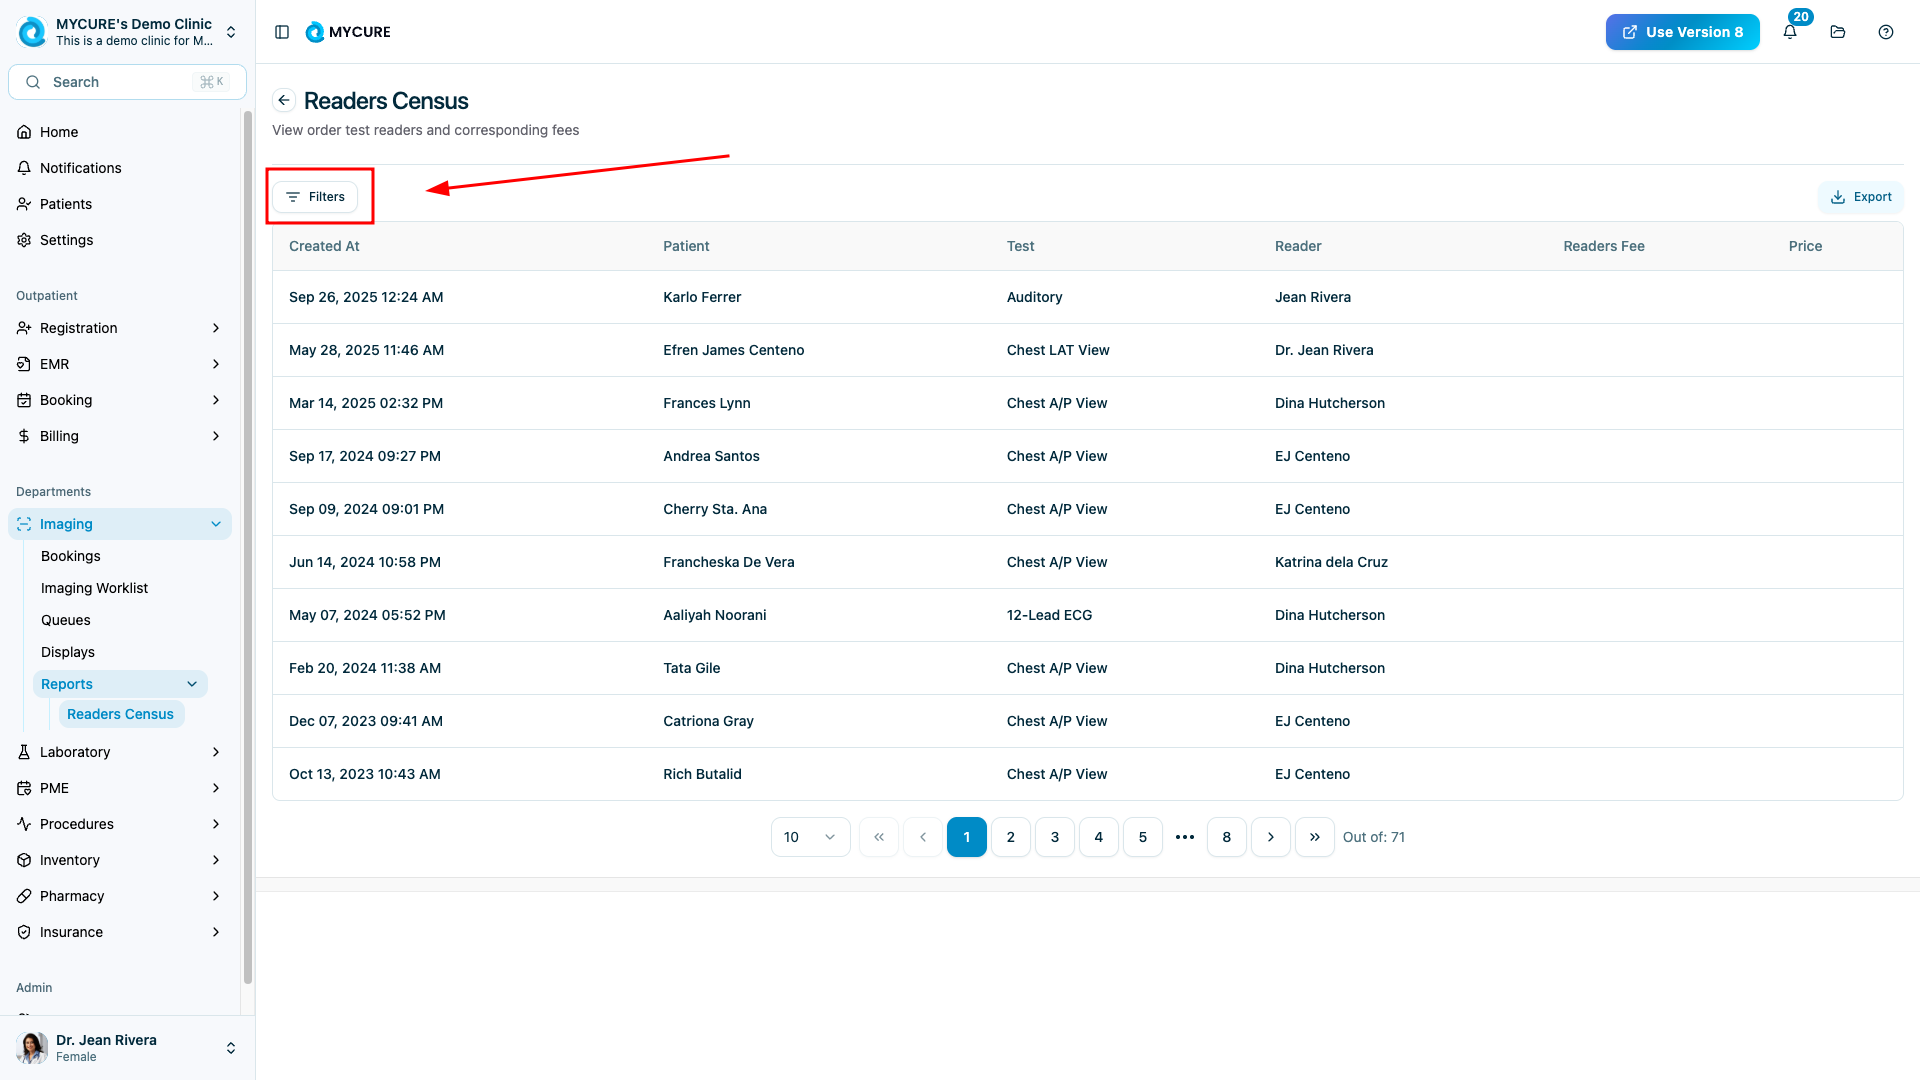
2. Filtering Readers Census Data
You can apply filters to narrow down the data displayed:
Click the "Filter" button, typically located in the upper right corner of the screen
A filter panel will appear with several options:
Created At: Click to open a date picker and select the relevant date range
Section: Use the dropdown to select a specific imaging section
Status: Filter by report status (e.g., Pending, Completed, Reviewed)
Patient: Search and select a specific patient
Test: Choose a particular test type
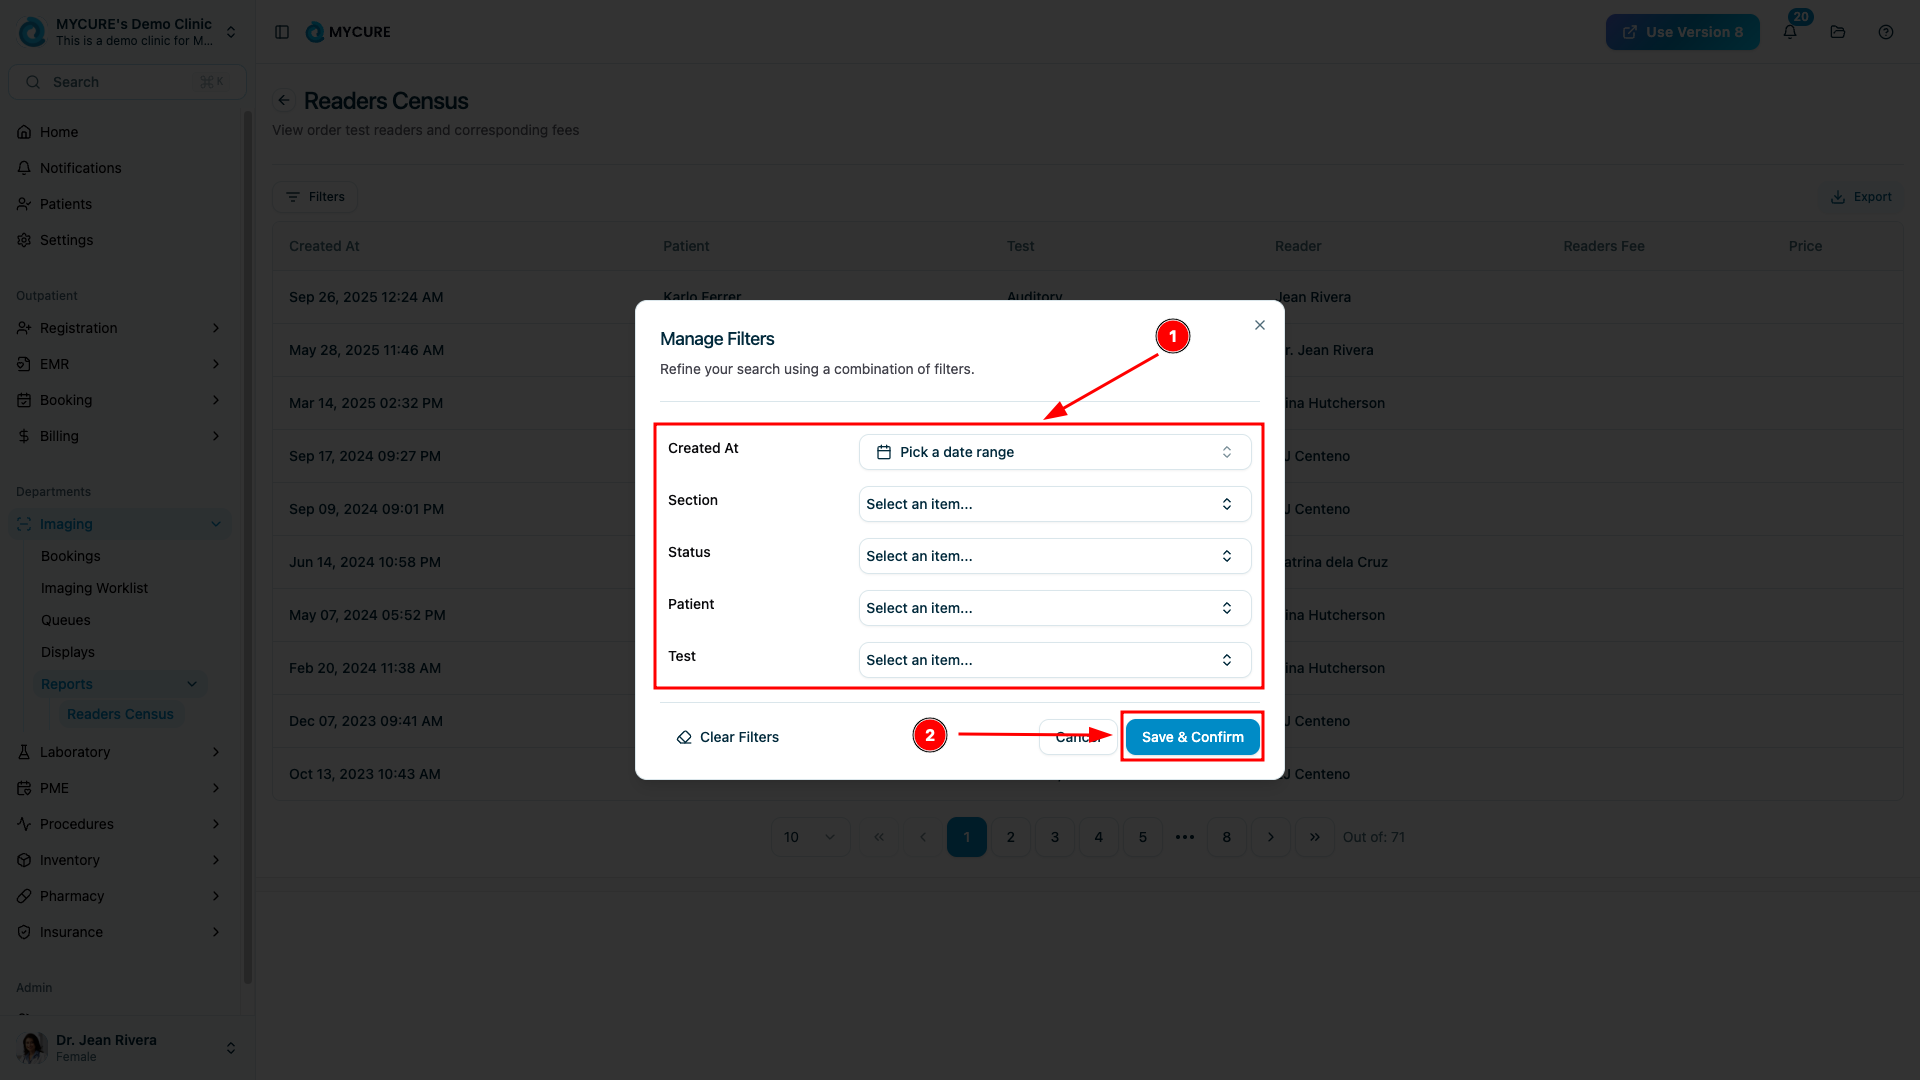
3. After selecting your desired filters, click "Save & confirm" to apply them

Tip:
If you want to start over with your filter selections, click the "Clear filters" option instead of manually removing each selection.
Note:
You can cancel the filter operation at any time by clicking "Cancel" to return to the previous view without applying any changes.
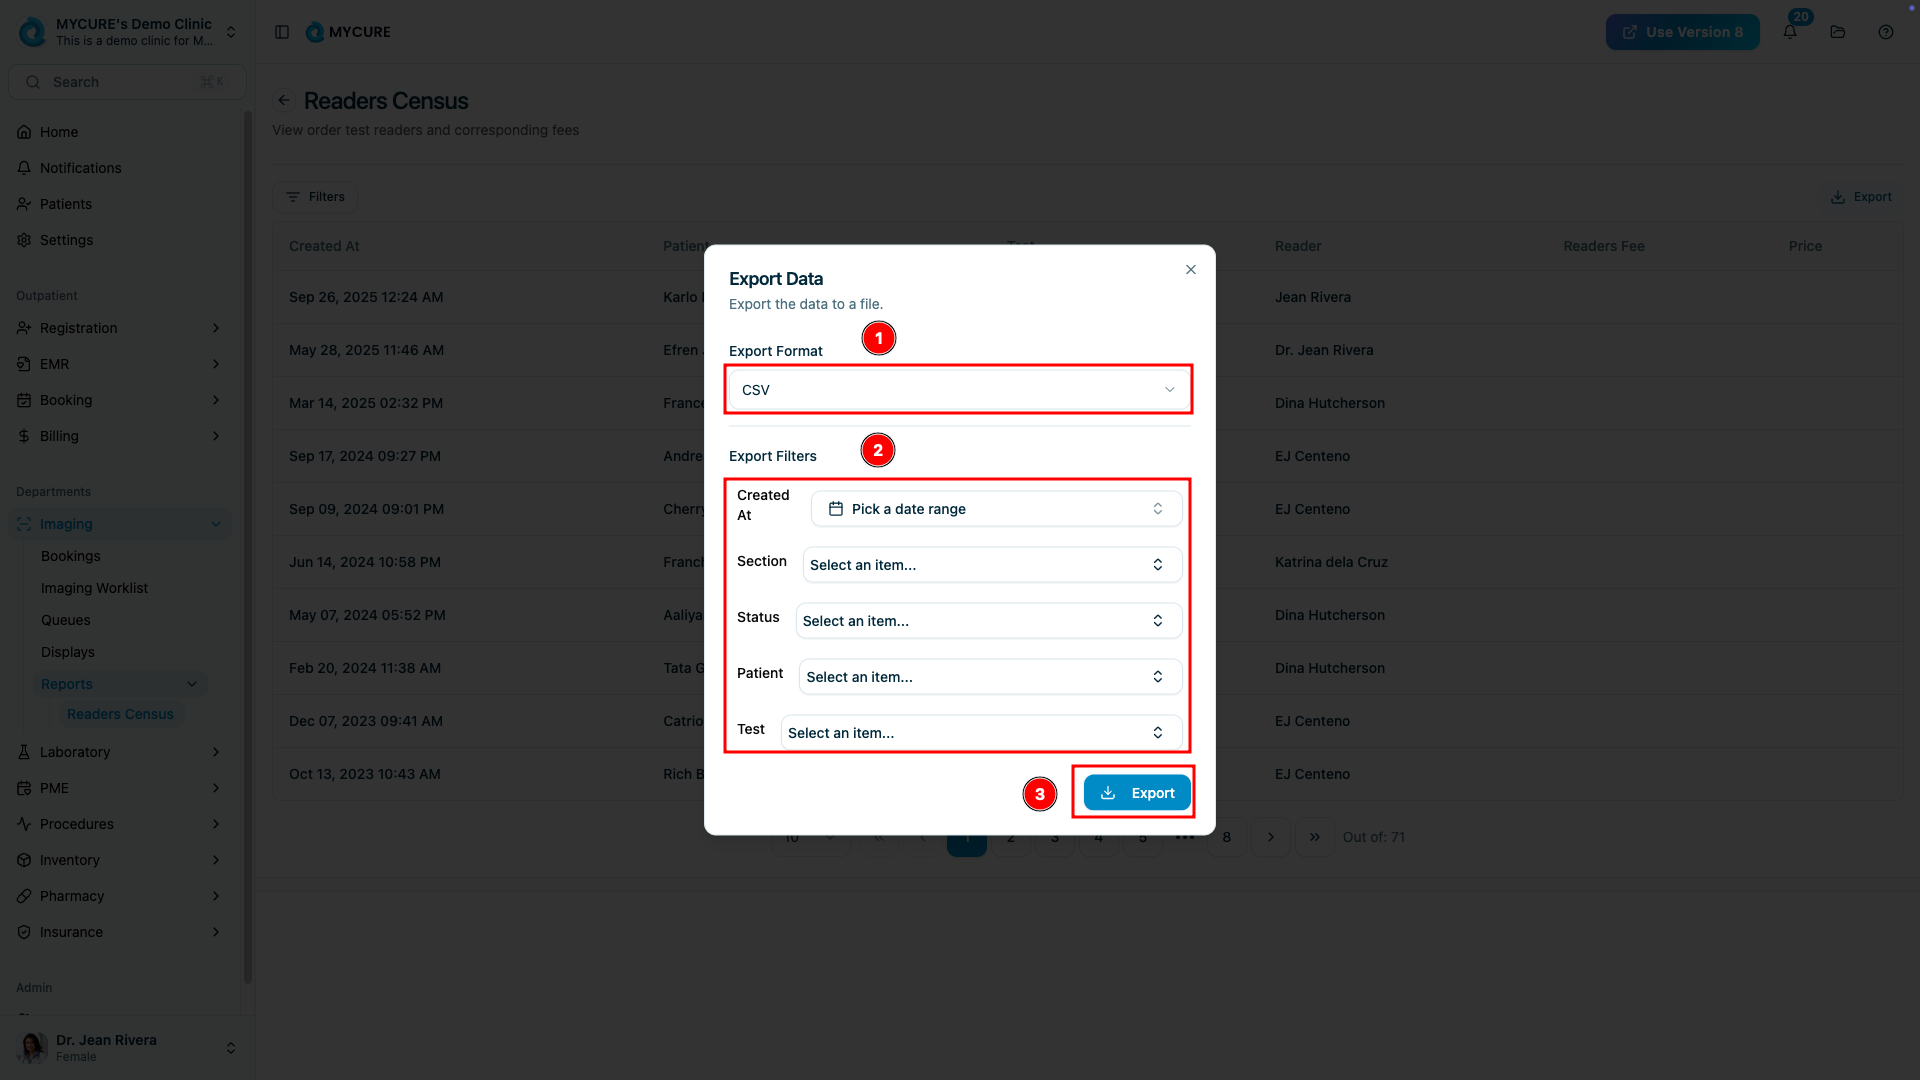
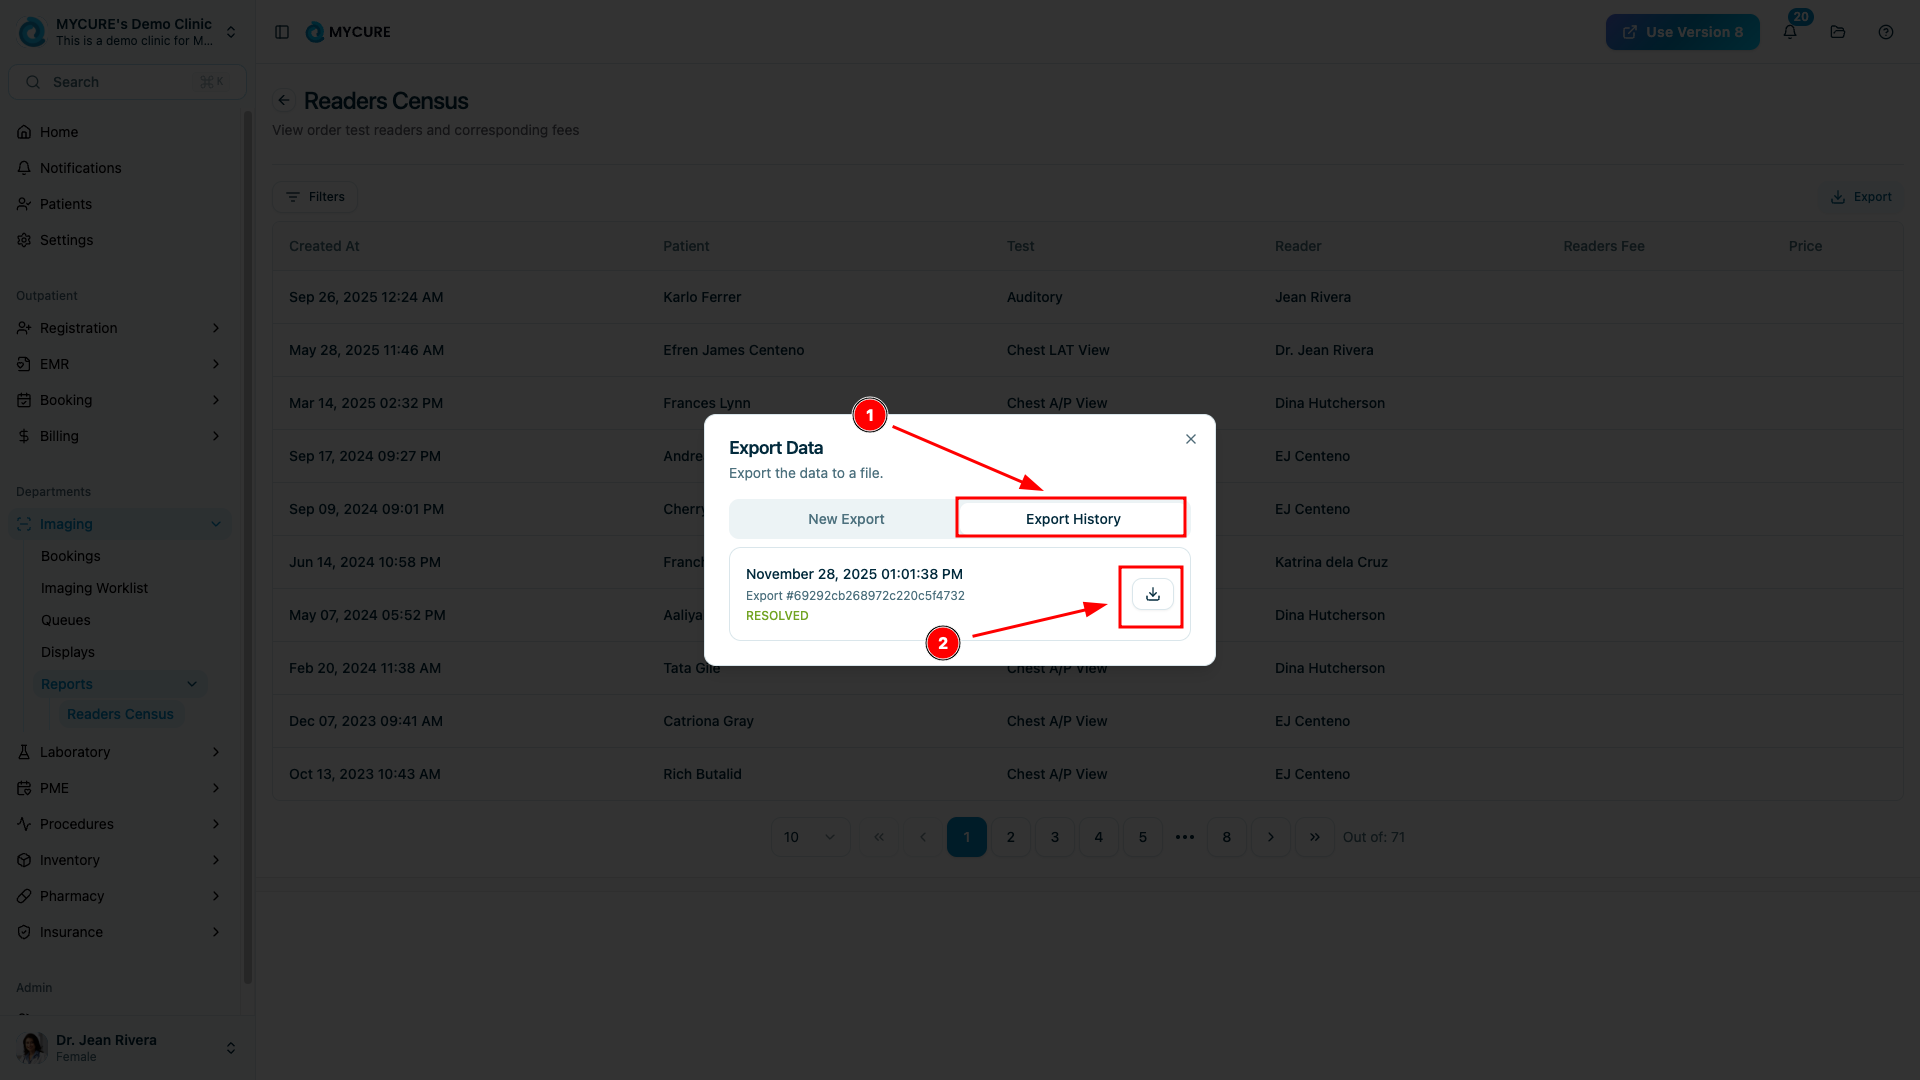
3. Exporting Readers Census Data
To export filtered data for reporting purposes:
Click the "Export" button (typically located near the filter button)
In the export panel, select your desired export format (e.g., PDF, CSV, Excel)
You can further refine your export by setting additional filters:
Created At: Select a specific date range
Section: Choose a specific imaging section
Status: Filter by report status
Patient: Select a specific patient
Test: Choose a particular test type
Click the "Export" button to generate and download your file

Warning:
Exporting large datasets may take some time to process. Avoid closing the browser or navigating away until the download starts.
Tips and Common Issues
Tip:
For regular reporting, save your commonly used filter combinations for quicker access.
Note:
The Readers Census data refreshes automatically when you apply new filters.
Troubleshooting
No data appears after applying filters - Check if your filter combination is too restrictive; try removing some filters to broaden your search
Export file doesn't include all data - Verify that you've selected the correct date range and other filter options for your export
Unable to select certain filter options - This may indicate you don't have permission to access certain data; contact your system administrator
If you encounter persistent issues, please contact the MYCURE support team at support@mycure.md or call (+632) 7799 6262 for assistance.