
How To Access And Export Transaction Reports
5 min read
Transaction Reports in MYCURE v10 provide a comprehensive view of all billing transactions in your clinic. This tutorial will guide you through accessing, filtering, and exporting transaction data to help you track financial activities and prepare reports for accounting purposes.
What You'll Learn
How to navigate to Transaction Reports
How to filter transactions by date
How to export transaction data in different formats
Before You Begin
You need a MYCURE v10 account with billing module access permissions
Make sure you have the appropriate user role (administrator or finance staff)
Ensure you know the date range for the transactions you want to view or export
Steps
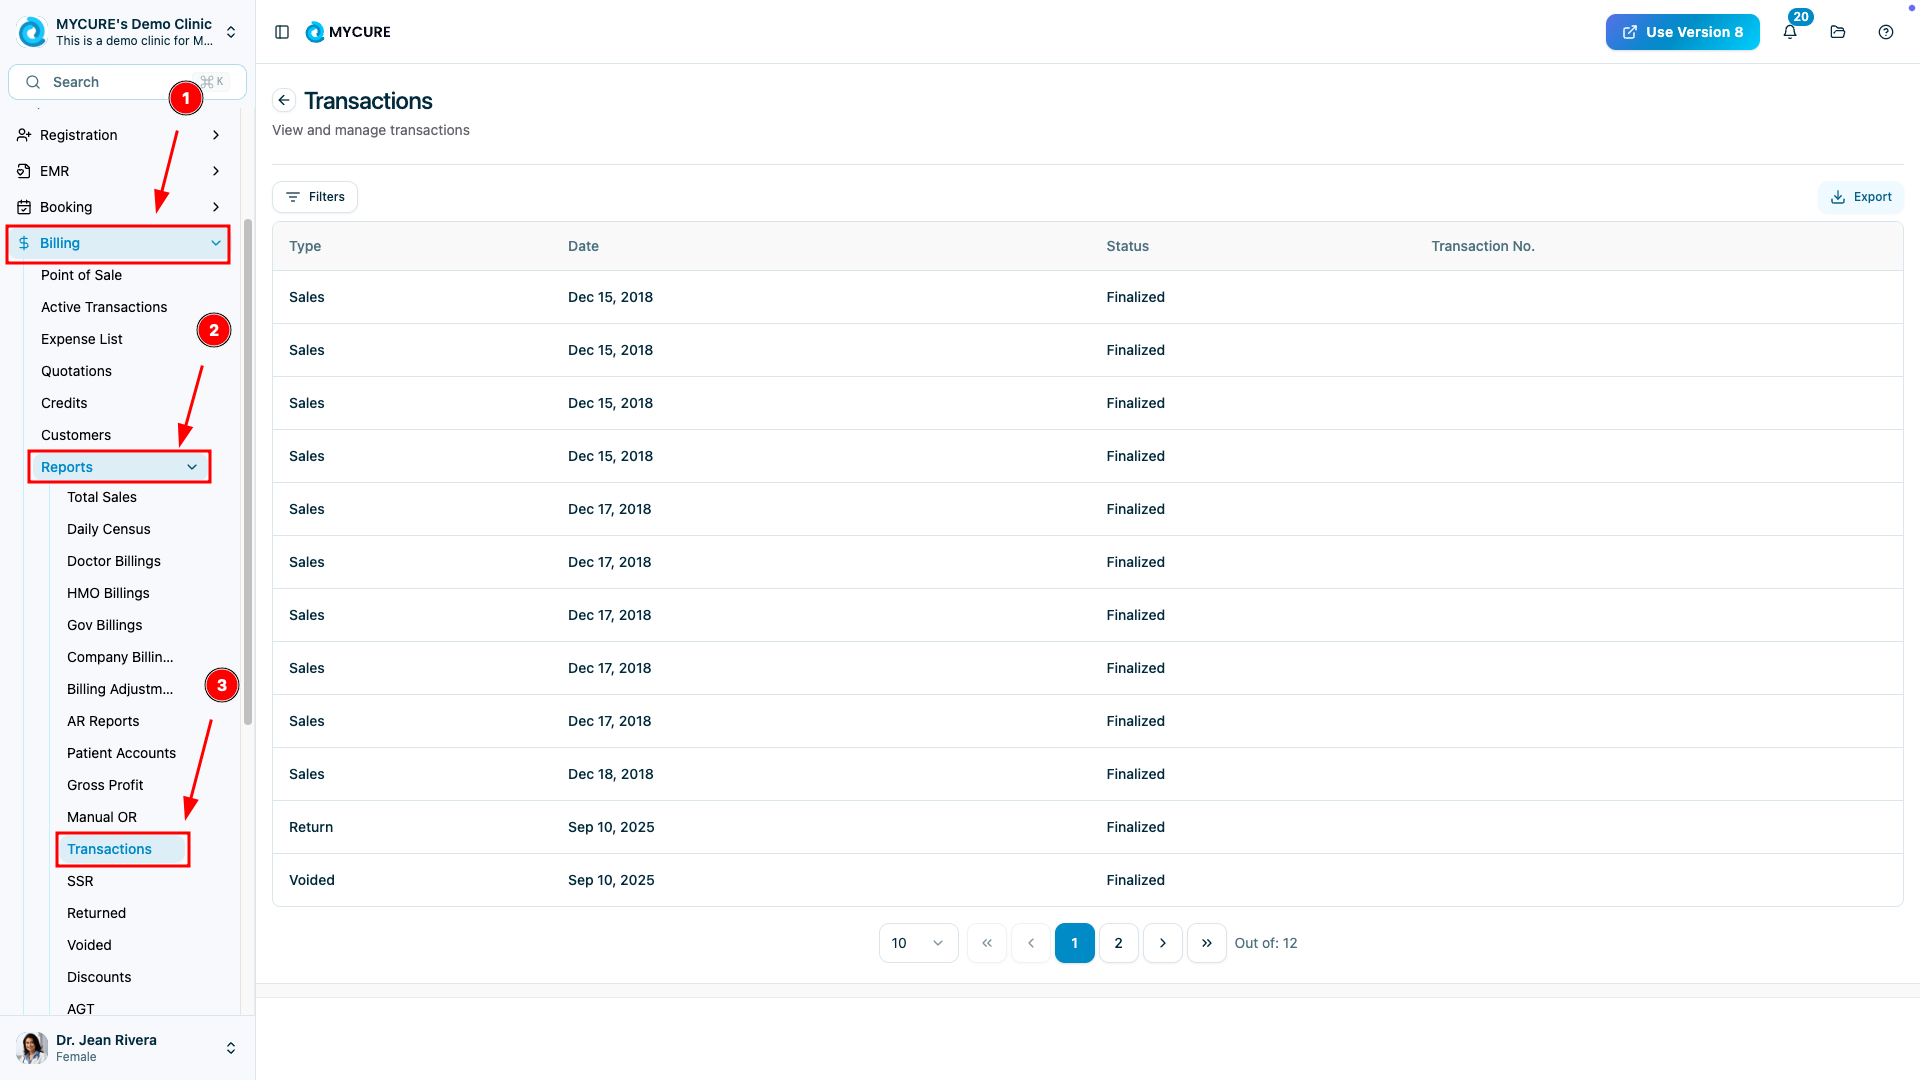
1. Accessing Transaction Reports
Navigate to the Transaction Reports section by following these steps:
Log in to your MYCURE account
Click on the Billing option in the main navigation bar
Select Reports from the dropdown menu
Click on Transactions to open the Transaction Reports view
Note:
Transaction Reports show all billing transactions by default. You may need to apply filters to see specific data.
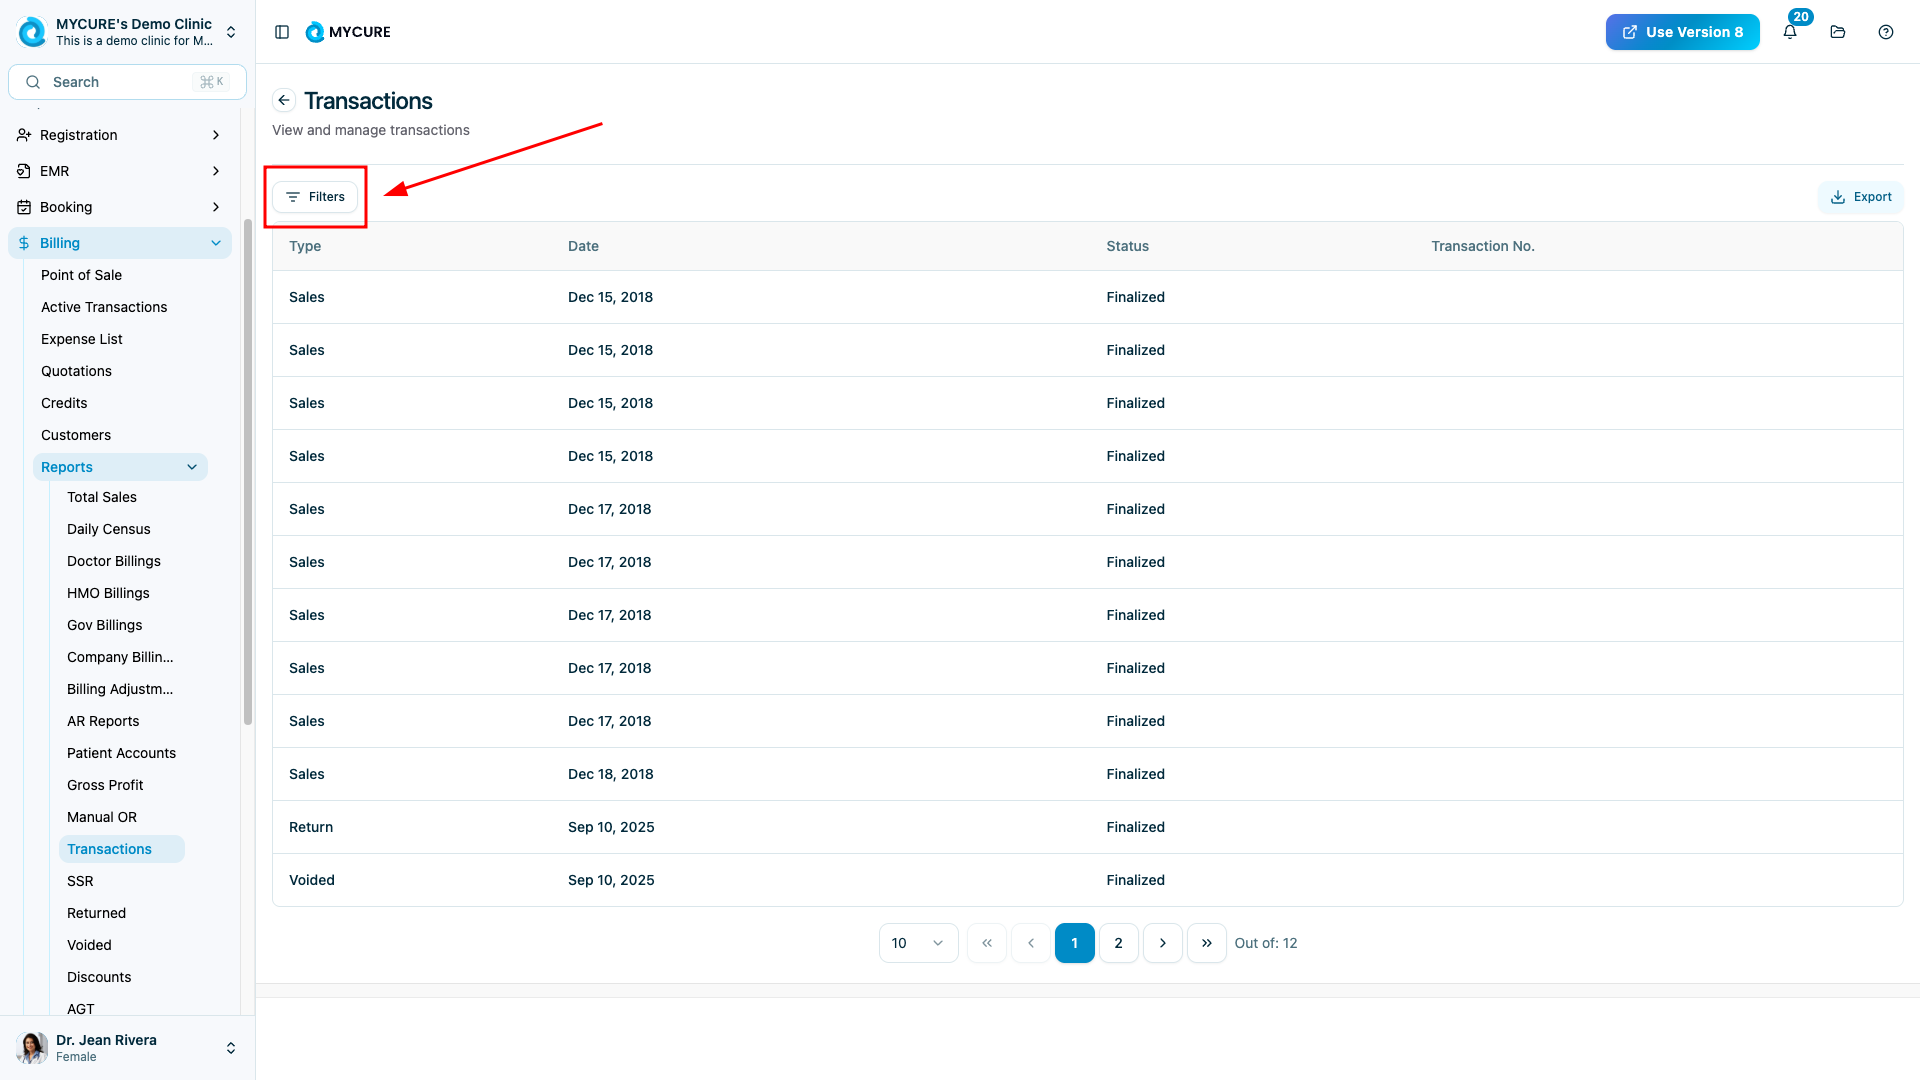
2. Filtering Transaction Data
To narrow down the transaction data to a specific time period:
From the Transaction Reports screen, click the Filter button
A filter dialog will appear with date selection options
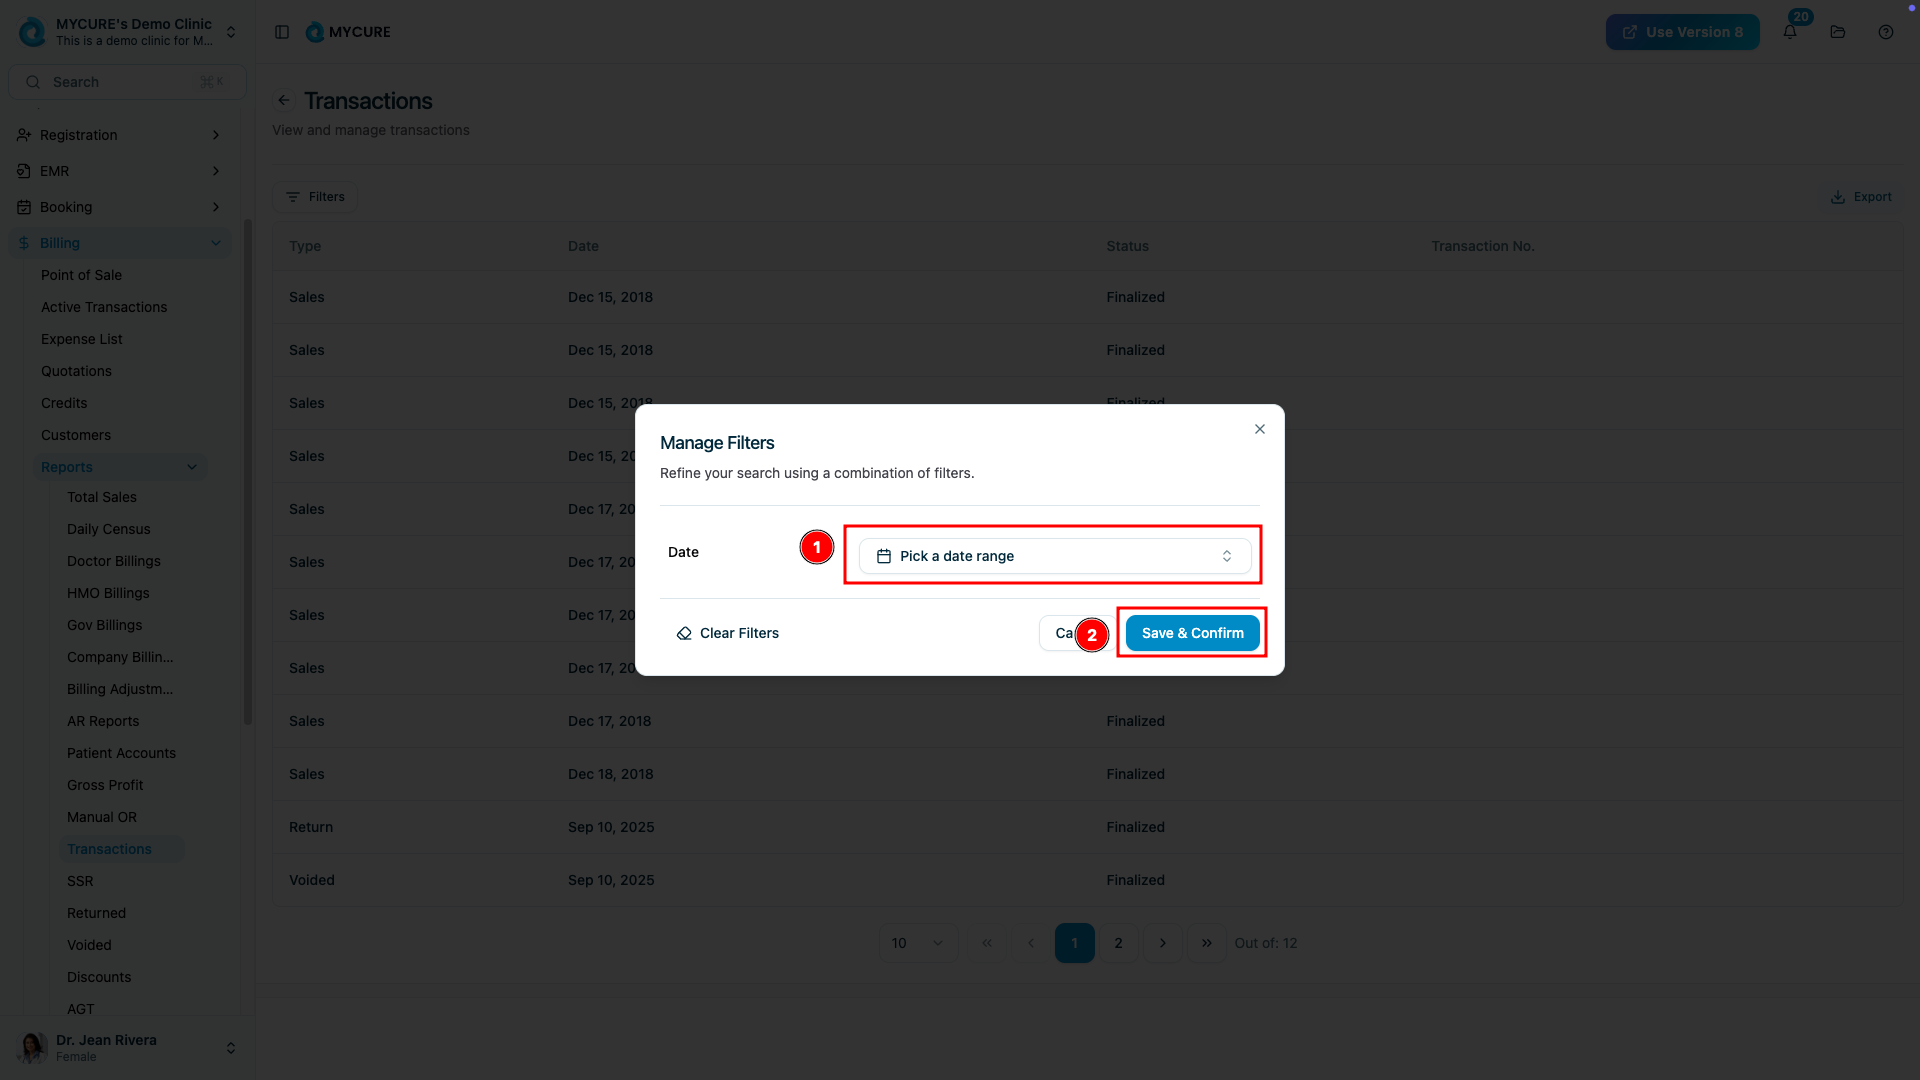
Select your desired start and end dates
Click Save & confirm to apply the filters
Alternatively, click Cancel to close without changing filters
Or click Clear filters to remove any previously applied filters
Tip:
Filtering before exporting ensures you only export the relevant data, making your reports more focused and easier to analyze.
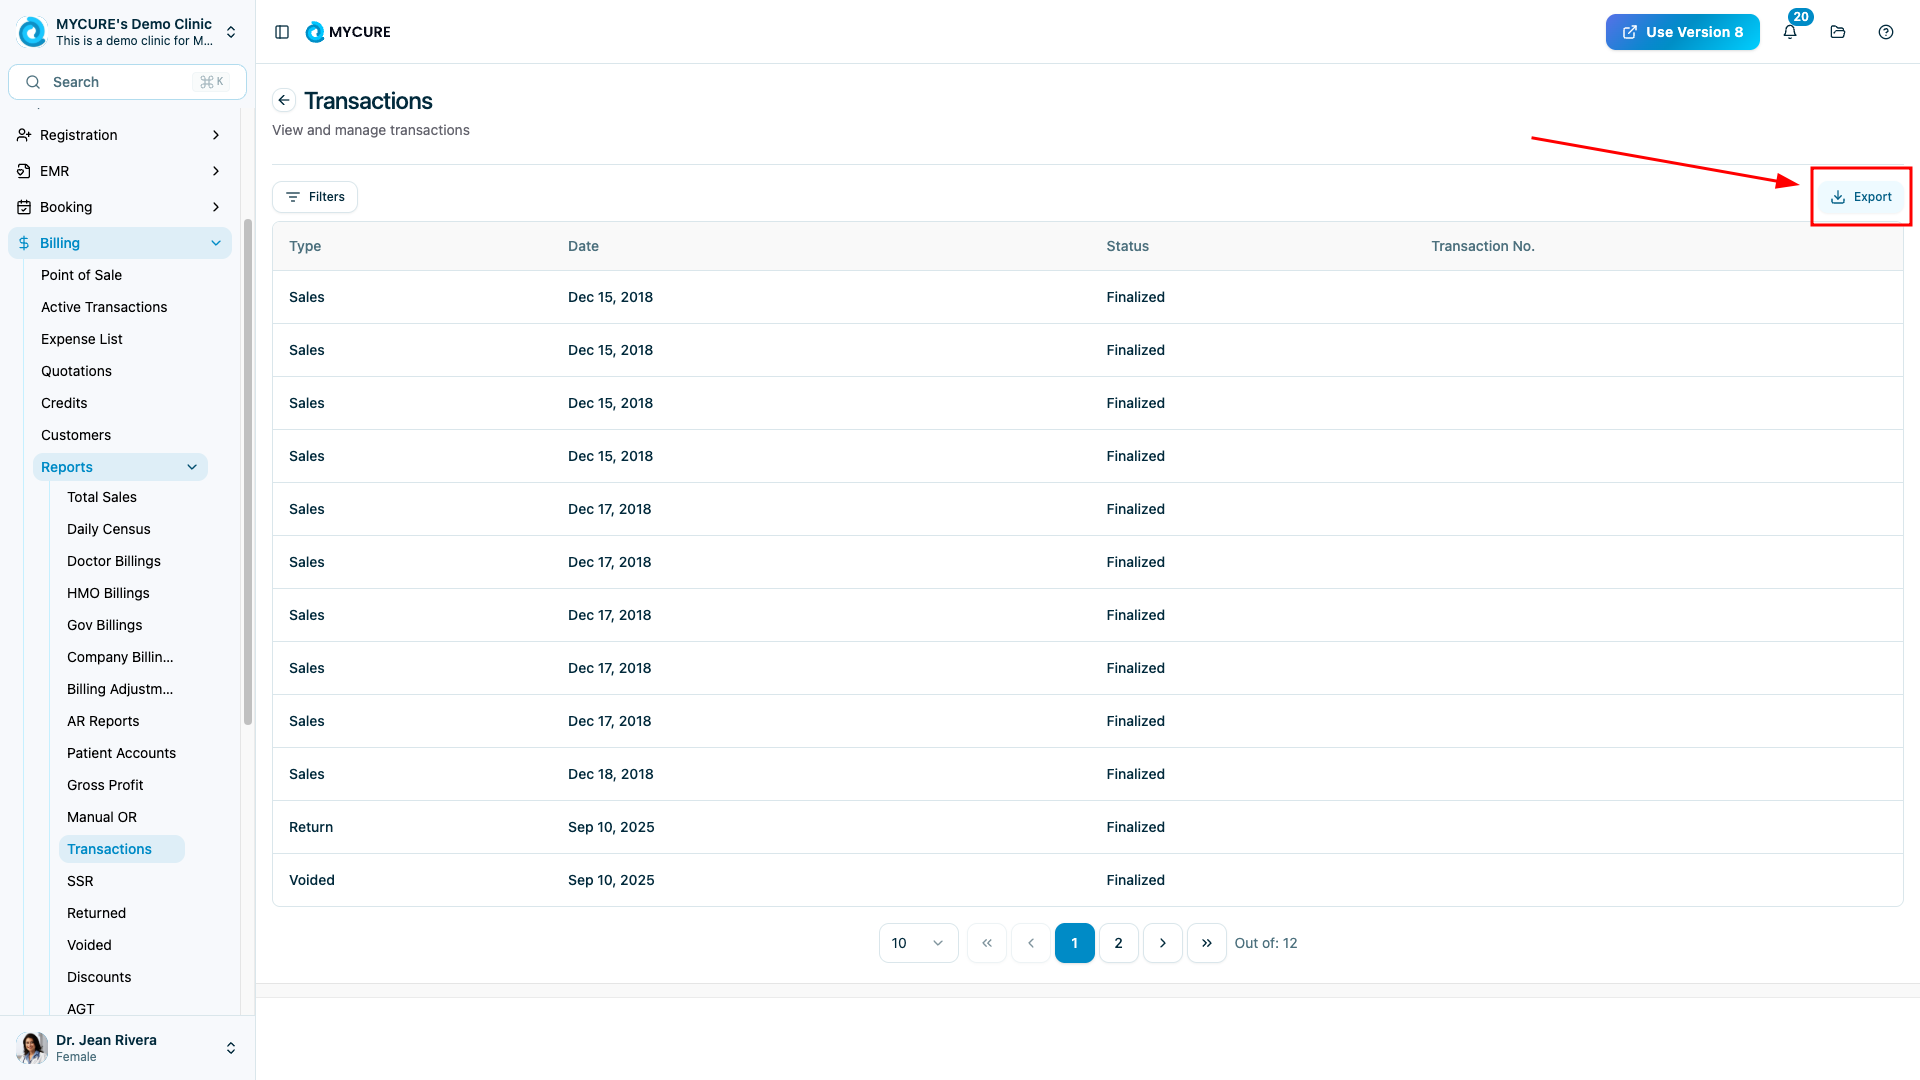
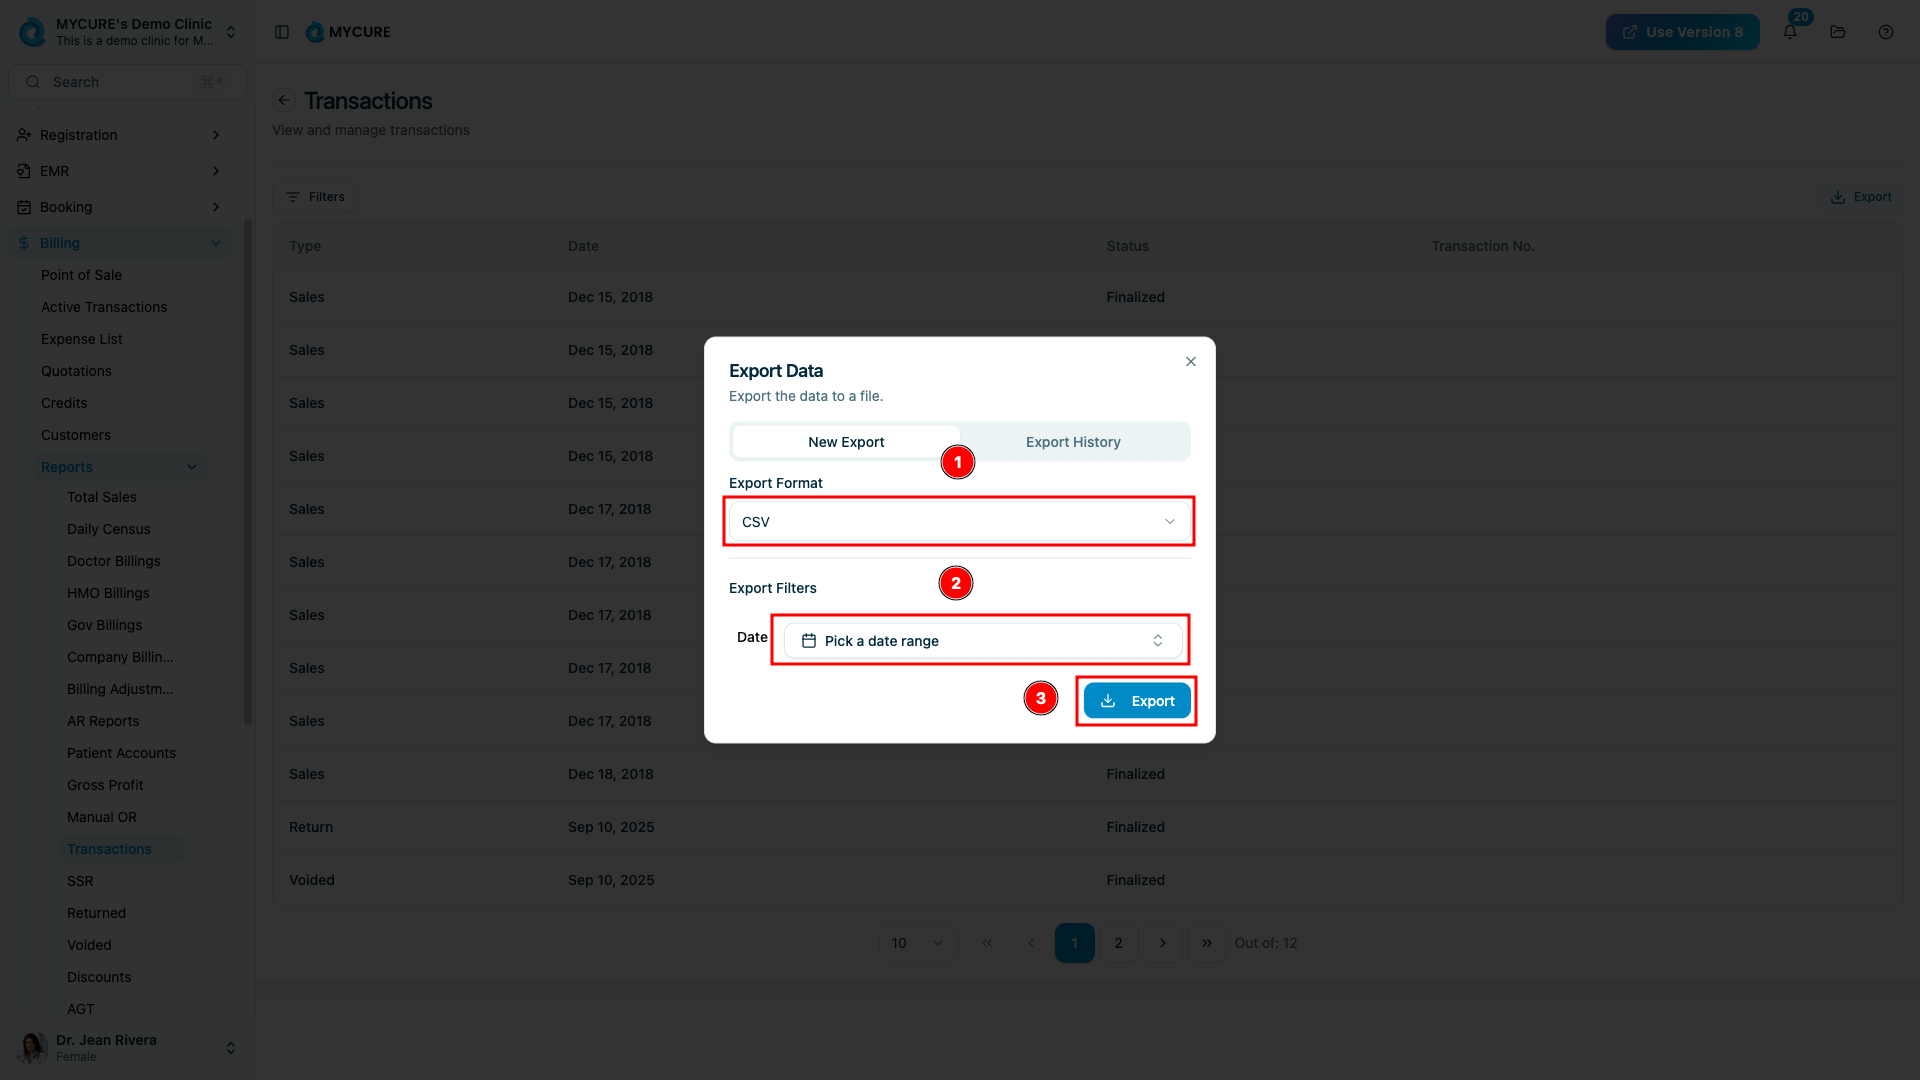
3. Exporting Transaction Data
To export your transaction data for external use:
From the Transaction Reports screen, click the Export button
In the export dialog, select your preferred export format
If you haven't already filtered the data, select a date range
Click the Export button to generate and download your report
Note:
If you've already applied filters, the export will only include the filtered data.
Tips and Common Issues
Tip:
For regular reporting, establish a consistent export schedule (e.g., weekly, monthly) to maintain up-to-date financial records.
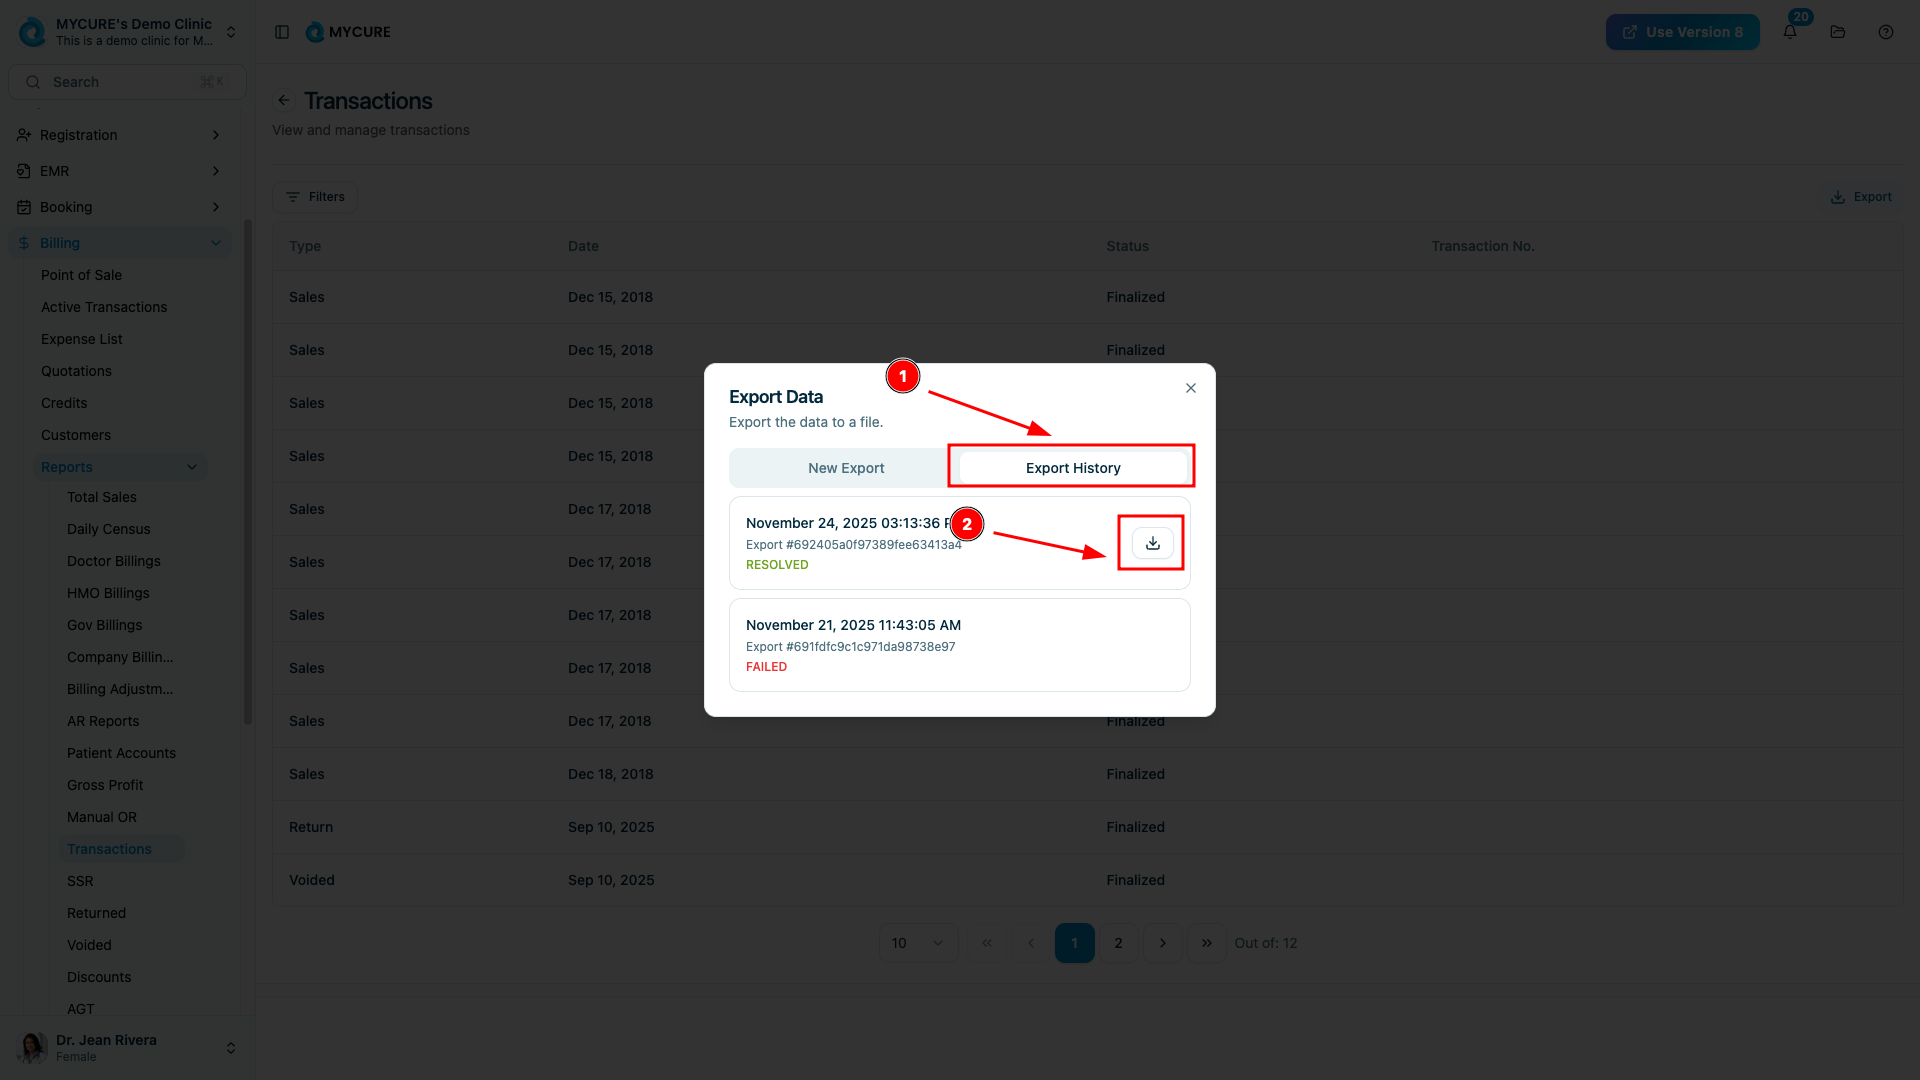
Note:
Exported files are downloaded directly to your default download location on your computer.
Warning:
Large date ranges may result in very large export files and longer processing times. Consider breaking long periods into smaller chunks if you experience issues.
Troubleshooting
Export button not responding - Refresh your browser and try again. If the issue persists, ensure your internet connection is stable.
Filtered data not showing correctly - Clear all filters and reapply them. Make sure your date selection is valid (start date before end date).
Downloaded file appears corrupt - Try a different export format. Some formats (like Excel) may have compatibility issues depending on your software.
Missing transactions in export - Verify your filter settings to ensure you've selected the correct date range for the transactions you're looking for.